diamondmeals.com

All-Time Favorites

Cavatelli Pasta with Broccoli

Cavatelli Pasta with Broccoli: 4 Easy Secrets for the Best Flavorful Italian Dish

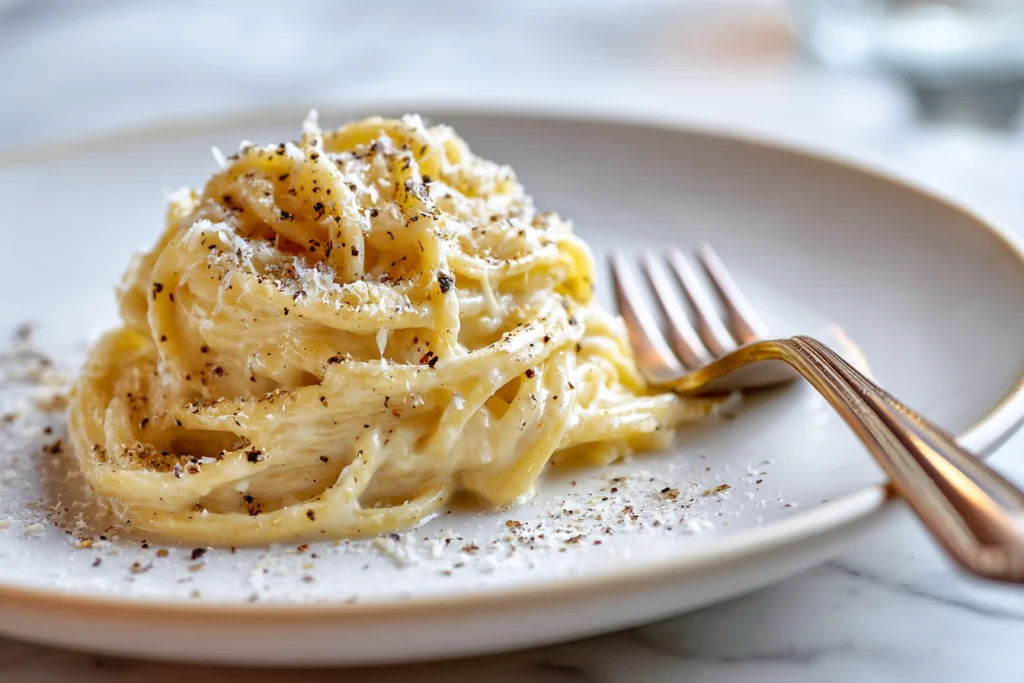
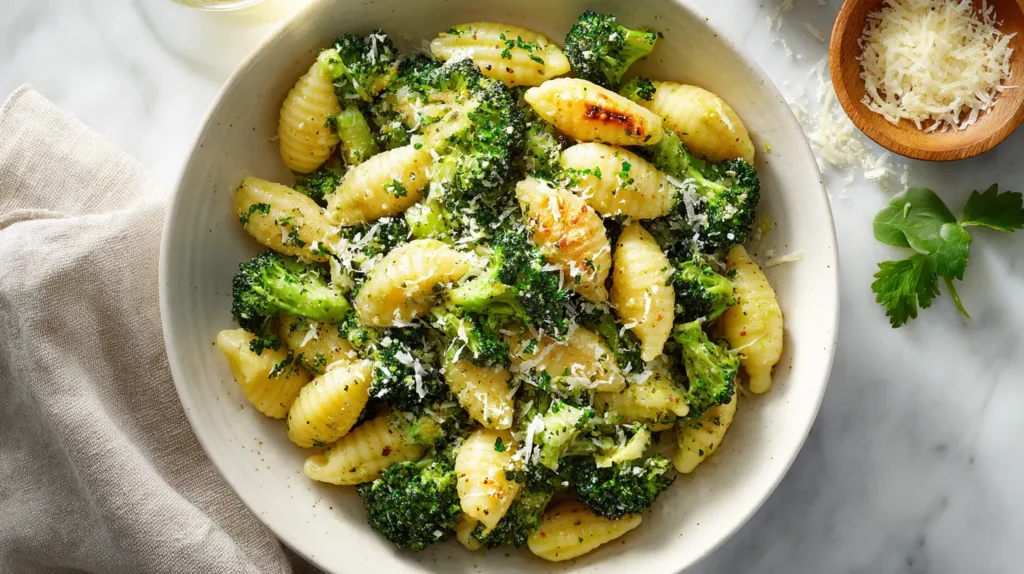
When it comes to comforting Italian meals, few dishes are as satisfying as cavatelli pasta with broccoli. This traditional recipe combines tender pasta, fresh green broccoli, garlic, and olive oil to create a dish that is both simple and deeply flavorful. The beauty of cavatelli pasta with broccoli lies in its balance. It is light yet filling, nutritious yet indulgent, and easy enough for beginners while still appealing to experienced cooks. Whether you’re preparing a quick lunch or a cozy dinner, this dish is always a perfect choice. What Is Cavatelli Pasta with Broccoli? Cavatelli pasta with broccoli is a classic Southern Italian dish known for its rustic simplicity. Cavatelli are small, slightly curved pasta shapes that have a soft, chewy texture, making them ideal for holding onto sauces. In this recipe, the pasta is combined with sautéed broccoli, garlic, and olive oil. The ingredients come together to form a cohesive dish where each bite delivers a perfect mix of flavor and texture. This is why cavatelli pasta with broccoli has remained popular for generations Ingredients You Need To prepare authentic cavatelli pasta with broccoli, gather the following ingredients: These simple ingredients are all you need to create a delicious plate of cavatelli pasta with broccoli. Step-by-Step Instructions 1. Cook the Pasta Bring a large pot of salted water to a boil and cook the cavatelli pasta until al dente. Before draining, reserve a cup of the cooking water. This step is essential for achieving the perfect texture in cavatelli pasta with broccoli. 2. Cook the Broccoli Add the broccoli florets to the boiling water during the last few minutes of cooking, or cook them separately by steaming. Cooking the broccoli correctly ensures that your cavatelli pasta with broccoli has the ideal texture—tender but still slightly firm. 3. Prepare the Garlic Base Heat olive oil in a large pan over medium heat. Add the garlic and cook gently until fragrant. The garlic-infused oil forms the flavor base of cavatelli pasta with broccoli, so it should be cooked carefully without burning. 4. Combine Everything Add the cooked broccoli to the pan, then add the drained pasta. Toss everything together until well combined. Add a splash of reserved pasta water to create a smooth, light sauce. This step helps bring together all the elements of cavatelli pasta with broccoli. 5. Season and Serve Season with salt and red pepper flakes, then sprinkle with grated Parmesan cheese. Serve your cavatelli pasta with broccoli immediately for the best flavor and texture. Tips for Perfect Results To make the best cavatelli pasta with broccoli, follow these tips: These small details can make a big difference in your final dish. Variations to Try One of the advantages of cavatelli pasta with broccoli is how versatile it is. Add Sausage For a richer version, add cooked sausage to your cavatelli pasta with broccoli. Add Chicken Grilled chicken can provide extra protein while keeping the dish balanced. Make It Creamy A small amount of cream or butter can create a richer version of cavatelli pasta with broccoli. Keep It Vegan Simply omit the cheese or use a plant-based alternative. Try Broccoli Rabe For a more traditional twist, replace broccoli with broccoli rabe for a slightly bitter flavor. For another timeless Italian classic, explore our rich and creamy cacio e pepe recipe, perfect for pasta lovers seeking simplicity and depth of flavor. Nutritional Benefits Cavatelli pasta with broccoli is not only delicious but also nutritious. This makes cavatelli pasta with broccoli a well-balanced meal suitable for many diets. If you enjoy comforting broccoli-based dishes, you’ll love our creamy Pioneer Woman broccoli cheese soup, a warm and satisfying favorite. Common Mistakes to Avoid When preparing cavatelli pasta with broccoli, avoid these mistakes: Avoiding these errors will help you achieve the best possible results. For a flavorful appetizer to complement your meal, try our cottage cheese spinach artichoke dip, a creamy and irresistible crowd-pleaser. Serving Suggestions You can enjoy cavatelli pasta with broccoli on its own or pair it with: This dish works perfectly as a main course or a side dish. Storage and Reheating Storage Store leftover cavatelli pasta with broccoli in an airtight container in the refrigerator for up to three days. Reheating Reheat gently in a pan with a little water or olive oil to maintain moisture. Final Thoughts Cavatellii pasta with broccoli is a timeless Italian dish that proves simple ingredients can create something truly special. Its combination of textures and flavors makes it a favorite for both everyday meals and special occasions. Whether you follow the traditional method or add your own twist, cavatelli pasta with broccoli is a recipe you will return to again and again. It is easy to prepare, nourishing, and always satisfying.

Cavatelli Pasta with Broccoli: 4 Easy Secrets for the Best Flavorful Italian Dish Read More »

What Is Arrowroot Powder

What Is Arrowroot Powder? 7 Powerful Uses, Benefits and Everything You Need to Know

What Is Arrowroot Powder is a natural ingredient that has been used for centuries in cooking, traditional remedies, and personal care. Today, arrowroot powder is gaining renewed attention as people search for healthier, gluten-free, and easy-to-digest alternatives to common starches. If you are wondering What Is Arrowroot Powder and how you can use it in your daily life, this complete guide will give you everything you need to know about What Is Arrowroot Powder What Is Arrowroot Powder? What Is Arrowroot Powder is a fine white starch extracted from the roots of a tropical plant known as Maranta arundinacea. This plant grows mainly in warm regions such as South America, Southeast Asia, and the Caribbean. The production of arrowroot powder involves washing and crushing the roots to extract their starch. This starch is then dried into a smooth, lightweight powder that can be used in many applications. Arrowroot powder is known for its neutral taste, silky texture, and high digestibility. Because arrowroot powder contains no gluten, it is widely used in gluten-free diets and recipes. Nutritional Profile of Arrowroot Powder Arrowroot powder is mainly composed of carbohydrates, but it also contains small amounts of important nutrients. A typical serving of arrowroot powder includes: One of the most interesting components of arrowroot powder is resistant starch. This type of starch behaves like fiber in the digestive system and provides several health benefits. Arrowroot powder is also low in fat and free from common allergens, making it suitable for a wide range of diets. Health Benefits of Arrowroot Powder 1. Easy Digestion Arrowroot powder is well known for being gentle on the digestive system. It is often recommended for people who need light and easily digestible foods. Because arrowroot powder is simple to break down, it is suitable for: This makes arrowroot powder a valuable ingredient in soft and nourishing meals. 2. Supports Gut Health The resistant starch found in arrowroot powder acts as a prebiotic. It feeds beneficial bacteria in the gut, helping maintain a healthy digestive system. Regular use of arrowroot powder may: Arrowroot powder can also help improve stool consistency in certain digestive conditions. 3. Promotes Fullness Arrowroot powder can help you feel full for longer periods. Because it slows digestion, it may reduce hunger and prevent overeating. Including arrowroot powder in meals can: This makes arrowroot powder a useful addition to a balanced diet. 4. Naturally Gluten-Free Arrowroot powder is completely gluten-free, making it an excellent option for individuals with gluten intolerance or celiac disease. It is widely used in gluten-free baking to improve the structure and texture of recipes. Many people choose arrowroot powder as a safe alternative to wheat-based ingredients. 5. Helps Stabilize Blood Sugar Arrowroot powder has a relatively mild effect on blood sugar compared to refined starches. The resistant starch content helps slow down glucose absorption. When used in moderation, arrowroot powder may: However, it is still important to use arrowroot powder in appropriate portions. 6. Provides Essential Nutrients Although arrowroot powder is mostly a carbohydrate source, it still provides small amounts of beneficial nutrients. These include: Adding arrowroot powder to your diet can contribute to overall nutritional balance. Culinary Uses of Arrowroot Powder Arrowroot powder is widely used in cooking because of its excellent thickening properties and neutral taste. 1. Thickening Agent One of the main uses of arrowroot powder is as a thickener. It is commonly used in: Arrowroot powder creates a smooth and glossy texture, making it ideal for recipes that require a clean appearance. 2. Gluten-Free Baking Arrowroot powder is often used in gluten-free baking to improve texture and softness. It works well when combined with other gluten-free flours. Common recipes that include arrowroot powder are: Arrowroot powder helps create light and airy baked goods. 3. Substitute for Cornstarch Arrowroot powder can easily replace cornstarch in most recipes. It has several advantages: Because of these benefits, many people prefer arrowroot powder over traditional starches. 4. Crispy Coating Arrowroot powder can be used as a coating for fried foods. It helps create a light and crispy texture without making food heavy. It is often used for: This makes arrowroot powder a great option for healthier frying techniques. 5. Baby Food Ingredient Arrowroot powder is commonly used in baby food because it is gentle and easy to digest. It helps create smooth textures and provides a quick source of energy. For a rich and aromatic infusion, explore our clove tea recipe, a timeless blend with powerful benefits. Non-Culinary Uses of Arrowroot Powder In addition to cooking, arrowroot powder has many practical uses in beauty and personal care. 1. Natural Dry Shampoo Arrowroot powder can absorb excess oil from the scalp, making it a simple and natural dry shampoo. It helps refresh hair between washes. 2. Deodorant Ingredient Arrowroot powder is often included in natural deodorants. It helps absorb moisture and reduce odor without harsh chemicals. 3. Body Powder Alternative Arrowroot powder is a natural alternative to talcum powder. It is gentle on the skin and helps keep it dry. 4. Skincare Uses Arrowroot powder is used in skincare products to: It is commonly found in natural face masks and body care products. 5. Cosmetic Applications Arrowroot powder can be used as a setting powder in makeup routines. It gives the skin a smooth and matte finish. If you love natural wellness drinks, don’t miss our warming ginger turmeric tea, perfect for daily health support. How to Use Arrowroot Powder Using arrowroot powder is simple and effective. To thicken liquids: Arrowroot powder works quickly, so only a small amount is needed. Substitutes for Arrowroot Powder If you do not have arrowroot powder, you can use alternatives such as: While these substitutes work similarly, arrowroot powder often provides a smoother texture. For a soothing and immune-boosting drink, you may also enjoy our comforting Starbucks Medicine Ball Tea recipe. Are There Any Side Effects? Arrowroot powder is generally safe for most people when consumed in normal amounts. However: Using arrowroot powder in moderation is

What Is Arrowroot Powder? 7 Powerful Uses, Benefits and Everything You Need to Know Read More »

Cowboy Ribeye

Cowboy Ribeye Recipe – Perfect Steakhouse Style Steak at Home

Few steaks capture attention quite like the Cowboy Ribeye. Thick, juicy, and beautifully marbled, this cut of beef is famous for its rich flavor and impressive presentation. Served with a short rib bone attached, it looks dramatic on the plate and tastes even better than it looks. For steak lovers, learning how to prepare this cut properly can transform an ordinary dinner into a restaurant-quality experience. The Cowboy Ribeye is popular in steakhouses because of its tenderness and bold beef flavor. Fortunately, you do not need a professional kitchen to cook it perfectly. With a good steak, proper seasoning, and the right cooking technique, you can achieve a beautifully seared crust and a juicy interior at home. This guide explains everything you need to know, from choosing the best cut to cooking it perfectly and serving it with delicious side dishes. What Is a Cowboy Ribeye? A Cowboy Ribeye is a bone-in ribeye steak that includes a portion of the rib bone. It is usually cut very thick, often between two and three inches. The bone is trimmed clean, leaving a short handle that gives the steak its distinctive appearance. This steak comes from the rib section of the cow, which produces some of the most tender and flavorful cuts of beef. Because the muscles in this area are not heavily exercised, the meat remains naturally tender. At the same time, ribeye steaks contain a large amount of marbling, which refers to the small streaks of fat throughout the meat. When cooked, this marbling melts and enriches the flavor of the steak. The result is a cut that is both juicy and deeply satisfying. Many steak enthusiasts consider the Cowboy Ribeye one of the best cuts available for grilling or pan-searing. Why This Steak Is So Popular There are several reasons why this steak is such a favorite among meat lovers. First, the Cowboy Ribeye delivers exceptional flavor. The marbling within the meat melts during cooking, giving the steak a buttery texture and intense beefy taste. Second, the bone adds visual appeal and can contribute subtle flavor while the steak cooks. Bone-in cuts are often preferred by chefs because they tend to cook evenly and retain moisture. Finally, the thick size of the steak allows it to develop a beautifully browned crust on the outside while remaining tender and juicy inside. These qualities make it a standout dish for special dinners and gatherings. Ingredients One of the best aspects of cooking this steak is its simplicity. Because the meat is naturally rich and flavorful, only a few ingredients are required. Ingredients This minimal seasoning enhances the natural flavor of the steak rather than overpowering it. How to Choose the Best Steak Selecting a high-quality Cowboy Ribeye is essential for achieving the best results. Look for Marbling Fine streaks of fat throughout the meat indicate good marbling. These fat deposits melt during cooking and create tenderness and flavor. Choose a Thick Cut A true Cowboy Ribeye should be thick. Thin steaks cook too quickly and cannot develop the same crust-to-juiciness balance. Buy Fresh, Quality Meat If possible, purchase your steak from a trusted butcher who can help you choose a well-trimmed cut with a clean bone and excellent marbling. Preparing the Steak Proper preparation makes a significant difference when cooking a thick steak. Dry the Surface Remove the steak from its packaging and gently pat it dry with paper towels. A dry surface helps the meat develop a deep brown crust when seared. Season Generously Season both sides of the Cowboy Ribeye with salt and black pepper. Thick steaks require a generous amount of seasoning to ensure balanced flavor. Optional Dry Brining For even better flavor, you can season the steak and refrigerate it uncovered overnight. This process allows the salt to penetrate the meat and improves texture. Bring to Room Temperature Before cooking, remove the steak from the refrigerator and allow it to sit at room temperature for about one hour. This step helps the meat cook evenly. How to Cook a Cowboy Ribeye One of the best ways to cook a Cowboy Ribeye is by combining stovetop searing with oven finishing. This method creates a flavorful crust while keeping the inside tender and juicy. Step 1: Preheat the Oven Set your oven to 450°F (230°C). While the oven heats, place a heavy skillet on the stovetop over high heat. A cast-iron pan works especially well because it retains heat and distributes it evenly. Step 2: Sear the Steak Once the skillet is very hot, place the steak in the pan. Let it cook for about two to three minutes on the first side without moving it. Turn the Cowboy Ribeye and sear the other side for another two to three minutes. You can also briefly sear the edges of the steak to ensure even browning. This step creates the flavorful crust that makes steak so delicious. Step 3: Finish in the Oven After searing, transfer the skillet directly into the oven. Cook the steak until it reaches your desired doneness. Using a meat thermometer is the most reliable way to monitor temperature. Approximate internal temperatures include: Most chefs recommend cooking ribeye steaks to medium-rare for the best texture and flavor. Step 4: Rest the Steak When the steak reaches the desired temperature, remove it from the oven and transfer it to a cutting board. Let the Cowboy Ribeye rest for 10 to 15 minutes before slicing. Resting allows the juices to redistribute throughout the meat, keeping it moist and flavorful. How to Slice and Serve Because the steak is quite large, it is often sliced before serving. First, cut the meat away from the bone. Next, slice the steak against the grain into thick pieces. Arrange the slices on a serving platter so that everyone can easily enjoy the tender meat. Serving the steak this way also helps preserve its juices and makes it easier to share. Flavor Variations Although the classic preparation is simple, you can easily

Cowboy Ribeye Recipe – Perfect Steakhouse Style Steak at Home Read More »

Instant Pot Frozen Whole Chicken

Instant Pot Frozen Whole Chicken – Easy Juicy Chicken from Frozen

Cooking dinner can become stressful when you realize the chicken you planned to cook is still frozen. Fortunately, the Instant Pot Frozen Whole Chicken method solves this problem quickly and easily. With the help of a pressure cooker, you can cook a frozen chicken directly from the freezer and still achieve tender, juicy, and flavorful meat. This cooking technique has become extremely popular among home cooks because it saves time and eliminates the need for defrosting. Instead of waiting several hours for chicken to thaw, you can place it in the Instant Pot and cook it to perfection in about an hour. In this complete guide, you will learn how to make the perfect Instant Pot Frozen Whole Chicken, including the ingredients, cooking time, detailed instructions, and useful tips to guarantee the best results. Why Cook a Frozen Chicken in the Instant Pot? Many people assume that frozen chicken must be thawed before cooking. However, the Instant Pot allows you to cook frozen poultry safely and efficiently. The sealed pressure cooking environment uses steam and high heat to cook food evenly in a much shorter time than traditional cooking methods. The biggest benefit of preparing an Instant Pot Frozen Whole Chicken is convenience. You do not need to plan ahead or remember to thaw the chicken the night before. This makes the recipe perfect for busy weeknights when you want a homemade meal without extra preparation. Another advantage is moisture retention. Because pressure cooking traps steam inside the pot, the chicken stays juicy and tender throughout the cooking process. The cooking liquid also becomes a flavorful broth that can be used later in soups or sauces. For families who enjoy simple meals with minimal preparation, Instant Pot Frozen Whole Chicken is an incredibly practical solution. Ingredients One reason this recipe is so popular is that Instant Pot Frozen Whole Chicken requires only a few basic ingredients that most people already have in their kitchen. Main Ingredients Optional Ingredients To add more flavor to your Instant Pot Frozen Whole Chicken, you can also include: These ingredients help create a more aromatic and flavorful dish. Equipment Needed To prepare Instant Pot Frozen Whole Chicken, you will need several simple kitchen tools. The trivet is especially important because it lifts the chicken above the cooking liquid, allowing steam to circulate evenly around the chicken. Step-by-Step Instructions Step 1: Prepare the seasoning Start by mixing olive oil, salt, pepper, garlic powder, onion powder, and paprika in a small bowl. This seasoning mixture will coat the chicken and enhance its flavor while cooking. If your frozen chicken has ice on its surface, quickly rinse it under cold water and pat it dry with paper towels. Step 2: Season the chicken Rub the seasoning mixture evenly over the frozen chicken. Try to cover as much of the surface as possible. Although seasoning may not stick perfectly to frozen meat, it will blend with the juices during cooking and still flavor the Instant Pot Frozen Whole Chicken beautifully. Step 3: Add liquid to the Instant Pot Pour one cup of chicken broth or water into the bottom of the Instant Pot. This liquid is essential because it produces steam, which allows the pressure cooker to function properly. Without enough liquid, the pot cannot build pressure. Step 4: Place the chicken in the Instant Pot Insert the trivet into the pot and carefully place the frozen chicken on top, breast side up. Keeping the chicken elevated ensures the Instant Pot Frozen Whole Chicken cooks evenly without sitting directly in the liquid. Step 5: Pressure cook the chicken Close the lid and set the valve to the sealing position. Select the Pressure Cook or Manual setting and cook on high pressure. Cooking time depends on the weight of the chicken. Cooking Time Guide These times allow the Instant Pot Frozen Whole Chicken to cook fully while remaining tender and juicy. Step 6: Natural pressure release Once cooking is complete, allow the Instant Pot to release pressure naturally for about 15 to 20 minutes. Natural release helps the chicken retain its juices and improves the texture of the meat. After the pressure has fully released, carefully open the lid. Step 7: Check the internal temperature Use a meat thermometer to check the thickest part of the thigh. The internal temperature should reach 165°F (74°C) to ensure the Instant Pot Frozen Whole Chicken is fully cooked. If the temperature is slightly lower, simply return the chicken to the pot and cook for another 5 to 10 minutes. Optional Step: Crispy Chicken Skin While Instant Pot Frozen Whole Chicken produces extremely tender meat, the skin will usually remain soft rather than crispy. If you prefer crispy skin, you can finish the chicken in the oven. Broiling Method This simple step gives your Instant Pot Frozen Whole Chicken a delicious roasted appearance. Helpful Tips for the Best Results Choose the correct chicken size Most 6-quart Instant Pots can easily fit a chicken weighing up to five pounds. Always add enough liquid At least one cup of liquid is necessary for pressure cooking. This ensures the Instant Pot Frozen Whole Chicken cooks safely and evenly. Allow natural pressure release Natural release prevents sudden temperature changes and helps keep the chicken tender. Season generously Because frozen meat absorbs seasoning more slowly, using a well-balanced spice mixture improves the final flavor of the Instant Pot Frozen Whole Chicken. Flavor Variations Once you master the basic Instant Pot Frozen Whole Chicken, you can experiment with different flavors. Lemon Herb Chicken Add lemon slices, thyme, and rosemary for a fresh Mediterranean taste. Garlic Butter Chicken Rub the chicken with melted butter, garlic, and parsley before cooking. Mexican Style Chicken Use cumin, chili powder, paprika, and lime juice for bold flavor. Asian Inspired Chicken Season with ginger, soy sauce, and sesame oil for a rich and savory taste. These variations make Instant Pot Frozen Whole Chicken an incredibly versatile recipe. “If you’re in the mood for something with

Instant Pot Frozen Whole Chicken – Easy Juicy Chicken from Frozen Read More »

Panang Curry

4 Incredible Panang Curry Secrets for a Rich & Creamy Thai Dish

Panang Curry is one of the most popular dishes in Thai cuisine. Known for its creamy coconut base, aromatic spices, and balanced sweet-savory taste, this dish offers a rich and comforting experience. Many people appreciate it because it is flavorful without being extremely spicy. This classic Thai recipe combines curry paste, coconut milk, lime leaves, and a protein such as chicken, beef, or tofu. The ingredients cook together to create a thick and fragrant sauce that coats every bite. Because of its smooth texture and complex flavors, it has become a favorite in Thai restaurants and home kitchens around the world. Preparing Panang Curry at home is easier than many people expect. With the right ingredients and a few simple cooking techniques, you can create a dish that tastes just as satisfying as one served in a restaurant. What Makes Panang Curry Unique Among Thai dishes, Panang Curry stands out because of its thick consistency and balanced flavor profile. Unlike some other Thai curries that are more soup-like, this one is richer and slightly sweeter. The distinctive flavor comes from a combination of coconut milk, curry paste, and aromatic herbs. These ingredients work together to create a sauce that is creamy, fragrant, and comforting. Another feature that makes this dish special is the gentle balance between sweetness and saltiness. Palm sugar adds a mild sweetness, while fish sauce contributes depth and umami. Because of this harmonious combination of flavors, Panang Curry is often considered one of the most approachable Thai dishes for people who are new to Thai cuisine. Key Ingredients That Create the Flavor A successful curry begins with high-quality ingredients. Each component contributes to the unique taste and aroma of the dish. Curry Paste The paste is the heart of the recipe. It usually contains a mixture of: These ingredients are blended together to create a fragrant base that defines the flavor of the curry. Coconut Milk Coconut milk gives the dish its signature creamy texture. Using full-fat coconut milk creates a rich sauce that balances the spice of the curry paste. Makrut Lime Leaves These aromatic leaves add a fresh citrus fragrance that enhances the overall flavor. Fish Sauce Fish sauce contributes a savory depth that is essential in many Thai dishes. Palm Sugar Palm sugar provides gentle sweetness and helps balance the salty and spicy elements. Protein Many versions include: Each option creates a slightly different texture while keeping the same rich curry flavor. How to Make Panang Curry at Home Cooking this Thai classic requires only a few steps. Once the ingredients are prepared, the dish comes together quickly. Servings 4 portions Preparation time 15 minutes Cooking time 15 minutes Ingredients Step-by-Step Cooking Instructions 1. Heat the Oil Begin by heating vegetable oil in a wok or large pan over medium heat. Once the oil is hot, add the curry paste and cook it for about one minute while stirring constantly. Cooking the paste first allows the spices to release their aroma and develop deeper flavor. 2. Add Coconut Milk Pour in about half of the coconut milk and stir until the paste dissolves into a smooth sauce. Allow the mixture to simmer gently until it begins to thicken. 3. Cook the Protein Add the sliced chicken or tofu and stir so it becomes coated in the sauce. Let it cook for several minutes until partially cooked. 4. Season the Curry Add the remaining coconut milk, fish sauce, and palm sugar. Stir well and allow the mixture to simmer. At this stage, the sauce should become fragrant and creamy. 5. Add Vegetables Add bell peppers, onions, and lime leaves. Cook for two to three minutes until the vegetables become tender but still slightly crisp. 6. Serve the Dish Remove the pan from the heat and garnish with fresh basil if desired. Serve the curry hot with jasmine rice. Tips for the Best Panang Curry A few simple techniques can greatly improve the final result. Use good coconut milk Full-fat coconut milk produces a richer sauce. Cook the paste properly Frying the paste briefly in oil enhances its aroma and depth. Balance the seasoning Taste the sauce and adjust sweetness or saltiness as needed. Slice meat thinly Thin slices cook faster and absorb the curry flavor better. If you enjoy rich umami flavors, you might also love our miso glazed eggplant, a delicious plant-based dish packed with deep savory notes Popular Variations One of the reasons this Thai dish is so popular is that it can be adapted in many ways. Chicken Version Chicken is one of the most common choices because it absorbs the sauce well and stays tender. Beef Version Thin slices of beef can also be simmered in the sauce to create a richer dish. Vegetarian Option For a plant-based meal, tofu or vegetables can replace meat. Mushrooms, eggplant, and broccoli work especially well. Seafood Variation Shrimp or scallops create a lighter yet flavorful alternative. For another comforting Asian-inspired meal, don’t miss our flavorful miso salmon, where tender fish meets a perfectly balanced miso glaze What to Serve with Panang Curry The creamy sauce pairs best with simple side dishes that help balance its richness. Jasmine Rice This classic pairing absorbs the flavorful sauce and completes the meal. Coconut Rice Coconut rice enhances the aroma and richness of the curry. Fresh Cucumber Salad A refreshing salad provides contrast to the warm and creamy dish. Steamed Vegetables Green vegetables add color and freshness to the plate. And if you’re in the mood for a warm and satisfying bowl, our homemade miso ramen is a must-try for lovers of rich and aromatic noodle soups Why This Thai Dish Is So Loved Many people enjoy this curry because it offers bold flavor without overwhelming heat. The creamy coconut base makes it comforting, while the spices create depth and complexity. Another reason for its popularity is versatility. It can be adapted with different proteins, vegetables, or spice levels depending on personal taste. The dish is also

4 Incredible Panang Curry Secrets for a Rich & Creamy Thai Dish Read More »

miso ramen

Authentic Miso Ramen Recipe: 7 Easy Steps to Make the Best Japanese Comfort Bowl

Few dishes represent the comforting side of Japanese cuisine as perfectly as miso ramen. This hearty noodle soup combines springy ramen noodles, a deeply savory broth, and a variety of delicious toppings. Warm, aromatic, and satisfying, this dish has become one of the most beloved styles of ramen both in Japan and around the world. Unlike lighter ramen soups, miso ramen is known for its rich and robust flavor. The broth is seasoned with fermented soybean paste, which gives the soup its signature umami taste and creamy depth. Because of this unique flavor profile, many ramen enthusiasts consider it one of the most satisfying noodle dishes ever created. In this guide, you will learn everything about miso ramen, including its origins, ingredients, and a step-by-step recipe that allows you to recreate this comforting bowl at home. The Origins of Miso Ramen While ramen itself has a long history in Japan, the miso-based variation is relatively modern. The dish was first developed in Sapporo, the capital of Japan’s northern island of Hokkaido. Hokkaido is known for its cold winters, which encouraged chefs to create a richer, more filling style of ramen. By adding miso paste to the broth, cooks developed a soup that was thicker and more satisfying than traditional soy-based ramen. Over time, the popularity of miso ramen spread across Japan. Today it is considered one of the four major ramen styles, alongside soy sauce ramen, salt ramen, and pork bone ramen. Because of its rich flavor and comforting warmth, it has become a favorite choice for ramen lovers everywhere. Why Miso Ramen Is So Popular There are several reasons why this dish has gained international popularity. Rich and Deep Flavor Miso paste contains natural compounds that enhance savory flavors, creating a broth full of umami. Hearty and Filling Compared with lighter ramen soups, the broth is thicker and more robust. Highly Customizable The dish can be adapted with different proteins, vegetables, and toppings. Perfect Comfort Food A hot bowl of ramen is both nourishing and satisfying, making it ideal for cold weather or cozy meals. These qualities make miso ramen one of the most appealing noodle soups in Japanese cuisine. Ingredients for Homemade Miso Ramen Making this dish at home requires simple ingredients that are easy to find. Broth Ingredients These ingredients create the flavorful base used in traditional miso ramen. Noodles Fresh noodles give the best texture, but dried ramen noodles also work well. Traditional Toppings Common toppings include: Each topping adds a new layer of texture and flavor to the bowl. Step-by-Step Miso Ramen Recipe This recipe makes two generous servings. Step 1: Prepare the Aromatics Heat sesame oil in a medium pot over medium heat. Add minced garlic and grated ginger. Cook for about one minute until fragrant. These aromatics create the first layer of flavor in the broth. Step 2: Cook the Meet Add ground meet to the pot and cook until browned. Break the meat into small pieces as it cooks. The meet releases flavorful juices that enrich the broth. If you enjoy spicy food, add chili paste at this stage. Step 3: Add the Miso Paste Reduce the heat slightly and stir in the miso paste. Mix it carefully with the pork mixture until it dissolves evenly. This step is essential for developing the deep flavor that characterizes miso ramen. Avoid cooking the miso over very high heat to preserve its taste. Step 4: Add the Broth Pour the chicken or meetstock into the pot. Add soy sauce and stir well. Allow the soup to simmer gently for about 10 to 15 minutes so the flavors combine. The broth should become rich, fragrant, and slightly creamy. Step 5: Cook the Noodles Bring a separate pot of water to a boil. Add the ramen noodles and cook them according to the package instructions. Fresh noodles typically cook very quickly. Drain them well so they do not dilute the soup. Step 6: Assemble the Bowl Divide the noodles into serving bowls. Pour the hot broth over the noodles, ensuring each bowl receives some of the meet mixture. Top your bowl with: Serve immediately while the soup is hot. How to Make Ramen Eggs Soft-boiled eggs are one of the most popular toppings for ramen. To prepare them: The result is a creamy egg that pairs perfectly with miso ramen. If you enjoy rich and comforting flavors, you might also love our White Beans with Onion Confit recipe, which brings together simple ingredients in a deeply satisfying dish. Popular Toppings for This Dish One of the best aspects of ramen is the ability to customize toppings. Popular additions include: In Hokkaido, corn and butter are often added to create a richer version of the soup. For another delicious way to enjoy miso in your cooking, be sure to try our flavorful Miso Salmon recipe, a perfect balance of savory and umami. Tips for the Best Homemade Miso Ramen Choose the Right Miso Different types of miso create different flavors. White miso is milder and slightly sweet, while red miso has a stronger taste. Combining the two varieties often creates the most balanced broth. Use a Flavorful Broth The broth is the foundation of the dish. A well-prepared stock will greatly improve the final result. Avoid Overcooking the Noodle Ramen noodles should remain slightly firm so they maintain their texture in hot soup. Add Aromatic Oils A drizzle of sesame oil or chili oil can enhance the aroma and complexity of the broth. Looking for a classic and comforting side dish? Our Potato O’Brien recipe is a wonderful choice, featuring crispy potatoes with colorful peppers and onions. Variations of Miso Ramen Many creative variations of miso ramen exist today. Spicy VersionPrepared with chili paste or chili oil for extra heat. Butter Corn StyleA specialty of northern Japan featuring sweet corn and butter. Vegetarian VersionMade with vegetable broth and mushrooms instead of meat. Seafood VersionIncludes shrimp or seafood broth for a coastal flavor. These variations demonstrate the

Authentic Miso Ramen Recipe: 7 Easy Steps to Make the Best Japanese Comfort Bowl Read More »

Miso Salmon

Miso Salmon Recipe: 7 Easy Steps for Perfect Sweet & Savory Japanese Salmon

If you are looking for a simple yet flavorful seafood recipe, Miso Salmon is an excellent choice. This Japanese-inspired dish combines tender salmon fillets with a rich miso-based marinade that delivers a perfect balance of sweet, savory, and umami flavors. The result is a beautifully glazed fish that feels both comforting and sophisticated. One of the reasons many people love Miso Salmon is its simplicity. With only a few pantry ingredients and minimal preparation time, you can create a dish that tastes like it came from a high-end restaurant. Whether baked, broiled, or grilled, the marinade caramelizes during cooking and enhances the natural richness of the salmon. This recipe is ideal for busy weeknights, but it is also elegant enough to serve when entertaining guests. Once you learn how easy it is to prepare Miso Salmon, it may quickly become one of your favorite seafood dishes. What Is Miso Salmon? Miso Salmon is a Japanese-inspired dish made by marinating fresh salmon fillets in a mixture containing miso paste, soy sauce, mirin, and other flavor-enhancing ingredients. The fish is then cooked until tender and slightly caramelized. The key ingredient in this recipe is miso paste. Miso is a fermented soybean paste widely used in Japanese cooking. It has a deep savory flavor known as umami, which enhances many dishes. When used in Miso Salmon, miso creates a thick glaze that coats the fish and adds complexity to the flavor. The fermentation process also contributes subtle sweetness and depth, making the dish both rich and balanced. Because salmon naturally contains healthy fats and a buttery texture, it pairs perfectly with the salty and slightly sweet miso marinade. Why This Miso Salmon Recipe Is So Popular There are several reasons why this dish has become popular in home kitchens around the world. Simple ingredients Most versions of Miso Salmon use ingredients that are easy to find and simple to combine. Quick cooking time Salmon cooks quickly, making this recipe perfect for busy schedules. Balanced flavor The combination of miso, soy sauce, and mirin creates a glaze that is both savory and slightly sweet. Elegant presentation When cooked properly, the glaze forms a beautiful caramelized coating that makes the fish look restaurant-quality. Nutritious meal Salmon is rich in omega-3 fatty acids, protein, and important vitamins. These qualities make Miso Salmon a favorite choice for both beginners and experienced cooks. Ingredients for Miso Salmon This recipe uses simple ingredients that work together to create a flavorful marinade. For the salmon For the marinade Optional garnish White miso is typically used because it has a mild flavor that complements the fish without overpowering it. How to Make Miso Salmon Preparing Miso Salmon is very straightforward and requires only a few steps. Step 1: Prepare the marinade In a small bowl, combine the miso paste, soy sauce, mirin, sake, honey, and sesame oil. Whisk the ingredients together until smooth. The mixture should be thick but spreadable. This marinade will coat the fish and provide the signature flavor of the dish. Step 2: Prepare the salmon Pat the salmon fillets dry with paper towels. This step helps the marinade adhere to the fish. Check the fillets for small bones and remove them if necessary. Place the salmon in a shallow dish or container. Step 3: Marinate the salmon Spread the marinade evenly over the fillets, making sure the surface of each piece is well coated. Cover the dish and refrigerate for about 30 minutes to 2 hours. This allows the flavors to penetrate the fish while maintaining a balanced taste. Step 4: Preheat the oven Preheat your oven to 400°F (200°C). Line a baking sheet with parchment paper or foil to prevent sticking and simplify cleanup. Step 5: Bake the salmon Remove the salmon from the marinade and gently scrape off excess sauce. Place the fillets skin-side down on the baking sheet. Bake the Miso Salmon for about 10 to 12 minutes, depending on the thickness of the fish. For a lightly caramelized finish, switch to the broiler during the final minute of cooking. Step 6: Garnish and serve Once cooked, remove the salmon from the oven and let it rest briefly. Sprinkle sesame seeds and sliced green onions over the fish for extra flavor and visual appeal. Serve warm with your favorite side dishes. Tips for Perfect Miso Salmon To achieve the best results, consider these helpful tips. Choose fresh salmon Fresh salmon produces the best flavor and texture. Use white miso paste White miso provides a gentle sweetness that pairs well with salmon. Avoid excess marinade Too much marinade can burn during cooking because miso contains natural sugars. Cook just until done Salmon should remain moist and flaky. Overcooking may cause dryness. Finish with a quick broil Broiling briefly helps caramelize the glaze and intensify the flavor. Following these tips will help you prepare delicious Miso Salmon every time. Variations of Miso Salmon This recipe can easily be adapted to create different flavor profiles. Honey glaze version Adding extra honey creates a sweeter and slightly caramelized coating. Garlic and ginger version Mixing grated ginger and minced garlic into the marinade adds warmth and fragrance. Spicy version Chili paste or chili flakes can add a gentle heat to the dish. Air fryer version Cooking the fish in an air fryer provides a quick alternative while still delivering excellent texture. These variations allow you to personalize the flavor of your Miso Salmon while keeping the recipe simple. What to Serve with Miso Salmon This dish pairs beautifully with many side dishes. Steamed rice Rice balances the savory marinade and completes the meal. Roasted vegetables Broccoli, asparagus, potatos or carrots add freshness and color. Looking for a classic and hearty side? Our Potato O’Brien recipe is a perfect choice, combining crispy potatoes with vibrant peppers and savory seasonings. If you enjoy bold and aromatic flavors, don’t miss our Dopiazeh Aloo, a delicious Persian-style potato dish that brings warmth and depth to any meal. Noodles Serving the fish over

Miso Salmon Recipe: 7 Easy Steps for Perfect Sweet & Savory Japanese Salmon Read More »

White Beans Onion Confit

White Beans Onion Confit: 7 Simple Secrets for the Best Mediterranean Bean Dish

White Beans Onion Confit is a comforting and flavorful dish that transforms simple ingredients into a rich and satisfying meal. Creamy white beans are combined with sweet caramelized onions, fragrant herbs, and olive oil to create a rustic recipe that feels both nourishing and elegant. Many traditional Mediterranean recipes focus on elevating humble ingredients through slow cooking and thoughtful seasoning. In this dish, onions are slowly cooked until they become soft and golden, developing a deep sweetness that blends beautifully with tender beans. The result is a dish that is simple yet full of flavor. Whether served as a vegetarian main course, a hearty side dish, or even as a topping for toasted bread, White Beans Onion Confit is a recipe that delivers warmth and comfort in every bite. What Is White Beans Onion Confit? White Beans Onion Confit is a rustic bean preparation where tender white beans are simmered with slow-cooked onions, garlic, herbs, and olive oil. The onions are gently caramelized until they become silky and sweet, creating the base of the dish. The term confit refers to cooking ingredients slowly in fat or oil in order to intensify flavor and texture. While the technique is commonly used with meats, vegetables such as onions can also be cooked in this way. The onion confit becomes soft, aromatic, and slightly sweet, forming a rich sauce for the beans. When prepared properly, White Beans Onion Confit develops a creamy texture and deep savory taste. The combination of beans and onion confit creates a comforting dish that is both rustic and refined. Why You’ll Love White Beans Onion Confit There are many reasons why White Beans Onion Confit has become a favorite in many kitchens. Simple Ingredients This dish relies on basic pantry staples such as beans, onions, garlic, olive oil, and herbs. Despite the simplicity of the ingredients, the slow cooking process creates remarkable flavor. Rich Flavor The onions are cooked slowly until they release their natural sweetness. This caramelized onion confit coats the beans with a silky and aromatic sauce. Nutritious and Filling White beans are an excellent source of plant-based protein and dietary fiber, making this dish both satisfying and nourishing. Versatile Dish White Beans Onion Confit can be served as a main vegetarian meal, a side dish for grilled foods, or even as a topping for crusty bread. Ingredients for White Beans Onion Confit The beauty of this recipe lies in its simplicity. Only a handful of ingredients are needed to prepare White Beans Onion Confit. Main Ingredients These ingredients combine to produce the deep flavor and creamy texture that make White Beans Onion Confit so satisfying. How to Make White Beans Onion Confit Preparing this dish is simple and requires only a few steps. Step 1: Heat the Olive Oil Place a large skillet or saucepan over medium heat. Add the olive oil and allow it to warm gently. The olive oil forms the base of the onion confit and helps carry the flavors throughout the dish. Step 2: Cook the Onions and Garlic Add the sliced onions, garlic, rosemary, and red pepper flakes to the pan. Season with salt and black pepper. Cover the pan and cook for about five minutes, stirring occasionally, until the onions begin to soften. Step 3: Slowly Caramelize the Onions Remove the lid and reduce the heat to medium-low. Cook the onions for 15 to 20 minutes, stirring occasionally, until they become soft, golden, and fragrant. This slow caramelization is essential for achieving the sweet and savory flavor that defines White Beans Onion Confit. Step 4: Add the Beans Stir the cannellini beans into the onion mixture. Add the chopped parsley and pour in the broth or water. Mix gently so the beans remain intact. Step 5: Simmer the Dish Allow the mixture to simmer for about five minutes. During this stage, the beans absorb the flavor of the onion confit and herbs, creating the rich texture that characterizes White Beans Onion Confit. Step 6: Finish With Cheese Remove the pan from heat and stir in the grated Parmesan cheese. Taste the dish and adjust seasoning if necessary. Serve the White Beans Onion Confit warm or at room temperature. Tips for Perfect White Beans Onion Confit Following a few simple tips will help you achieve the best flavor when making White Beans Onion Confit. Cook the Onions Slowly The key to the dish is patience. Cooking onions slowly allows their natural sugars to develop fully. Use Quality Olive Oil Because olive oil is an important component of White Beans Onion Confit, using a good quality oil enhances the overall flavor. Try Homemade Beans While canned beans work well, cooking dried beans from scratch can improve both flavor and texture. Adjust the Consistency If the mixture becomes too thick, add a small amount of broth to loosen the sauce. If you enjoy rich and comforting flavors, you may also love our delicious snow crab legs recipe, a perfect seafood dish for special meals. Variations of White Beans Onion Confit There are many ways to adapt White Beans Onion Confit depending on your taste preferences. Vegan Version To make vegan White Beans Onion Confit, simply omit the Parmesan cheese or replace it with nutritional yeast. Lemon and Herb Version Adding lemon zest and fresh thyme creates a brighter flavor that pairs beautifully with the beans. Tomato Variation Some cooks add a spoonful of tomato paste or chopped tomatoes to create a richer sauce. Wine Variation A splash of white wine during cooking can add complexity and depth to the flavor of White Beans Onion Confit. For another creamy and crowd-pleasing appetizer, be sure to try our cottage cheese spinach artichoke dip, a warm and flavorful favorite. What to Serve With White Beans Onion Confit White Beans Onion Confit pairs wonderfully with many dishes. Crusty Bread Serve it with toasted baguette slices or rustic sourdough bread. Grilled Meat The creamy beans complement grilled chicken, lamb, or sausages. Roasted Vegetables Roasted eggplant, zucchini,

White Beans Onion Confit: 7 Simple Secrets for the Best Mediterranean Bean Dish Read More »

Cacio e Pepe

Authentic Cacio e Pepe Recipe (Creamy Roman Pasta in 20 Minutes)

Cacio e Pepe recipe lovers know that this classic Roman pasta dish is proof that simple ingredients can create extraordinary flavor. Made with just pasta, Pecorino Romano cheese, and freshly ground black pepper, this traditional Italian recipe delivers a creamy, rich sauce without using cream or butter. When prepared with the right technique, the combination of starchy pasta water and finely grated cheese creates the signature silky texture that makes this dish so beloved around the world. In this Cacio e Pepe guide, you will learn how to prepare an authentic version of this iconic Italian pasta, including its history, the best ingredients to use, detailed cooking instructions, and expert tips that guarantee perfect results every time. What Is Cacio e Pepe? The name translates directly from Italian as “cheese and pepper.” These two ingredients, combined with pasta and cooking water, create the signature sauce that defines the dish. Unlike many creamy pasta recipes, this one does not rely on butter or cream. Instead, its smooth texture comes from a natural emulsion created by mixing finely grated Pecorino Romano with starchy pasta water. The pasta most commonly used includes long shapes such as spaghetti, bucatini, or tonnarelli. These shapes allow the sauce to cling evenly, ensuring every bite is coated with the peppery, cheesy mixture. Although the ingredients are simple, preparing the dish correctly requires attention to temperature and technique. The cheese must melt smoothly without clumping, and the pasta water must contain enough starch to create a silky sauce. The Origins of This Roman Cacio e Pepe Pasta This recipe comes from the Lazio region of Italy and has been enjoyed for centuries. Historically, it was a practical meal for shepherds traveling across the countryside. Shepherds needed ingredients that were durable, nutritious, and easy to transport. Three foods met those needs perfectly: Pecorino Romano was especially useful because it keeps well for long periods without refrigeration. Black pepper added warmth and strong flavor, while pasta provided energy during long journeys. Over time, this humble meal evolved into one of the most celebrated pasta dishes in Italian cuisine. Today, it appears on restaurant menus around the world. Why This Cacio e Pepe Recipe Is So Popular There are many reasons this Roman classic Cacio e Pepe continues to captivate cooks and diners alike. Simplicity The recipe uses very few ingredients, making it easy to prepare at home. Bold Flavor Pecorino Romano provides a sharp, salty taste that pairs beautifully with aromatic black pepper. Creamy Texture The sauce becomes naturally creamy without heavy ingredients. Quick Preparation The entire dish can be prepared in about twenty minutes. These characteristics make it perfect for both weeknight dinners and elegant meals. Ingredients Of Cacio e Pepe This recipe serves four people. Main Ingredients Because the recipe contains so few ingredients, quality is extremely important. Selecting the Best Ingredients To Make Cacio e Pepe Pasta Long pasta shapes work best because they allow the sauce to coat evenly. Recommended choices include: Pecorino Romano This traditional sheep’s milk cheese is essential for authentic flavor. It is saltier and sharper than Parmesan, giving the dish its characteristic taste. Always grate the cheese finely for the smoothest sauce. Black Pepper Freshly ground pepper releases aromatic oils that enhance the flavor of the sauce. Whole peppercorns ground just before cooking produce the best result. Step-by-Step Cooking The Cacio e Pepe 1. Bring Water to a Boil Fill a large pot with water and bring it to a boil. Add salt once the water begins bubbling. Because Pecorino Romano already contains salt, avoid over-salting the water. 2. Cook the Pasta Add the pasta and cook until al dente, according to the package instructions. Before draining, reserve about 1½ cups of pasta cooking water. This starchy liquid is essential for the sauce. 3. Toast the Pepper While the pasta cooks, place a large skillet over medium heat. Add the freshly ground pepper and toast it briefly until fragrant. This step enhances the pepper’s flavor. 4. Add Pasta Water Pour about half a cup of the reserved pasta water into the skillet with the pepper. Allow the mixture to simmer gently so the pepper flavor infuses the liquid. 5. Transfer the Pasta Using tongs, transfer the cooked pasta directly from the pot into the skillet. Toss the noodles so they absorb the pepper-infused water. 6. Add the Cheese Remove the pan from the heat. Gradually sprinkle the grated Pecorino Romano over the pasta while tossing continuously. Add small amounts of pasta water if necessary. 7. Create the Creamy Sauce Continue tossing the pasta until the cheese melts completely and forms a smooth sauce that coats the noodles evenly. The texture should appear glossy and creamy. 8. Serve Immediately Transfer the pasta to serving plates. Finish with additional Pecorino Romano and freshly cracked black pepper for extra flavor. If you enjoy bold and satisfying flavors, you might also love our flavorful snow crab legs recipe, perfect for an indulgent seafood dinner. Expert Tips for Success Finely Grate the Cheese Small cheese particles melt faster and blend more smoothly with pasta water. Control the Heat Too much heat can cause the cheese to clump instead of forming a creamy sauce. Use Enough Pasta Water The starch in the water is essential for emulsifying the sauce. Toss Continuously Constant movement helps the cheese and water combine properly. For another creamy and comforting appetizer, be sure to try our cottage cheese spinach artichoke dip, a crowd-pleasing favorite. Common Mistakes to Avoid Using Pre-Grated Cheese Pre-grated cheese often contains additives that prevent smooth melting. Skipping the Pepper Toasting Step Toasting the pepper intensifies its aroma and flavor. Not Saving Pasta Water Without the starchy water, the sauce cannot form correctly. If you’re in the mood for something rich and deeply savory, our birria ramen recipe is an unforgettable fusion dish worth exploring. Possible Variations Of Cacio e Pepe Although traditionalists prefer the original three-ingredient version, some modern cooks experiment with small additions. Butter A small amount

Authentic Cacio e Pepe Recipe (Creamy Roman Pasta in 20 Minutes) Read More »

Best Cloud Bread Recipe

Best Cloud Bread Recipe – Easy, Fluffy Low-Carb Bread (Only 4 Ingredients)

If you are searching for a soft, airy bread alternative that is both simple and healthy, this Best Cloud Bread Recipe is exactly what you need. Cloud bread has become incredibly popular among people following keto, gluten-free, and low-carb lifestyles because it offers the texture of bread without the carbohydrates found in traditional recipes. Unlike regular bread made with flour and yeast, cloud bread relies on whipped egg whites to create its light, fluffy structure. The result is a delicate bread with a slightly crisp exterior and a soft, pillowy interior. The Best Cloud Bread Recipe is surprisingly easy to prepare and requires only a few basic ingredients that you may already have in your kitchen. In this detailed guide, you will learn how to prepare the Best Cloud Bread Recipe, discover useful baking tips, explore variations, and find creative ways to enjoy this unique bread alternative. What Is Cloud Bread? Cloud bread is a light bread substitute made mainly from eggs and cream cheese or yogurt. The egg whites are whipped until they form stiff peaks, which creates an airy structure that gives cloud bread its characteristic softness. The Best Cloud Bread Recipe produces a bread that looks almost like small golden clouds when baked. Its texture is different from traditional bread but still satisfying enough to be used for sandwiches, snacks, or even breakfast dishes. One reason many people love the Best Cloud Bread Recipe is that it contains very few carbohydrates. Because it does not include flour or grains, it is naturally gluten-free and suitable for those who want a lighter bread alternative. Another advantage is how quick it is to make. From start to finish, the Best Cloud Bread Recipe usually takes less than forty minutes, making it perfect for busy home cooks. Why This Is the Best Cloud Bread Recipe Many versions of cloud bread exist, but the Best Cloud Bread Recipe stands out because it creates a perfect balance of texture and flavor. Here are several reasons why this recipe works so well. Light and Fluffy Texture The whipped egg whites create an airy structure that gives the bread its signature cloud-like appearance. Simple Ingredients The Best Cloud Bread Recipe uses only a few ingredients, making it easy for anyone to prepare. Low-Carb Friendly Each piece contains minimal carbohydrates compared with traditional bread. Naturally Gluten-Free Because the Best Cloud Bread Recipe does not use flour, it is suitable for people avoiding gluten. Versatile You can enjoy cloud bread in savory or sweet dishes depending on the ingredients you add. Ingredients for the Best Cloud Bread Recipe The Best Cloud Bread Recipe requires just a handful of ingredients that work together to create the light structure and mild flavor of this bread. Main Ingredients These ingredients form the base of the Best Cloud Bread Recipe and ensure the bread rises properly during baking. Optional Flavor Additions To enhance the flavor of the Best Cloud Bread Recipe, you can also add: These additions create a more savory version of cloud bread that works beautifully with sandwiches or breakfast dishes. Equipment Needed Before preparing the Best Cloud Bread Recipe, make sure you have the following tools ready. Using an electric mixer is highly recommended because whipping egg whites properly is essential for the success of the Best Cloud Bread Recipe. Step-by-Step Instructions Follow these instructions carefully to achieve perfect results with the Best Cloud Bread Recipe. Step 1: Preheat the Oven Preheat your oven to 300°F (150°C). Line a baking sheet with parchment paper to prevent the bread from sticking. Preparing the baking sheet before mixing the batter helps the Best Cloud Bread Recipe bake evenly. Step 2: Separate the Eggs Carefully separate the egg whites from the egg yolks. Place the whites in one bowl and the yolks in another. It is important that no yolk mixes into the whites because it can prevent them from whipping properly. Proper separation is a key step in the Best Cloud Bread Recipe. Step 3: Prepare the Egg Yolk Mixture In the bowl with the egg yolks: The mixture should be smooth and slightly thick. This step creates the flavorful base for the Best Cloud Bread Recipe. Step 4: Whip the Egg Whites Add the cream of tartar to the egg whites. Using an electric mixer, beat them until stiff peaks form. When the mixer is lifted, the egg whites should stand upright without collapsing. This step is essential because the airy structure of the Best Cloud Bread Recipe comes from properly whipped egg whites. Step 5: Fold the Mixtures Together Gently fold the egg yolk mixture into the whipped egg whites using a spatula. Slow folding motions help preserve the air inside the batter. This technique keeps the Best Cloud Bread Recipe light and fluffy. Step 6: Shape the Cloud Bread Spoon the batter onto the prepared baking sheet to form small round shapes. Leave some space between each portion because the batter may spread slightly during baking. Proper shaping helps the Best Cloud Bread Recipe bake evenly. Step 7: Bake the Bread Bake the cloud bread for 15 to 30 minutes, or until the tops become lightly golden. The baking time may vary depending on your oven. Once the bread is golden and slightly firm, the Best Cloud Bread Recipe is ready to come out of the oven. Step 8: Allow It to Cool Let the bread cool completely before serving. As it cools, the bread becomes more stable and easier to handle. Cooling also improves the texture of the Best Cloud Bread Recipe. Tips for Perfect Cloud Bread Although the Best Cloud Bread Recipe is simple, a few tips can help you achieve the best results every time. Use Room Temperature Eggs Egg whites whip more easily when they are not cold. Avoid Overmixing Overmixing can collapse the air bubbles that give the Best Cloud Bread Recipe its fluffy texture. Fold Carefully Always fold the batter gently to keep the mixture airy. Watch the Baking

Best Cloud Bread Recipe – Easy, Fluffy Low-Carb Bread (Only 4 Ingredients) Read More »