diamondmeals.com

All-Time Favorites

carne con chile

Carne con Chile Recipe – Authentic Slow-Cooked Beef with Rich Chile Flavor

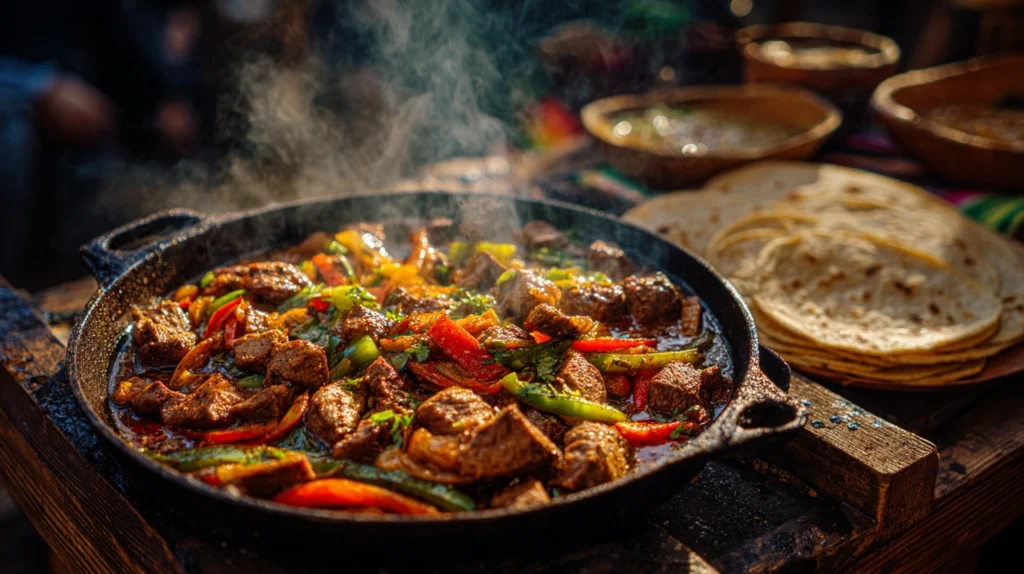
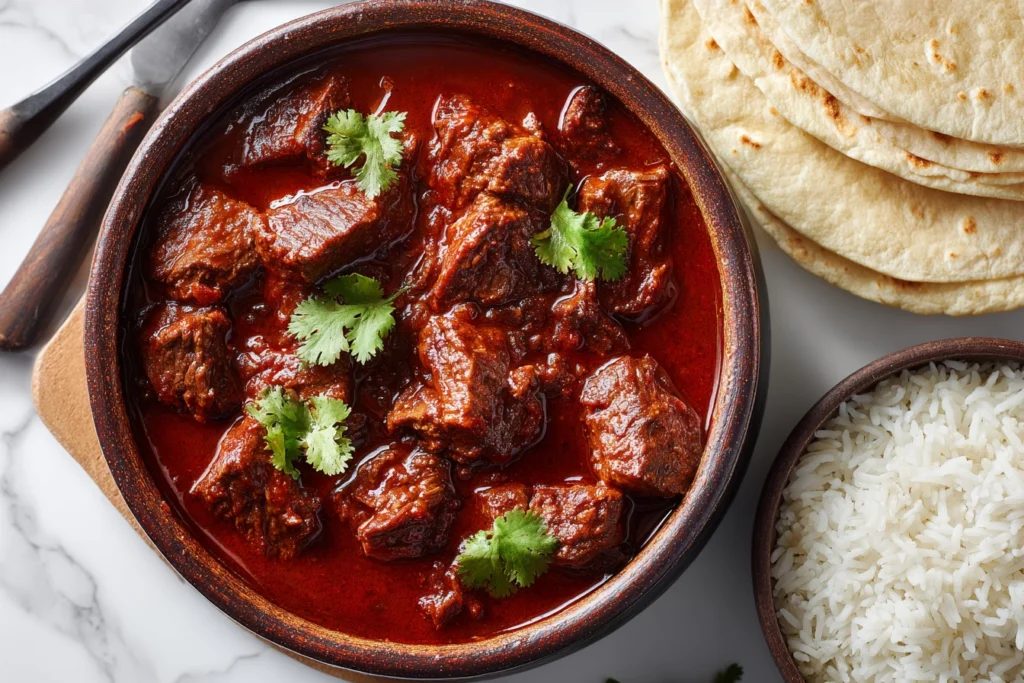
Carne con chile is a classic dish that represents comfort, tradition, and bold flavor. Built around slow-cooked beef and a rich chile-based sauce, this recipe has been passed down through generations and adapted across regions while preserving its essence. Hearty, warming, and deeply satisfying, it remains a favorite for family meals and special gatherings alike. This dish is rooted in rustic cooking, where simple ingredients are transformed through time and technique. Rather than relying on heavy sauces or shortcuts, the focus is on carefully prepared chiles, quality beef, and patience. The result is a stew that is rich without being heavy and spicy without overpowering the palate. The Character of a Classic Dish What makes carne con chile special is its balance. The dish highlights the natural richness of beef while allowing the chiles to provide depth, smokiness, and warmth. Unlike many modern chili-style recipes, this preparation emphasizes flavor development over heat intensity. The texture is equally important. The beef is cooked until tender enough to break apart with a spoon, while the sauce thickens naturally as it simmers. Every bite carries layers of flavor that feel both comforting and bold. Ingredients That Build Flavor A successful carne con chile starts with carefully chosen ingredients. Each one plays a specific role in building the final taste. Core Ingredients Optional Enhancements The ingredient list is intentionally simple. The depth of flavor comes from preparation and slow cooking rather than complexity. Preparing the Chile Sauce The heart of carne con chile lies in its sauce. Begin by removing stems and most seeds from the dried chiles. Briefly rinse them, then soak them in hot water until soft. This process releases their aroma and flavor. Once softened, the chiles are blended with garlic and a portion of onion until smooth. A small amount of soaking liquid or broth helps achieve the right consistency. For a refined texture, the sauce can be strained, though this step is optional. This sauce forms the foundation of the dish and determines much of its final character. Browning the Beef for Depth Proper browning is essential. Season the beef with salt and pepper, then brown it in a heavy pot over medium-high heat. Work in batches to avoid steaming the meat. This step creates caramelized flavors that enrich the final dish. Once browned, the beef is set aside while the base of the stew is prepared. Building the Stew Base In the same pot, onions are cooked until soft and lightly golden. Garlic is added briefly to release its aroma. The chile sauce is then poured in and stirred thoroughly, lifting the flavorful browned bits from the bottom of the pot. This mixture is gently simmered to allow the flavors to blend before the beef is returned to the pot. Slow Cooking to Perfection The browned beef is added back, followed by enough broth to partially cover the meat. Spices are added, and the heat is lowered. The stew is covered and allowed to simmer slowly. This stage is where carne con chile truly develops its character. Over the course of two to three hours, the beef becomes tender and absorbs the chile sauce. Occasional stirring ensures even cooking and prevents sticking. As the liquid reduces, the sauce thickens naturally, coating the meat with rich flavor. Final Adjustments and Balance Before serving, the stew is tasted and adjusted. Salt, spices, or liquid can be added as needed. The ideal consistency is thick but still spoonable. Allowing the dish to rest briefly before serving enhances its depth, as the flavors continue to meld. Serving Suggestions Carne con chile is extremely versatile at the table. It can be served in many traditional and creative ways: No matter how it is served, the dish remains hearty and satisfying. If you enjoy rich, home-style flavors, our picadillo recipe is another comforting classic worth exploring. Helpful Tips for Best Results These simple tips make a noticeable difference in the final result. For a bold and festive dish packed with smoky character, our discada recipe offers a delicious change of pace Popular Variations While the traditional preparation is widely loved, carne con chile can be adapted in subtle ways: Each variation keeps the soul of the dish intact while offering something new. Why This Dish Endures The lasting appeal of carne con chile lies in its simplicity and depth. It is a dish that rewards patience and care, turning humble ingredients into something memorable. It brings warmth to the table and invites sharing, making it as meaningful as it is flavorful. This recipe reflects a cooking philosophy that values time, balance, and tradition — qualities that never go out of style. Seafood lovers may also appreciate our tacos gobernador recipe, a refined blend of shrimp, cheese, and Mexican flair. Frequently Asked Questions About carne con chile How does “chile con carne” sound in Spanish? “Chile con carne” literally means chile with meat. In Spanish-speaking regions, it often refers to a meat-based dish cooked with chiles, though the exact preparation varies by country. What meat is used for Chile Colorado? Chile Colorado is traditionally made with beef, most commonly beef chuck or beef shoulder, which becomes tender after slow cooking in a red chile sauce. What is the best meat to use in chile? The best meat for chile is well-marbled beef such as chuck roast or stew meat, as it stays juicy and tender during long simmering. How is carne con chile traditionally made? Carne con chile is traditionally prepared by slow-cooking chunks of beef in a sauce made from dried chiles, garlic, onions, and spices until the meat is tender and deeply flavored. Conclusion Rich, comforting, and deeply flavorful, carne con chile remains a timeless classic. Its tender beef, bold chile sauce, and slow-cooked richness make it a dish worth mastering. Whether prepared for a family meal or a special occasion, it delivers satisfaction with every bite. Once you make it part of your kitchen repertoire, it becomes more than just a

Carne con Chile Recipe – Authentic Slow-Cooked Beef with Rich Chile Flavor Read More »

Cazuela

Cazuela: A Traditional Chilean Stew That Warms the Soul

Few dishes embody comfort, tradition, and nourishment quite like cazuela. This classic Chilean stew is a humble yet deeply satisfying meal built on simple ingredients, slow simmering, and generations of culinary wisdom. Served in homes across Chile and throughout Latin America, cazuela is not just food—it is a reflection of family, seasonality, and cultural identity. At its core, cazuela is a one-pot dish made with meat, vegetables, and a fragrant broth. Every bowl tells a story of local produce, rural cooking traditions, and the belief that the best meals come from patience rather than complexity. Whether prepared with chicken or beef, cazuela remains a timeless recipe that continues to bring people together around the table. The Meaning and Origins of Cazuela The word cazuela originally refers to the clay pot traditionally used to cook and serve this dish. Over time, the name became synonymous with the stew itself. Long before modern cookware, these earthenware vessels allowed ingredients to simmer gently, developing deep flavor while preserving nutrients. Cazuela has roots in indigenous South American cooking, particularly among the Mapuche people, who prepared brothy meals using local vegetables such as potatoes, squash, and corn. With the arrival of Spanish settlers, meat and new cooking techniques were introduced, shaping the cazuela we recognize today. This fusion of indigenous and colonial influences created a dish that is both rustic and refined. Cazuela evolved into a staple of everyday cooking, especially valued for its ability to stretch ingredients while delivering warmth and nourishment. Why Cazuela Is a Household Essential In Chilean culture, cazuella represents more than sustenance. It is often associated with family lunches, cooler weather, and moments of rest. Many households prepare cazuela at least once a week, adjusting ingredients based on what is fresh and available. What makes cazuela especially beloved is its versatility. It can be light or hearty, simple or elaborate, yet it always maintains its comforting essence. Each serving typically includes a piece of meat, a potato, a chunk of squash, corn on the cob, and a generous ladle of broth—making it both filling and balanced. Cazuela is also known for its ability to nourish the body. Rich in vegetables, protein, and minerals from the broth, it is often described as restorative food—ideal for cold days or when energy is low. Essential Ingredients for Traditional Cazuela Although every family has its own variation, classic cazuela relies on a core group of ingredients that work in harmony. Protein Cazuela is most commonly made with: Bone-in cuts are preferred because they enrich the broth with flavor and body. Vegetables Vegetables are the heart of cazuella and give it its signature look: Starch Many versions of cazuella include: Aromatics and Seasoning Flavor is built gently using: Fresh parsley or cilantro is often used as a garnish before serving. Broth Water or homemade stock forms the base. As the meat and vegetables simmer together, the broth becomes naturally rich without the need for heavy seasoning. Classic Chilean Cazuela Recipe This recipe reflects a traditional approach to cazuella, balancing authenticity with practicality for home kitchens. Preparation Time 30 minutes Cooking Time 90 minutes Servings 6 generous portions Ingredients Step-by-Step Instructions 1. Brown the Meat Heat a large pot over medium heat with a small amount of oil. Season the meat lightly with salt and pepper. Brown the pieces on all sides to develop flavor, working in batches if necessary. 2. Create the Broth Add the onion, garlic, bay leaf, and oregano to the pot. Pour in the water or broth and bring to a gentle boil. Reduce heat and simmer uncovered for 30 minutes, skimming any foam from the surface. 3. Add Root Vegetables Carefully add the potatoes, carrots, and pumpkin to the pot. Continue simmering for another 25 minutes until the vegetables begin to soften. 4. Add Rice and Corn Stir in the rice and corn pieces. Simmer for 15 minutes, allowing the rice to cook fully and the broth to thicken slightly. 5. Final Seasoning Taste the cazuela and adjust seasoning with salt and pepper. Remove the bay leaf. 6. Serve Serve cazuella hot in deep bowls. Each portion should include meat, vegetables, corn, and plenty of broth. Garnish with fresh herbs just before serving. If you enjoy bold, rustic flavors, you may also love our authentic discada recipe, packed with rich, slow-cooked goodness. Cazuela Variations You Can Try One of the joys of cazuella is its adaptability. Chicken Cazuella Lighter and faster to cook, chicken cazuela is ideal for weeknight meals while still delivering comfort. Beef Cazuela Richer and deeper in flavor, beef cazuela benefits from longer simmering and is perfect for colder days. Seasonal Vegetable Cazuela Some cooks add zucchini, peas, or sweet potato depending on the season, maintaining the structure of cazuella while enhancing freshness. No-Rice Cazuella In some households, rice is omitted to keep the broth clearer and lighter. For another comforting classic made with simple ingredients, take a look at our homemade picadillo recipe. Tips for the Best Cazuella Seafood lovers might want to explore our tacos gobernador recipe, a flavorful option with a delicious coastal twist How Cazuela Is Traditionally Served Cazuella is typically served as a complete meal. Some people enjoy it with crusty bread on the side to soak up the broth. Others add a spoon of fresh salsa or a squeeze of lemon for brightness. Leftover cazuela tastes even better the next day, as the flavors continue to develop. It can be reheated gently on the stove without losing its character. Why Cazuela Remains Timeless In a world of fast food and complicated recipes, cazuella stands out for its simplicity and heart. It proves that good cooking does not require luxury ingredients—only care, patience, and respect for tradition. Cazuella continues to thrive because it adapts without losing its soul. It remains deeply rooted in culture while fitting effortlessly into modern kitchens. Every pot of cazuella carries warmth, nourishment, and a sense of home. Frequently Asked Questions This article draws inspiration from trusted culinary

Cazuela: A Traditional Chilean Stew That Warms the Soul Read More »

Picadillo

Picadillo: A Timeless Latin Comfort Food with Rich Flavor and Tradition

Picadillo is one of those classic dishes that feels both humble and deeply comforting at the same time. Made with ground meat, aromatic vegetables, tomatoes, and a unique balance of savory, sweet, and tangy ingredients, picadillo has earned its place as a staple in many kitchens across Latin America and beyond. Simple to prepare yet rich in flavor, this dish is loved for its versatility, affordability, and ability to bring people together around the table. Although picadillo appears in many countries, each region has adapted it to local tastes and traditions. From Spain to Cuba, Mexico, and the Caribbean, picadillo has evolved while keeping its essential identity: finely chopped or ground ingredients simmered together to create a hearty, satisfying meal. In this article, you will discover the origins of picadillo, what makes the Cuban version so special, how to prepare an authentic and flavorful recipe at home, and the many ways you can customize it to suit your preferences. The Origins and Cultural Significance of Picadillo The word picadillo comes from the Spanish verb picar, which means “to mince” or “to chop.” This name perfectly reflects the nature of the dish, which is traditionally made using finely chopped or ground meat combined with other small, evenly cut ingredients. Originally rooted in Spanish cuisine, picadillo traveled across the Atlantic during the colonial era. As Spanish settlers introduced their cooking techniques to new regions, local ingredients and cultural influences reshaped the dish. Over time, picadillo became deeply embedded in everyday home cooking throughout Latin America and the Caribbean. What makes picadillo so culturally significant is its role as a practical, family-friendly meal. It was often prepared as a way to stretch ingredients, use what was available, and create something nourishing and flavorful without excess. Today, picadillo remains a symbol of comfort food, often associated with childhood memories, family lunches, and traditional gatherings. What Makes Cuban Picadillo Unique Among the many regional versions, Cuban picadillo stands out for its distinctive balance of flavors. It combines savory ground beef with tomatoes, onions, garlic, and bell peppers, then elevates the dish with olives, capers, and raisins. This contrast between salty, sweet, and acidic elements is what gives Cuban picadillo its signature taste. Potatoes are often added to make the dish more filling, while white wine or broth provides depth and richness to the sauce. The result is a dish that is bold yet comforting, complex yet easy to enjoy. Cuban picadillo is most commonly served with white rice, which absorbs the flavorful sauce beautifully. It is frequently accompanied by fried plantains or a simple salad, creating a complete and satisfying meal. Essential Ingredients for Classic Picadillo One of the reasons picadillo is so popular is that it relies on simple, accessible ingredients. While variations exist, a traditional Cuban-style picadillo typically includes: Each ingredient plays an important role. The vegetables form a fragrant base, the beef provides richness, the tomatoes create body, and the olives and capers add a salty bite that balances the natural sweetness of the raisins. Step-by-Step Picadillo Recipe This recipe yields a flavorful, well-balanced picadiillo that is ideal for family meals or meal prep. Ingredients (Serves 6) Instructions 1. Prepare the Aromatic Base Heat the olive oil in a large skillet or heavy pot over medium heat. Add the chopped onion, bell pepper, and garlic. Cook gently until the vegetables are soft and fragrant, stirring frequently to avoid burning. 2. Brown the Meat Add the ground beef to the pan. Season with cumin, salt, and black pepper. Break the meat apart with a spoon and cook until it is evenly browned. Proper browning at this stage helps develop deep flavor in the picadillo. 3. Add the Potatoes Stir in the diced potatoes, making sure they are well mixed with the meat and vegetables. Allow them to cook for a few minutes so they absorb some of the seasoning. 4. Deglaze and Simmer Pour in the broth, scraping the bottom of the pan to release any flavorful bits. Add the tomato sauce and raisins, then stir until everything is well combined. Reduce the heat to low, cover the pan, and let the picadiillo simmer gently for 20 to 30 minutes. Stir occasionally and add a small amount of liquid if needed to prevent sticking. 5. Finish with Olives and Capers In the final minutes of cooking, add the olives and capers. Taste and adjust seasoning if necessary. The picadiillo should be thick, rich, and aromatic, with tender potatoes and a balanced flavor profile. How to Serve Picadillo Picadiillo is traditionally served hot over steamed white rice. The rice acts as the perfect base, soaking up the savory sauce and highlighting the contrast of flavors. Popular side dishes include: Picadiillo can also be used as a filling for empanadas, tacos, stuffed peppers, or even baked potatoes, making it a highly versatile recipe. If you enjoy bold, rustic flavors, you may also love this hearty discada recipe, perfect for sharing and slow, flavorful cooking Popular Picadillo Variations One of the greatest strengths of picadiillo is its adaptability. While the Cuban version is iconic, many variations exist: These variations show how picadiillo can easily be adjusted to suit different tastes and dietary needs. For a lighter and refreshing contrast, this vibrant bhel puri brings a delightful mix of crunch, spice, and freshness. Why Picadillo Remains a Favorite Picadiillo has stood the test of time because it is practical, nourishing, and deeply satisfying. It brings together simple ingredients in a way that feels comforting and familiar, yet never boring. The balance of flavors makes it appealing to a wide audience, while its versatility allows home cooks to make it their own. Whether prepared for a quick weeknight dinner or a traditional family gathering, picadillo continues to be a dish that connects people through food, culture, and shared memories. And if you’re craving something deeply comforting and modern, this rich birria ramen offers an irresistible fusion of flavors FAQ Final Thoughts Picadiillo is more than just a

Picadillo: A Timeless Latin Comfort Food with Rich Flavor and Tradition Read More »

Tacos Gobernador

Tacos Gobernador Recipe: Authentic Mexican Shrimp & Melted Cheese Tacos

Tacos gobernador are one of Mexico’s most irresistible seafood tacos, known for their rich flavors, melty cheese, and perfectly seasoned shrimp. Originating from the coastal state of Sinaloa, these tacos beautifully reflect the region’s love for fresh seafood and bold yet balanced ingredients. Unlike many traditional tacos, tacos gobernador blur the line between taco and quesadilla, combining sautéed shrimp, peppers, tomatoes, and generous amounts of melted cheese inside warm corn tortillas. If you’ve never tried tacos gobernador before, imagine tender shrimp cooked with aromatic vegetables, folded into a lightly toasted tortilla where cheese melts and binds everything together. The result is comforting, indulgent, and deeply satisfying — a dish that feels both rustic and refined. Today, tacos gobernador are enjoyed not only along Mexico’s Pacific coast but also in Mexican restaurants and home kitchens around the world. This recipe guide will walk you through the history, ingredients, technique, and tips needed to make authentic tacos gobernador at home, while also helping you understand why this dish has become such a modern Mexican classic. The Origin of Tacos Gobernador Unlike ancient Mexican dishes rooted in pre-Hispanic traditions, tacos gobernador are a relatively modern creation. The dish was born in the 1990s in Mazatlán, a vibrant port city famous for its shrimp. According to culinary lore, a restaurant chef created this taco to honor a visiting governor who loved shrimp tacos. Wanting to impress him, the chef elevated the dish by adding sautéed peppers, tomatoes, and melted cheese — and thus, tacos gobernador were born. The name “gobernador” quickly stuck, and the taco became a symbol of coastal Mexican creativity. Today, tacos gobernador represent how regional Mexican cuisine evolves by respecting tradition while embracing innovation. What Makes Tacos Gobernador Special What truly sets tacos gobernador apart is their unique combination of ingredients and textures. In traditional Mexican cooking, seafood and cheese are not commonly paired, yet in this dish, the combination works beautifully. The sweetness of shrimp balances the richness of the cheese, while peppers and tomatoes add freshness and depth. Key characteristics of tacos gobernador include: Together, these elements create a taco that is creamy, savory, slightly smoky, and incredibly comforting. Ingredients for Tacos Gobernador (Serves 4–6) For the Shrimp Filling For Assembling the Tacos How to Make Tacos Gobernador 1. Prepare the Vegetables If using poblano peppers, roast them until the skin blisters and blackens. Let them steam briefly, peel off the skin, remove seeds if desired, and slice into thin strips. This step adds subtle smokiness to the tacos gobernador. Slice the onion thinly, mince the garlic, and dice the tomatoes. Having everything ready before cooking ensures the shrimp won’t overcook. 2. Sauté the Base Heat butter or oil in a large skillet over medium heat. Add the onion and cook until soft and translucent. Stir in the garlic and cook briefly until fragrant, being careful not to burn it. Add the roasted peppers and tomatoes. Cook for a few minutes until the vegetables soften and release their juices, forming a flavorful base for the shrimp. 3. Cook the Shrimp Add the chopped shrimp to the skillet. Season with salt, pepper, and any optional spices. Cook for 3–5 minutes, stirring gently, until the shrimp turn opaque and tender. Avoid overcooking, as shrimp can quickly become rubbery. Once done, remove the skillet from heat and set aside. 4. Warm the Tortillas Heat a dry skillet or griddle over medium heat. Warm each corn tortilla briefly until pliable but not crispy. This makes them easier to fold without breaking. 5. Assemble the Tacos Gobernador Place a tortilla in the skillet and sprinkle shredded cheese over one half. Allow the cheese to melt slightly, then spoon the shrimp mixture on top of the cheese. Fold the tortilla over, pressing gently with a spatula. Cook until the tortilla is lightly golden and the cheese is fully melted. Flip carefully if needed to toast both sides. Repeat with remaining tortillas. 6. Serve Immediately Serve tacos gobernador hot, garnished with fresh cilantro and lime wedges. A squeeze of lime just before eating brightens the flavors and balances the richness of the cheese. For bold, smoky flavors, you may also enjoy our authentic discada recipe, a hearty dish that celebrates rich spices and slow-cooked tradition. Serving Ideas and Pairings Tacos gobernador are filling enough to be a main dish, but they pair wonderfully with simple sides: Because tacos gobernador are rich, lighter accompaniments help keep the meal balanced. If you’re craving something lighter and refreshing, our vibrant bhel puri offers a perfect contrast with its crisp textures and bright flavors. Tips for Perfect Tacos Gobernador For lovers of comforting fusion dishes, don’t miss our birria ramen, where deep, savory broth meets irresistible noodle comfort. Variations You Can Try While shrimp is the most popular protein, tacos gobernador can be adapted: Each variation keeps the spirit of tacos gobernador while allowing flexibility. Why Tacos Gobernador Are So Popular The popularity of tacos gobernador comes from their universal appeal. They are familiar enough to feel comforting, yet unique enough to feel special. The combination of shrimp and cheese surprises many people — and quickly wins them over. Tacos gobernador also showcase the brilliance of Mexican coastal cuisine, where fresh seafood meets thoughtful seasoning and simple techniques. They are proof that great food doesn’t need to be complicated — it just needs balance. Frequently Asked Questions Final Thoughts Tacos gobernador are more than just shrimp tacos with cheese. They are a celebration of regional Mexican creativity, a reminder that culinary traditions continue to evolve, and a perfect example of how simple ingredients can create extraordinary flavor. Whether you’re cooking for family, hosting friends, or adding a new recipe to your food blog, tacos gobernador deserve a place at your table. Once you try them, they may quickly become one of your favorite taco recipes — rich, comforting, and unforgettable. This article is informed by respected culinary sources and classic interpretations, which helped shape the techniques and flavor balance

Tacos Gobernador Recipe: Authentic Mexican Shrimp & Melted Cheese Tacos Read More »

Bhel Puri

Bhel Puri Recipe: A Fresh, Crunchy & Flavor-Packed Indian Street Snack

Among the many treasures of Indian street food, bhel puri stands out as one of the most beloved and instantly recognizable snacks. Light yet satisfying, crunchy yet juicy, spicy yet refreshingly tangy, bhel puri perfectly represents the balance of flavors that Indian cuisine is famous for. This iconic snack is not only a staple at bustling street stalls and beachside vendors, but also a favorite homemade treat enjoyed across generations. In this comprehensive guide, you’ll discover everything you need to know about bhel puri—its origins, flavor profile, essential ingredients, preparation techniques, variations, and expert tips to help you recreate authentic street-style bhel puri in your own kitchen. What Is Bhel Puri? Bhel puri is a classic Indian chaat, a category of savory snacks known for their bold combinations of textures and tastes. At its core, bhel puri is a mixture of puffed rice combined with crunchy fried elements, fresh vegetables, tangy chutneys, aromatic spices, and herbs. The result is a vibrant dish that is light, refreshing, and packed with flavor. Unlike cooked meals, bhel puri is assembled fresh and served immediately. Its appeal lies in contrast—crisp puffed rice meets soft boiled potatoes, sweet tamarind chutney balances spicy green chutney, and fresh herbs lift the entire dish. Every spoonful delivers a different sensation, making bhel puri both exciting and addictive. The Cultural Roots of Bhel Puri The story of bhell puri is deeply tied to India’s street food culture, particularly in Mumbai. It became popular as a quick, affordable snack sold by street vendors along beaches, railway stations, and busy marketplaces. Vendors prepare bhel puri right in front of customers, mixing ingredients at lightning speed while adjusting flavors to individual preferences. Over time, bhel puri evolved from a local street snack into a nationally loved dish. Today, it is served at festivals, family gatherings, parties, and restaurants. Despite its widespread popularity, bhel puri has retained its humble charm—simple ingredients transformed into something extraordinary through balance and technique. Why Bhel Puri Is So Loved There are several reasons why bhell puri continues to be a favorite: This versatility makes bhel puri suitable for almost any occasion, from a casual snack to an elegant appetizer. Key Ingredients That Define Authentic Bhel Puri While many variations exist, traditional bhel puri relies on a few essential components. Understanding each ingredient helps you build flavor correctly. Base Ingredients Fresh Additions Flavor Builders Each ingredient plays a specific role, and skipping or overusing one can disrupt the balance that makes bhel puri so special. How to Make Bhel Puri at Home (Step-by-Step) This recipe creates a classic street-style bhell puri that is flavorful, crisp, and well balanced. Preparation Time: 15 minutes Assembly Time: 10 minutes Servings: 2–3 Ingredients For the bhel purri mixture: For seasoning and flavor: Instructions Step 1: Prepare the puffed riceMake sure the puffed rice is crisp. If it feels soft, dry-roast it briefly in a pan until crunchy, then allow it to cool completely. Step 2: Combine fresh ingredientsIn a large mixing bowl, add puffed rice, boiled potatoes, onions, tomatoes, green chili, and coriander leaves. Mix gently so the puffed rice doesn’t break. Step 3: Add chutneys graduallyDrizzle in the tamarind chutney and green chutney little by little. Toss lightly and taste as you go. This step is crucial for balancing flavors without making the bhel puri soggy. Step 4: Season the mixtureSprinkle chaat masala and salt evenly. Add a squeeze of fresh lemon juice to brighten the flavors. Step 5: Finish with crunchAdd roasted peanuts, crushed papdi, and sev. Toss once more very gently to distribute the ingredients. Step 6: Serve immediatelyBhel puri should be served right away while it’s crisp and fresh. Expert Tips for Perfect Bhel Puri If you enjoy bold, comforting flavors, you may also love our rich and deeply satisfying birria ramen, perfect for cozy meals. Popular Variations of Bhel Puri One of the beauties of bhell puri is its adaptability. Across India, different regions add their own twist. These variations show how bhell puri can evolve while still preserving its essential character. For a lighter yet soulful option, don’t miss our classic consomé de pollo, a timeless recipe full of warmth and simplicity. Serving Ideas Bhell puri works beautifully in many settings: For entertaining, keep all components separate and assemble bhell puri just before serving to ensure maximum crunch. If you’re in the mood for something hearty and crowd-pleasing, our authentic discada recipe is another must-try favorite. Why Bhel Puri Deserves a Place in Your Kitchen Beyond being delicious, bhell puri represents a philosophy of cooking that values balance, freshness, and creativity. It proves that you don’t need complex techniques or expensive ingredients to create something memorable. With a handful of pantry staples and a few minutes, you can bring the essence of Indian street food into your home. Whether you’re new to Indian cuisine or a longtime fan, bhel puri offers a joyful, flavorful experience that never feels heavy or overwhelming. Once you master the basics, you’ll find yourself returning to this recipe again and again. Frequently Asked Questions This article is informed by insights drawn from trusted culinary resources, including this detailed guide on traditional bhel puri preparation.

Bhel Puri Recipe: A Fresh, Crunchy & Flavor-Packed Indian Street Snack Read More »

Birria ramen

Birria Ramen: The Ultimate Fusion Comfort Bowl

Birria ramen is one of those rare dishes that feels both indulgent and deeply comforting at the same time. It brings together the slow-cooked, richly spiced flavors of traditional Mexican birria with the soothing warmth and slurp-worthy appeal of Japanese ramen. The result is a bold, satisfying fusion that has quickly become a favorite among home cooks, chefs, and food lovers around the world. This dish is more than a trend — it’s a celebration of flavor, technique, and culinary creativity. Whether you’re craving something hearty for a cold evening or looking to impress guests with a restaurant-style meal at home, birria ramen delivers depth, warmth, and unforgettable taste in every bowl. What Is Birria Ramen? At its heart, birria ramen is a fusion dish that combines two iconic comfort foods. Birria is a traditional Mexican stew made by slow-braising meat — most commonly beef — in a deeply seasoned chili and spice broth until it becomes tender and flavorful. Ramen, on the other hand, is a Japanese noodle soup built around a rich broth, springy noodles, and carefully chosen toppings. Birria ramen merges these two traditions by using birria consommé as the ramen broth, adding ramen noodles, and finishing the dish with classic ramen-style and fresh garnishes. The result is a bowl that’s spicy, savory, aromatic, and incredibly comforting. What makes birria ramen truly special is how naturally the flavors come together. The bold spices of birria complement the simplicity of ramen noodles, while fresh toppings bring balance and brightness to the rich broth. Why Birria Ramen Works So Well The success of birria ramen lies in its foundation: the broth. Both birria and ramen are built around deeply flavored liquids that are developed slowly over time. When these techniques meet, the result is a broth that is rich, layered, and satisfying without being overwhelming. The slow-cooked meat adds body and umami, while dried chilies, warm spices, and aromatics create complexity. Ramen noodles soak up the broth, delivering flavor in every bite. Fresh garnishes cut through the richness, ensuring the dish feels balanced rather than heavy. This harmony of flavors is what makes birria ramen more than just a novelty — it’s a dish that feels intentional, thoughtful, and deeply comforting. Ingredients for Birria Ramen For the Birria For the Ramen Optional Toppings How to Make Birria Ramen 1. Prepare the Chili Base Start by removing stems and seeds from the dried chilies. Toast them briefly in a dry pan until fragrant, then soak them in hot water until softened. Blend the softened chilies with garlic, tomatoes, vinegar, and warm spices until smooth. This mixture forms the flavor backbone of your birria ramen. 2. Brown the Meat Season the beef generously with salt and pepper. Heat oil in a large pot and sear the meat until deeply browned on all sides. This step builds flavor and adds depth to the final broth. 3. Slow-Cook the Birria Add onions to the pot, followed by the chili sauce and beef stock. Add cinnamon, cloves, and bay leaves. Bring everything to a gentle simmer, then cover and cook on low heat for several hours until the meat is fall-apart tender. This slow cooking process is essential for developing the rich, complex broth that defines great birria ramen. 4. Shred the Meat Once cooked, remove the beef from the pot and shred it using two forks. Set it aside while you prepare the broth. 5. Refine the Broth Strain the broth to remove solids, then taste and adjust seasoning. If desired, skim excess fat from the surface. The broth should be rich, aromatic, and deeply savory — the heart of your birria ramen. Cooking the Ramen Noodles Bring a separate pot of water to a boil and cook the ramen noodles according to package instructions. Drain well and divide them evenly between serving bowls. Cooking the noodles separately ensures they maintain the perfect texture and don’t over-absorb the broth. Assembling Birria Ramen To assemble birria ramen, place the cooked noodles in bowls and ladle the hot birria consommé over them. Top generously with shredded birria beef, then add your favorite toppings. A soft-boiled egg adds richness, while fresh herbs, onions, and citrus bring brightness and contrast. The balance of rich broth, tender meat, and fresh garnishes is what makes birria ramen so satisfying. For a bold, spicy complement, you may also enjoy our homemade volcano sauce recipe, perfect for adding extra heat and depth to fusion dishes. Tips for the Best Birria Ramen Take Your Time Birria ramen rewards patience. The longer the birria simmers, the deeper and more developed the flavor becomes. Balance Richness If the broth feels too heavy, a squeeze of lime or a handful of fresh herbs can instantly brighten the dish. Customize the Heat Adjust the number and type of dried chilies to control the spice level. Birria ramen can be mild, spicy, or somewhere in between. Use Quality Noodles Good ramen noodles make a noticeable difference. Their texture helps carry the broth and enhances the overall eating experience. If you’re a fan of rich, slow-cooked flavors, our traditional discada recipe is another hearty dish worth exploring. Serving Suggestions Birria ramen is a complete meal on its own, but it also pairs beautifully with simple sides. Light, fresh accompaniments help balance the richness of the dish and create a satisfying dining experience. Serve birria ramen hot and fresh, allowing the aromas to shine. It’s best enjoyed immediately, while the noodles are perfectly tender and the broth is steaming. Why Birria Ramen Has Become So Popular The rise of birria ramen reflects a broader love for creative fusion cooking. Food lovers today appreciate dishes that honor tradition while embracing innovation. Birria ramen does exactly that — it respects the roots of both cuisines while creating something entirely new. Its visual appeal, comforting nature, and bold flavors make it especially popular on social media and restaurant menus. But beyond its popularity, birria ramen stands out because it genuinely tastes

Birria Ramen: The Ultimate Fusion Comfort Bowl Read More »

Consomé de Pollo

Consomé de Pollo: A Timeless Latin Chicken Broth for Comfort, Flavor, and Tradition

Few dishes are as universally comforting and culturally rich as consomé de pollo. This clear, aromatic chicken broth has been cherished for generations across Latin America, valued not only for its delicate flavor but also for its restorative qualities. Simple yet deeply satisfying, consome de pollo is the kind of dish that brings people together, whether served as a light starter, a healing broth, or a nourishing meal during colder days. In this complete guide, you will learn everything you need to know about consomé de pollo: its origins, cultural importance, essential ingredients, step-by-step preparation, and the small details that transform a basic chicken broth into a truly exceptional consommé. What Is Consomé de Pollo? Consomé de pollo is a clear chicken broth made by slowly simmering chicken with vegetables and herbs, then carefully straining the liquid to achieve clarity and purity of flavor. Unlike thick soups or stews, this dish focuses on refinement and balance. The goal is a transparent, golden broth that captures the essence of chicken without heaviness. Across Latin America, consome de pollo may be served plain or lightly garnished, depending on regional traditions. In some households, it includes delicate shreds of chicken or thinly sliced vegetables. In others, it is served completely clear, sometimes enriched with lightly beaten eggs poured into the hot broth. What unites all versions of consomé de pollo is its role as a comfort food. It is often prepared for family gatherings, after celebrations, or during moments of recovery, when the body needs warmth and nourishment without excess. The Cultural Significance of Consomé de Pollo The history of consomé de pollo reflects the blending of culinary traditions. The technique of clarifying broth comes from classical European cooking, while the ingredients and flavors reflect Latin American agriculture and home cooking. Over time, each region adapted the dish to local tastes, making it a staple in everyday kitchens. In Colombia, consome de pollo is often served in small cups, sometimes with a squeeze of lime, as a revitalizing broth. It is common at family gatherings and is frequently offered to guests as a sign of hospitality. In Chile, the consommé is known for its clarity and elegance, often prepared with eggs and fresh herbs for added richness. Beyond geography, consomé de pollo carries emotional meaning. It is the dish many people associate with childhood, care, and recovery. It is what families prepare when someone is tired, unwell, or simply in need of comfort. Why Consomé de Pollo Is So Beloved There are many reasons why consomé de pollo has endured across generations: Despite its simplicity, a well-made consome de pollo reflects patience, care, and respect for ingredients. For a bold and smoky main dish, you may enjoy our traditional discada recipe, perfect for sharing and full of rich flavor Essential Ingredients for Authentic Consomé de Pollo The beauty of consomé de pollo lies in its simplicity. Each ingredient plays a clear role in building flavor and aroma. Chicken Bone-in chicken pieces are essential. Legs, thighs, wings, and necks provide depth and richness. Some traditional versions also include chicken liver or heart for a more intense flavor, though this is optional. Vegetables These vegetables form the aromatic base and contribute subtle sweetness. Herbs and Seasonings Some regional variations include a small amount of cumin, used sparingly. Optional Additions If you’re looking to elevate your meals with fresh, vibrant flavor, our homemade chimichurri seasoning is a simple and delicious option. How to Make Consomé de Pollo: Step-by-Step Making consomé de pollo is not difficult, but it does require attention to detail. The key is gentle cooking and careful straining. Step 1: Prepare the Chicken Rinse the chicken pieces thoroughly under cold water. If using organ meat, soak briefly in cold water and rinse again to remove impurities. This step helps achieve a cleaner broth. Step 2: Start the Broth Place the chicken in a large pot and cover with cold water. Starting with cold water allows the flavors to develop gradually. Bring the pot to a gentle boil over medium heat. As the water heats, foam will rise to the surface. Skim this foam carefully using a spoon. This is essential for a clear consome de pollo. Step 3: Add Vegetables and Herbs Once the foam is removed, reduce the heat to low. Add the onion, garlic, carrots, celery, herbs, salt, and pepper. The broth should simmer gently, never boil aggressively. Step 4: Slow Simmer Allow the consomé de pollo to simmer uncovered for two to four hours. This slow cooking extracts flavor while preserving clarity. Avoid stirring too much, as this can cloud the broth. Step 5: Strain the Broth Remove the pot from heat. Carefully strain the broth through a fine mesh strainer or cheesecloth into a clean pot or bowl. Do not press on the solids, as this can release particles into the liquid. Step 6: Optional Egg Enrichment If desired, reheat the broth and slowly drizzle lightly beaten eggs into the hot liquid while stirring gently. This adds richness while maintaining a delicate texture. How to Serve Consomé de Pollo Consomé de pollo can be served in many ways, depending on preference and tradition. Classic and Simple Serve the broth hot in small bowls or cups, garnished with fresh herbs. This version highlights the purity of flavor. With Citrus A squeeze of lime or lemon brightens the broth and adds freshness, especially popular in Colombian-style servings. As a Light Meal Pair consomé de pollo with: These additions turn the broth into a satisfying yet gentle meal. For a creamy, plant-based alternative that pairs beautifully with both sweet and savory dishes, try our smooth pistachio milk recipe. Tips for a Perfect Consomé de Pollo Health and Nutritional Benefits Consomé de pollo is often associated with wellness and recovery. While it is not a medicine, it offers several benefits: This is why consome de pollo is commonly prepared during colds, fatigue, or periods of stress. Common Mistakes to Avoid Avoiding these mistakes

Consomé de Pollo: A Timeless Latin Chicken Broth for Comfort, Flavor, and Tradition Read More »

apple macaroni

Apple Macaroni: A Swiss Alpine Comfort Dish with a Sweet Twist

Introduction: My Experience with Apple Macaroni The first time I prepared apple macaronii, I was honestly surprised by how well sweet and savory flavors could work together in one dish. Like many people, I associated macaroni with cheese-heavy, purely savory recipes. But this Swiss Alpine version completely changed my perspective. When I tasted the creamy macaroni combined with tender potatoes, melted cheese, caramelized onions, and a side of homemade apple sauce, the balance felt perfect. The sweetness of the apples didn’t overpower the dish; instead, it softened the richness and made every bite more comforting. Since then, apple macaroni has become one of my favorite cozy recipes to prepare, especially during colder days when I want something hearty yet comforting. What Is Apple Macaroni? Apple macaroni is inspired by a traditional Swiss dish known as Alpine macaroni. It was originally eaten by mountain herders who needed filling, energy-rich meals made from simple ingredients. Over time, this rustic dish evolved into a beloved comfort food across Switzerland. What makes apples macaroni unique is the combination of creamy pasta and potatoes served with apple sauce. While it may sound unusual at first, the contrast between savory cheese and sweet apples is what defines this dish. The apples help balance the creaminess and prevent the meal from feeling too heavy. Ingredients for Apple Macaroni To prepare a classic version of apple macaroni, you will need the following ingredients: For the Macaroni Dish For the Apple Sauce These simple ingredients come together to form the heart of authentic apple macaroni Step-by-Step Preparation 1. Make the Apple Sauce Start by preparing the apple sauce so it has time to cool slightly before serving. Place the chopped apples in a saucepan with a small amount of water. Cook over medium heat until the apples soften and begin to break down. Add sugar gradually, tasting as you go. If desired, add a small amount of lemon juice to brighten the flavor. Mash the apples for a chunky texture or blend for a smooth sauce. Set aside. This apple sauce is essential to the apple macaroni experience. 2. Cook the Potatoes and Macaroni Bring the water to a boil in a large pot and add salt. Add the potato cubes first and cook for a few minutes. Then add the macaroni and cook until the pasta is al dente and the potatoes are tender. Drain everything together and set aside. Cooking the potatoes and pasta together helps unify the flavors and texture of apple macaroni. 3. Prepare the Creamy Cheese Sauce In the same pot, melt the butter over medium heat. Stir in the flour to create a light roux. Slowly add the cream while whisking continuously to avoid lumps. Let the sauce thicken gently. Add the grated cheese and stir until fully melted and smooth. Season with salt and black pepper. Return the drained macaroni and potatoes to the pot and gently mix until everything is well coated in the creamy sauce. This is the rich base of apple macaroni. 4. Caramelize the Onions In a separate pan, melt a little butter over low heat. Add the sliced onions with a pinch of salt. Cook slowly, stirring occasionally, until the onions turn golden and soft. Caramelized onions add depth and a subtle sweetness that complements the apple macaroni perfectly. How to Serve Apple Macaroni Apples macaroni is traditionally served hot, with caramelized onions sprinkled generously on top. The apple sauce is usually served on the side rather than mixed in. Some people prefer to add a spoonful of apple sauce directly onto their plate next to the pasta, while others enjoy alternating bites of savory macaroni and sweet apple sauce. Both ways are authentic and delicious. For a complete meal, apple macaroni pairs well with: You Can Try Also Our Recipe Pistachio Sauce and Wafer Cookies Tips for Perfect Apple Macaroni These small details make a big difference in the final result. Why Apple Macaronii Works So Well The success of apples macaroni lies in contrast. The dish brings together: Together, these elements create a comforting, well-balanced plate. Apples macaronii is filling without being overwhelming, and indulgent without feeling greasy. Variations of Apple Macaroni While traditional apples macaroni is vegetarian, there are many variations: No matter the variation, the apple component remains essential to preserving the identity of apples macaroni. Why Apple Macaroni Is a Perfect Comfort Food Apples macaroni is comforting not just because it’s creamy and warm, but because it feels nostalgic and grounding. It’s a dish meant to be shared, enjoyed slowly, and appreciated for its simplicity. Every time I prepare apples macaroni, it reminds me that comfort food doesn’t need to be complicated. Sometimes, the most unexpected combinations create the most memorable meals. Final Thoughts Apples macaroni is a beautiful example of how traditional recipes can surprise and delight. The harmony between creamy pasta, potatoes, caramelized onions, and sweet apples makes this dish unique and deeply satisfying. Whether you’re discovering it for the first time or recreating a beloved Alpine classic, apples macaroni deserves a place in your comfort food collection. This recipes based on this recipe

Apple Macaroni: A Swiss Alpine Comfort Dish with a Sweet Twist Read More »

Discada Recipe

Discada Recipe: The Ultimate Guide to Mexico’s Legendary Cowboy Skillet

If you are looking for a bold, crowd-pleasing dish that brings together rich flavors, rustic tradition, and communal cooking, this discada recipe is exactly what you need. Deeply rooted in northern Mexican culture, discada is a hearty mixed-meat dish traditionally cooked outdoors over an open flame. It is more than just food — it is a celebration of togetherness, fire, and flavor. This guide will walk you through everything you need to know about making an authentic discada recipe at home: its history, ingredients, step-by-step cooking process, serving ideas, and expert tips to ensure perfect results every time. What Is Discada? A discada recipe is a traditional Mexican mixed-meat dish cooked on a large, concave metal disc known as a disco. These discs were originally repurposed plow blades used by ranchers and farmers in northern Mexico. Their curved shape made them ideal for cooking large quantities of food evenly over fire. Discada is especially popular in regions like Chihuahua, Coahuila, Nuevo León, and Tamaulipas. It is commonly prepared during family gatherings, celebrations, and weekend cookouts, where cooking becomes a shared social experience. The dish combines several meats — typically beef, pork, bacon, chorizo, and sausage — along with vegetables like onions, peppers, tomatoes, and garlic. Everything is cooked in stages, allowing each ingredient to contribute its flavor to the final dish. Ingredients for an Authentic Discada Recipe To prepare a classic discada recipe, you will need a combination of meats, vegetables, and simple seasonings. Quality ingredients make a noticeable difference, so choose fresh cuts whenever possible. Meats Vegetables Seasonings and Extras This combination forms the foundation of a traditional discada recipe, but you can easily customize it to suit your taste. Equipment You’ll Need Traditionally, discada is cooked on a metal disc over an open flame. However, you can still make an excellent discada recipe using modern equipment: The key is using a wide cooking surface that allows ingredients to brown rather than steam. For a fresh, creamy finish, you might enjoy our cilantro lime crema, which pairs beautifully with savory dishes. Step-by-Step Discada Recipe Instructions Cooking a discada recipe is all about timing and layering flavors. Follow these steps carefully for best results. Step 1: Preheat the Pan Place your disc or skillet over medium heat. Allow it to heat thoroughly before adding any ingredients. A properly heated pan ensures good browning. Step 2: Cook the Bacon Add the bacon to the pan and cook until it releases its fat and becomes lightly crispy. This rendered fat will serve as the cooking base for the rest of the ingredients. Push the bacon to the side of the pan. Step 3: Brown the Chorizo Add the chorizo to the center of the pan. Break it up as it cooks until fully browned. Once cooked, move it to the side with the bacon. Step 4: Cook the Meat Add the cubed Meat to the pan. Cook until it is nicely browned on all sides. This step adds depth and texture to your discada recipe. Step 5: Brown the Beef Add the beef cubes next. Allow them to sear properly without stirring too much. Browning the beef enhances the overall flavor of the dish. Step 6: Add Sausages If using hot dogs or smoked sausage, add them now. Cook briefly until lightly browned, then mix them with the other meats. Step 7: Sauté the Vegetables Add onions, bell peppers, serrano peppers, and garlic to the center of the pan. Cook until the vegetables soften and release their aroma. Step 8: Add Tomatoes and Season Stir in the diced tomatoes, salt, and black pepper. If desired, add a small amount of beer to deglaze the pan and add depth. Step 9: Combine and Simmer Mix everything together and allow the discada recipe to simmer until flavors are fully combined and excess liquid has reduced. Step 10: Finish and Garnish Sprinkle chopped cilantro over the dish just before serving. Adjust seasoning if needed. If you’re looking for a lighter, wellness-focused option, try our natural Mounjaro-inspired recipe for a simple, nourishing boost How to Serve Discada A discada recipe is best enjoyed fresh and hot. Here are some classic serving ideas: Discada Tacos Spoon the discada mixture into warm tortillas. Top with fresh onion, cilantro, salsa, and a squeeze of lime. Discada Plates Serve alongside Mexican rice, refried beans, guacamole, and grilled vegetables. Family-Style Serving Place the pan in the center of the table and let everyone build their own tacos — a true communal experience. Expert Tips for the Best Discada Recipe These small details make a big difference in the final result. To end on a sweet note, our delicate wafer cookies make an easy and irresistible treat. Popular Discada Recipe Variations One of the reasons the discada recipe has remained popular for generations is its adaptability. Each variation adds a new personality to the dish while respecting its roots. Why Discada Is a Celebration Dish A discada recipe is rarely cooked for one or two people. It is designed for gatherings, laughter, and shared moments. The act of cooking outdoors, surrounded by friends or family, reflects the dish’s true spirit. Discada represents generosity, abundance, and the joy of cooking together — values deeply embedded in Mexican culture. To ensure authenticity and accuracy, we’ve consulted respected food publications and traditional recipe references in crafting this guide. FAQ Final Thoughts This discada recipe is more than a combination of meats and vegetables — it is a culinary tradition that brings people together. Rich, smoky, savory, and endlessly customizable, discada is perfect for weekend cookouts, celebrations, or any time you want to serve something unforgettable. Once you try this recipe, it is sure to become a favorite in your home, just as it has been in northern Mexico for generations. This article draws inspiration from well-established culinary sources, whose expertise has helped shape and enrich the depth of this recipe.

Discada Recipe: The Ultimate Guide to Mexico’s Legendary Cowboy Skillet Read More »