Horseradish Pickles: A Bold and Flavorful Homemade Classic
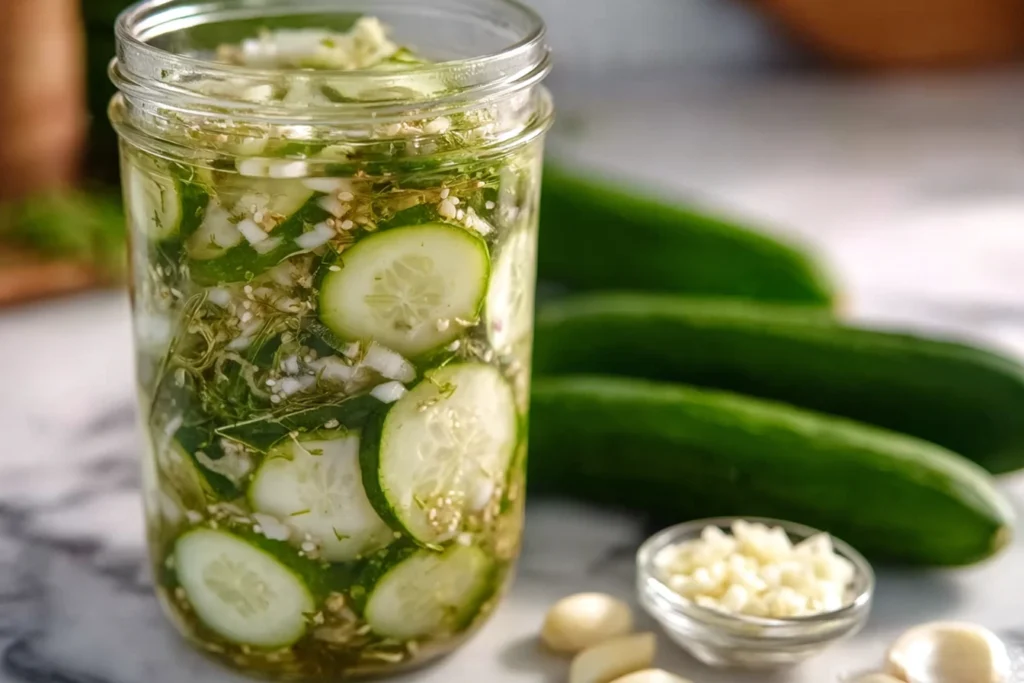
If you enjoy vibrant flavors with a little heat, horseradish pickles are the perfect addition to your kitchen repertoire. Crisp cucumbers infused with sharp horseradish create a bold twist on traditional pickles. The balance of tangy vinegar, aromatic spices, and that unmistakable sinus-clearing kick makes them unforgettable. Homemade horseradish pickles are surprisingly easy to prepare. With a simple brine and fresh ingredients, you can create jars of crunchy, spicy goodness that elevate sandwiches, burgers, salads, and charcuterie boards. What Are Horseradish Pickles? At their core, horseradish pickles are cucumbers preserved in a vinegar-based brine enhanced with freshly grated or prepared horseradish root. While classic dill pickles rely mainly on garlic and herbs, this variation introduces a peppery intensity that deepens the flavor profile. Horseradish belongs to the mustard family and releases natural compounds when grated. These compounds are responsible for its distinctive heat. When combined with vinegar, salt, and spices, the root transforms ordinary cucumbers into something complex and bold. The result is a pickle that delivers: Why Make Them at Home? Store-bought options rarely capture the brightness of freshly made horseradish pickles. When you prepare them yourself, you control: Homemade batches also allow you to experiment with variations while preserving the satisfying crunch that makes good pickles irresistible. Choosing the Right Cucumbers The foundation of excellent horseradish pickles begins with selecting the best cucumbers. Look for small pickling varieties that are: Fresh cucumbers produce crisp results. For optimal texture, pickle them within 24 hours of purchasing or harvesting. Before brining, rinse thoroughly and trim a thin slice from the blossom end. This small step helps maintain firmness during storage. The Essential Ingredients Here is a balanced refrigerator-style recipe for horseradish pickles. For the Pickles: For the Brine: This combination allows the flavor of horseradish to shine without overwhelming the natural freshness of the cucumbers. Step-by-Step Preparation 1. Prepare the Cucumbers Wash and dry them carefully. Leave whole, slice into spears, or cut into coins depending on preference. 2. Make the Brine Combine water, vinegar, salt, sugar, and spices in a saucepan. Bring to a gentle boil, stirring until dissolved. Remove from heat and allow to cool slightly. 3. Layer the Jars Place dill, garlic, and half of the grated horseradish at the bottom of sterilized jars. 4. Pack Tightly Arrange cucumbers tightly inside the jars. Add the remaining horseradish over the top. 5. Pour the Brine Cover the cucumbers completely with brine. Ensure no air pockets remain. 6. Refrigerate Seal jars and refrigerate for at least 48 hours. For best flavor, wait 4–5 days before enjoying. These refrigerator horseradish pickles develop stronger character over time. Flavor Development During the first two days, vinegar provides dominant tanginess. As the days pass, the horseradish integrates fully into the brine. After several days, the flavor becomes rounder and more balanced. The spice level depends on the freshness and quantity of horseradish used. You can easily adjust it to suit your tolerance. Variations to Try One of the pleasures of making horseradish pickles is customizing the flavor. Extra-Spicy Version Increase the grated horseradish and add additional red pepper flakes. Sweet and Spicy Add slightly more sugar for contrast between heat and sweetness. Garlic-Forward Double the garlic for deeper savory notes. Fermented Method Use a saltwater brine instead of vinegar and allow natural fermentation at room temperature for several days before refrigerating. Each variation maintains the signature character while introducing subtle differences. Serving Ideas Horseradish pickles pair beautifully with rich foods. Their acidity cuts through fat and enhances savory dishes. Try serving them: Their crisp texture and bold flavor make them a standout condiment. For a creamy and refreshing pairing, try our cilantro lime crema — it adds the perfect smooth contrast to bold, spicy flavors. Storage and Safety Because these are refrigerator-style horseradish pickles, they are not shelf-stable. Always store them in the refrigerator. For best quality, consume within 3–4 weeks. Discard if you notice: Proper hygiene and clean jars ensure safe preparation. To deepen the herbal notes and bring vibrant seasoning to your table, explore our homemade chimichurri seasoning for an irresistible flavor boost. Nutritional Overview Horseradish pickles are low in calories and fat-free. They contain small amounts of vitamin C and antioxidants from both cucumbers and horseradish. Horseradish itself contains natural plant compounds associated with antimicrobial and digestive-support properties. However, like all pickled foods, they contain sodium, so moderation is recommended. If you enjoy tangy, punchy condiments, don’t miss our pickled garlic recipe — a deliciously sharp addition to any savory spread. Final Thoughts Homemade horseradish pickles offer an exciting upgrade to traditional pickles. They deliver crisp texture, vibrant acidity, and a distinctive spicy finish that transforms simple meals into memorable ones. With fresh cucumbers, quality horseradish, and a well-balanced brine, you can create jars of horseradish pickles that are flavorful, customizable, and deeply satisfying. Once you experience their bold character, they may become a permanent favorite in your kitchen. This recipe has been thoughtfully inspired by insights from https://emilykylenutrition.com/horseradish-pickles/, whose approach to flavor balance and technique helped shape this version.
Horseradish Pickles: A Bold and Flavorful Homemade Classic Read More »