diamondmeals.com

Dessert

Cloud Cake

Cloud Cake Recipe – 6 Easy Steps to Make the Ultimate Soft & Fluffy Dessert

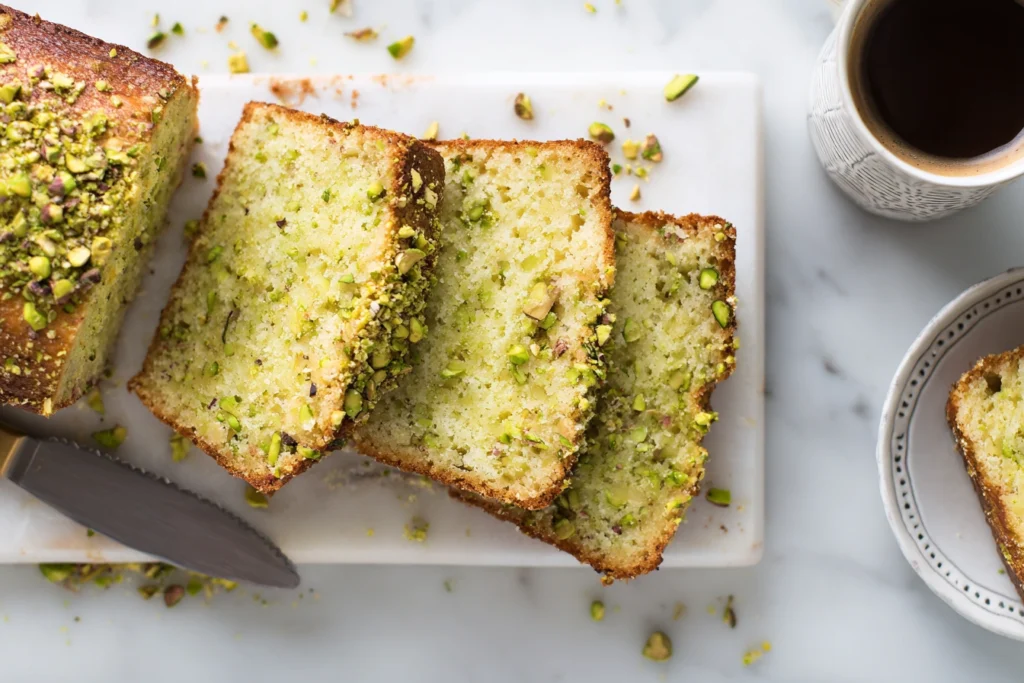
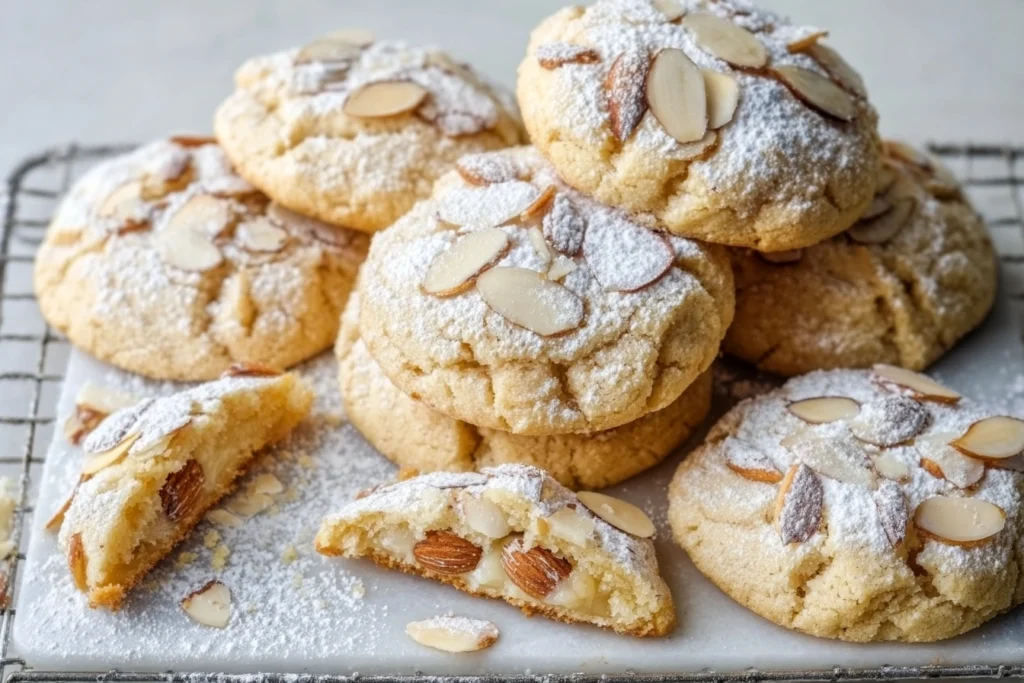
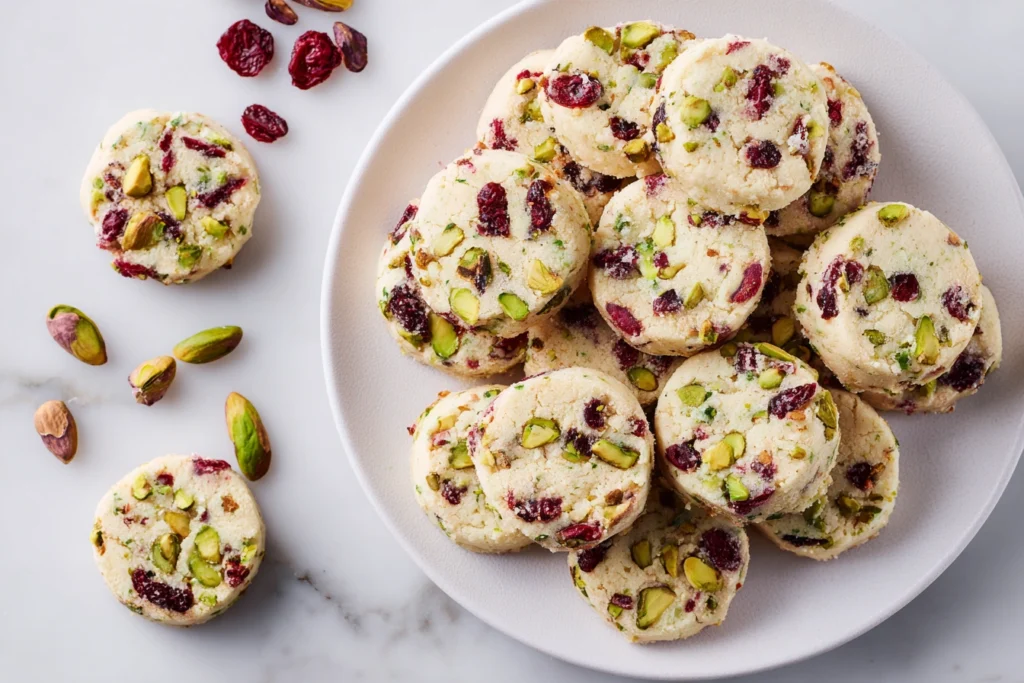
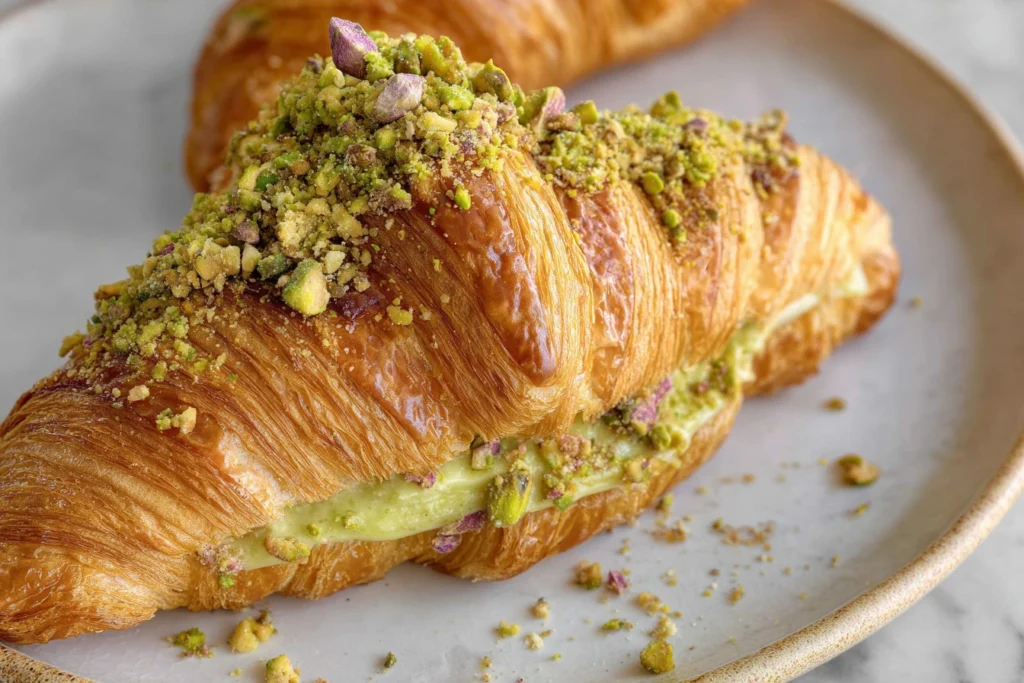
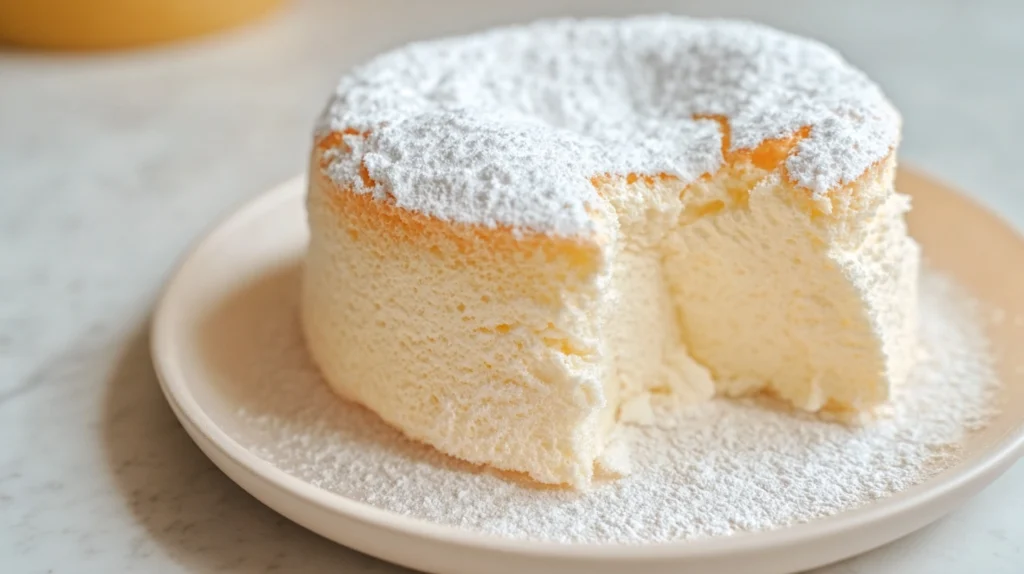
Few desserts capture elegance and simplicity quite like a classic cloud cake. With its delicate crumb and airy texture, this light sponge-style creation has become a favorite among home bakers who want something refined without complicated techniques. The beauty of this recipe lies in its balance — soft yet structured, simple yet impressive. Unlike heavy butter cakes, this airy dessert relies on whipped eggs and gentle folding methods to achieve its signature lightness. The result is a dessert that feels almost weightless on the palate, making it perfect for afternoon coffee, brunch gatherings, or elegant celebrations. In this guide, you will learn how to prepare a perfectly fluffy cake from scratch, along with professional tips that help maintain its soft structure and smooth finish. What Makes This Cloud Cake So Light? The secret behind this airy dessert comes from its preparation technique rather than complicated ingredients. Egg whites are whipped to create tiny air pockets that expand during baking, giving the finished cake its height and softness. Instead of relying on heavy fats, the recipe focuses on structure created through careful mixing. Many bakers describe this style as somewhere between a sponge cake and a soufflé. Yogurt or starch is often added to maintain moisture, ensuring the crumb stays tender without becoming dense. Because the texture is delicate, every step — from whipping the eggs to folding the batter — plays an important role in achieving the desired result. Ingredients You’ll Need To Make Cloud Cake One of the most appealing aspects of this Cloud Cake recipe is its simplicity. Most ingredients are already in a typical kitchen pantry. Each ingredient has a purpose. Yogurt adds softness, cornstarch provides stability, and whipped egg whites bring volume. Step-by-Step Instructions 1. Prepare the Pan and Ingredients Preheat your oven to 170°C (340°F). Line the bottom of a round baking pan with parchment paper. Separate the eggs carefully, placing whites and yolks in different bowls. 2. Create the Base Mixture Whisk egg yolks with sugar until the mixture becomes pale and creamy. This step helps dissolve the sugar and gives the batter a smooth foundation. Add yogurt, cornstarch, and baking powder, mixing gently until well combined. 3. Whip the Egg Whites Add a small pinch of salt to the egg whites and beat until stiff peaks form. The foam should look glossy and stable, as this structure helps the cake rise naturally in the oven. 4. Fold Gently Start by adding a small portion of whipped whites to the yolk mixture to lighten it. Then incorporate the remaining whites slowly using upward folding motions. Avoid stirring too quickly, as this can deflate the batter. 5. Bake Transfer the batter into the prepared pan and smooth the surface lightly. Bake for about 45 to 55 minutes until the top is lightly golden and the center feels set. 6. Cool and Serve Allow the cake to cool gradually before removing it from the pan. Finish with a generous dusting of powdered sugar for a simple and elegant presentation. ✨ If you enjoy delicate bakery flavors, you may also love our almond croissant cookies — a refined treat with a buttery, irresistible texture. The Science Behind the Texture The light crumb of this Cloud Cake dessert comes from a process known as aeration. When egg whites are whipped, proteins stretch and trap air, creating a foam that expands with heat. As the cake bakes, these air pockets stabilize and give structure to the crumb. Cornstarch works alongside the eggs to keep the interior soft without adding heaviness. Yogurt provides moisture and a subtle tang that balances sweetness. Because this method depends on air rather than fat, precision and patience are key. ✨ For a soft and nutty twist, explore our pistachio muffins, perfect for pairing with your favorite coffee or tea. Helpful Tips for Beginners Even though the recipe looks simple, small details can make a big difference in the final result: These techniques help maintain the airy texture that makes this dessert so unique. ✨ And if you’re craving something comforting yet elegant, don’t miss our pistachio loaf, known for its rich aroma and tender crumb. Flavor Ideas and Variations Once you master the base of Cloud Cake recipe, you can customize the flavor in many creative ways: Lemon VersionAdd lemon zest to the batter for a fresh citrus note. Vanilla StyleA teaspoon of vanilla extract enhances aroma and warmth. Berry PairingServe slices with strawberries, raspberries, or blueberries for a colorful finish. Coconut TwistTop with whipped coconut cream for a tropical touch. These variations allow you to adapt the recipe while preserving its light character. Serving Suggestions Cloud Cake Because the texture is delicate, simple garnishes often work best. Consider serving your slices with: Avoid heavy frostings that could weigh down the cake’s soft structure. Common Baking Mistakes to Avoid Collapsed CenterOpening the oven too early can cause the cake to sink. Let it bake undisturbed for most of the cooking time. Dense TextureOvermixing during folding removes the air needed for a fluffy crumb. Cracked SurfaceA few cracks are normal, but excessive cracking may indicate that the oven temperature is too high. Recognizing these issues helps you adjust your technique for better results next time. Storage Tips This Cloud Cake dessert tastes best on the day it is baked, but you can store leftovers easily. Bring chilled slices back to room temperature before serving so the texture becomes soft again. Why This Cloud Cake Recipe Works So Well The combination of yogurt, cornstarch, and whipped eggs creates a balanced structure that feels light yet stable. The flavor remains subtle, allowing you to enjoy the softness without overwhelming sweetness. Many bakers appreciate this style because it proves that impressive desserts do not require complicated decoration. With a few thoughtful techniques, you can create something that looks elegant and tastes delicate. Final Thoughts About Cloud Cake A well-made cloud cake is all about precision and care. By focusing on gentle folding, proper whipping, and steady baking

Cloud Cake Recipe – 6 Easy Steps to Make the Ultimate Soft & Fluffy Dessert Read More »

Pistachio Loaf

Pistachio Loaf: A Moist and Elegant Nutty Cake for Every Occasion

A beautifully baked pistachio loaf is the perfect example of how simple ingredients can create something refined and comforting at the same time. With its soft crumb, delicate green tone, and rich nutty aroma, this cake stands out from traditional quick breads. Whether served with coffee in the morning or enjoyed as a light dessert, it brings a sense of warmth and elegance to any table. Unlike overly sweet bakery cakes, this recipe focuses on balance. The natural flavor of pistachios adds depth without heaviness, while a carefully mixed batter keeps the texture tender and moist. Many home bakers appreciate how reliable this style of loaf can be, especially when they want a recipe that looks impressive but remains easy to prepare. Why This Nutty Pistachio Loaf Is So Popular Over the past few years, pistachio-based desserts have gained attention for their unique flavor profile. The nuts provide a gentle sweetness and a buttery finish that pairs beautifully with vanilla or light citrus notes. Because of this versatility, the loaf format has become a favorite among both beginner and experienced bakers. Another reason people love this dessert is its practicality. A single pan yields several slices, making it ideal for sharing or storing for later. The oils naturally present in pistachios also help maintain moisture, which means the cake stays soft longer than many traditional sponge recipes. Ingredients for a Perfect Pistachio Loaf To create a balanced texture and flavor, each ingredient in this pistachio loaf plays a specific role. Using fresh, high-quality components makes a noticeable difference in the final result. Dry Ingredients Wet Ingredients The combination of coconut flour and cornstarch helps stabilize the crumb, ensuring the pistachio loaf stays tender without becoming dense. Step-by-Step To Make Pistachio Loaf Prepare Your Pan and Oven Preheat your oven to 325°F (165°C). Line a standard loaf pan with parchment paper so the cake releases easily after baking. Grind the Pistachios Place pistachios and sugar in a food processor and pulse until finely ground. The texture should resemble a soft powder rather than a paste. This step ensures that the flavor spreads evenly throughout the batter. Mix the Wet Components Add the cubed butter and blend until incorporated. Then add the eggs, milk, and vanilla extract. Process until the mixture looks smooth and creamy. Combine the Dry Ingredients Add coconut flour, all-purpose flour, cornstarch, baking powder, and salt. Pulse gently just until combined. Over-mixing can make the loaf heavy. Bake the Batter Pour the mixture into your prepared pan and smooth the surface. Bake for about 60 to 70 minutes, or until a toothpick inserted into the center comes out clean. Cool Completely Allow the cake to cool before slicing. This helps the structure set and prevents crumbling. Tips to Achieve the Best Texture A few simple techniques can make a big difference in the outcome of your pistachio loaf. These small details help create a dessert that looks and tastes professionally made. Flavor Variations to Explore One of the most enjoyable aspects of baking this recipe is how easily it can be adapted. Lemon Twist Add a little lemon zest for a fresh and aromatic variation that highlights the natural sweetness of pistachios. Almond Aroma A few drops of almond extract deepen the flavor and add complexity without overpowering the loaf. Chocolate Addition Fold in dark chocolate chips for a richer version that transforms the loaf into a more indulgent treat. What Makes This Pistachio Loaf So Moist? Moisture is essential in any successful cake, and this recipe achieves it through a thoughtful balance of fats and dry ingredients. Pistachios contain natural oils that help soften the crumb, while butter adds richness and structure. Coconut flour absorbs liquid without making the batter heavy, creating a texture that remains soft even after a day or two. Many bakers notice that the flavor improves over time. As the loaf rests, the nutty notes become more pronounced, making each slice even more enjoyable. ✦ And if you’re craving a more indulgent pastry experience, our pistachio croissant offers a flaky, bakery-inspired twist that pairs perfectly with coffee. Serving Suggestions This cake can be served in several different ways depending on the occasion. Its subtle sweetness allows it to fit into both casual and refined settings. ✦ For something buttery and festive, don’t miss our cranberry pistachio shortbread cookies, a beautiful balance of nutty richness and sweet tart flavor. How to Store Your Pistachio Loaf Proper storage helps maintain freshness and flavor. Because this pistachio loaf retains moisture well, it often tastes just as good the next day. ✦ If you enjoy soft bakery-style treats, you may also love our pistachio muffins — a delicate and flavorful recipe perfect for breakfast or brunch. Common Mistakes to Avoid Even simple recipes can benefit from a few reminders. Following the recommended steps ensures a consistent and reliable result. Frequently Asked Questions Can I Make This Recipe Gluten-Free? Yes. Replace the all-purpose flour with a gluten-free blend suitable for baking. Can I Reduce the Sugar? You can reduce it slightly, but sugar contributes to both sweetness and texture. Why Did My Cake Turn Out Dense? Over-mixing or using too much flour are common causes of a heavy texture. Final Thoughts Baking a pistachio loaf at home is a rewarding experience that combines simplicity with elegance. The delicate nut flavor, soft crumb, and beautiful appearance make it a versatile dessert that works for everyday moments or special occasions. Once you become comfortable with the technique, you may find yourself returning to this recipe again and again. Whether served plain or dressed up with toppings, this pistachio loaf brings together flavor, texture, and visual appeal in a way that feels both timeless and modern. It is a recipe that invites creativity while remaining reliable, making it a wonderful addition to any baker’s collection. This article is thoughtfully inspired by insights gathered from trusted culinary sources, including this detailed reference

Pistachio Loaf: A Moist and Elegant Nutty Cake for Every Occasion Read More »

Powdered Sugar Donuts

Powdered Sugar Donuts – Soft, Fluffy Homemade Bakery-Style Treat

Few homemade desserts feel as nostalgic and comforting as powdered sugar donuts. Soft, light, and coated in a delicate layer of sweet sugar, these donuts bring the warmth of a classic bakery straight into your kitchen. Many bakers love powdered sugar donuts because they are easy to prepare, require simple ingredients, and deliver a fluffy texture that feels both indulgent and familiar. Unlike traditional yeast donuts, powdered sugar donuts are typically made using a cake-style batter that bakes quickly in the oven. This method creates a tender crumb while avoiding the complexity of frying. Whether you are preparing breakfast for family, planning a cozy brunch, or simply craving a sweet treat, powdered sugar donuts offer a simple yet elegant solution. Why You’ll Love Powdered Sugar Donuts There are many reasons why powdered sugar donuts remain a favorite among home bakers. Their preparation is straightforward, making them ideal even for beginners. Instead of waiting for dough to rise, you simply mix the batter, bake, and coat. Powdereed sugar donuts also have a versatile flavor profile. They are sweet without being overwhelming, which allows them to pair beautifully with coffee, tea, or fresh fruit. Because the texture resembles a soft cake, powderedd sugar donuts feel lighter than fried pastries while still satisfying dessert cravings. Another advantage is how customizable powdered sugar donuts can be. You can adjust spices, add citrus zest, or experiment with different extracts while maintaining the classic look and taste. What Makes Powdered Sugar Donuts Unique? The secret behind great powdered sugar donuts lies in balance. The batter combines butter for flavor and oil for moisture, resulting in donuts that stay soft even after cooling. A touch of nutmeg is often added to powderedd sugar donuts to recreate the subtle bakery aroma that many people recognize instantly. Unlike glazed donuts, powdered sugar donuts rely on a simple coating that enhances sweetness without overpowering the soft interior. This snowy layer of sugar creates an elegant finish that makes powdered sugar donuts look as beautiful as they taste. Because the batter is piped directly into a donut pan, powdereed sugar donuts are easy to shape and require no rolling or cutting, which makes them perfect for quick baking sessions. Ingredients for Classic Powdered Sugar Donuts Creating homemade powderedd sugar donuts starts with everyday baking ingredients. Each component plays an important role in achieving the perfect texture. Dry Ingredients Wet Ingredients Coating Using both butter and oil helps powdereed sugar donuts stay moist while still delivering rich flavor. The combination of white and brown sugar adds depth and a soft crumb. How to Make Powdered Sugar Donuts Step by Step 1. Prepare the Oven and Pan Preheat your oven to 425°F (220°C). Lightly grease a donut pan to ensure your powdeered sugar donuts release easily after baking. 2. Mix the Wet Ingredients In a large bowl, blend butter, oil, and sugars until smooth. Add eggs and vanilla extract, mixing gently until fully combined. 3. Combine the Dry Ingredients Whisk flour, baking powder, baking soda, salt, and nutmeg in a separate bowl. Even mixing ensures your powdered sugar donuts bake evenly. 4. Create the Batter Alternate adding the dry ingredients and milk into the wet mixture. Stir until just combined to keep powdereed sugar donuts soft and fluffy. 5. Fill the Donut Pan Pipe or spoon the batter into each cavity, filling just below the rim so the powdeered sugar donuts rise evenly. 6. Bake Until Light and Tender Bake for about 10 minutes, or until the donuts spring back when touched. 7. Coat in Powdered Sugar Allow the donuts to cool slightly before rolling them generously in powdered sugar. Warm powdered sugar donuts hold the coating best. Tips for Perfect Powdered Sugar Donuts Use Room-Temperature Ingredients Room-temperature butter and eggs help create a smoother batter, giving powdered sugar donuts a lighter texture. Avoid Overmixing Overmixing can make powdereed sugar donuts dense. Stir only until the ingredients are combined. Add Classic Flavor A small pinch of nutmeg adds depth and gives powdered sugar donuts their traditional bakery taste. Double Coat for Extra Sweetness For a thicker coating, roll powderedd sugar donuts twice — once warm and again after cooling. Baked vs Fried Powdered Sugar Donuts Many bakers prefer baked powdeered sugar donuts because they are simpler and require less oil. Baking creates a soft cake-like crumb that feels lighter while still delivering the classic donut experience. Fried powderedd sugar donuts, however, develop a crisp exterior and richer flavor. Both methods are delicious, but baked powdered sugar donuts remain a popular choice for home kitchens due to their ease and consistency. ✦ If you enjoy soft bakery-style treats, you may also love our pistachio muffins — a delicate and flavorful recipe perfect for breakfast or brunch. Flavor Variations One of the best things about powdeered sugar donuts is how easily you can customize them. Lemon Powdered Sugar Donuts Add fresh lemon zest to the batter for a bright citrus twist. Chocolate Powdered Sugar Donuts Replace a portion of the flour with cocoa powder to create a rich chocolate version. Cinnamon Powdered Sugar Donuts Mix cinnamon into the powdered sugar coating for a warm spiced finish. Vanilla Bean Powdered Sugar Donuts Use vanilla bean paste to enhance flavor and aroma. ✦ For something buttery and festive, don’t miss our cranberry pistachio shortbread cookies, a beautiful balance of nutty richness and sweet tart flavor. Storage Tips Powdereed sugar donuts are best enjoyed fresh, but they can be stored if needed. If storing, re-dust powdereed sugar donuts before serving since the sugar may dissolve slightly over time. Serving Ideas Powdered sugar donuts pair beautifully with simple drinks and breakfast dishes: Arranging powderedd sugar donuts on a dessert tray creates an inviting presentation perfect for gatherings or weekend brunch. ✦ And if you’re craving a more indulgent pastry experience, our pistachio croissant offers a flaky, bakery-inspired twist that pairs perfectly with coffee. Common Mistakes to Avoid Overfilling the Pan Too much batter can cause powderedd sugar donuts

Powdered Sugar Donuts – Soft, Fluffy Homemade Bakery-Style Treat Read More »

Almond croissant cookies

Almond Croissant Cookies: A Bakery-Style Cookie Inspired by a Classic Pastry

Almond croissant cookies are a refined dessert that blends the elegance of French bakery flavors with the comfort and simplicity of homemade cookies. Inspired by the iconic almond croissant, this recipe captures everything people love about that pastry—rich almond flavor, buttery notes, and a soft, indulgent texture—while transforming it into an easy-to-make cookie format. Unlike traditional croissants, which require laminated dough and long resting times, almond croissant cookies offer a far more accessible approach. They deliver the same luxurious taste through a tender cookie dough filled with a creamy almond center and finished with sliced almonds and powdered sugar. The result is a cookie that looks sophisticated, tastes indulgent, and feels special enough for any occasion. Whether you are baking for guests, holidays, or simply treating yourself, almond croissant cookies bring bakery-quality results straight from your oven. What Makes Almond Croissant Cookies Unique The appeal of almond croissant cookies lies in their thoughtful balance of texture and flavor. They are not ordinary cookies, and they are not pastries either. Instead, they sit perfectly between the two, offering the best of both worlds. Each cookie features a soft and buttery exterior that gently crisps at the edges. Inside, there is a rich almond filling inspired by frangipane, the classic almond cream used in French baking. The filling stays creamy after baking, creating a contrast with the cookie dough that makes every bite memorable. Another defining feature of almond croissant cookies is their visual appeal. The sliced almonds on top and the final dusting of powdered sugar give them a refined, bakery-style finish that elevates them beyond everyday cookies. Ingredient Breakdown and Their Role To achieve the authentic flavor and texture of almond croissant cookies, each ingredient plays an essential role. Almond Filling The almond filling is the heart of the recipe. Almond flour provides deep nutty flavor and structure, while butter adds richness and smoothness. Sugar balances the natural bitterness of almonds, and egg yolk binds everything together. Almond extract intensifies the flavor, while vanilla adds warmth and depth. Cookie Dough The cookie dough serves as a tender shell for the almond filling. Butter creates a soft, rich base, while a combination of white sugar and brown sugar ensures both sweetness and moisture. The extra egg yolk contributes to a chewy interior, while baking soda provides just enough lift to keep the cookies from becoming dense. Together, these components ensure almond croissant cookies remain soft, flavorful, and indulgent. Step-by-Step Preparation Step 1: Make the Almond Filling Start by mixing almond flour, sugar, softened butter, egg yolk, almond extract, and vanilla extract in a bowl until smooth and cohesive. The mixture should resemble a thick almond paste. Portion the filling into equal pieces and place them on a lined tray. Chill until firm. This step is crucial to prevent the filling from melting out during baking. Step 2: Prepare the Cookie Dough In a large bowl, cream butter with white sugar and brown sugar until light and fluffy. This process helps create the soft texture that defines almond croissant cookies. Add the egg, egg yolk, and almond extract, mixing until fully incorporated. In a separate bowl, combine flour, baking soda, and salt. Gradually mix the dry ingredients into the wet mixture until a soft dough forms. Step 3: Assemble the Cookies Preheat the oven and line baking sheets with parchment paper. Divide the dough into equal portions. Flatten each portion slightly and place a chilled almond filling piece in the center. Carefully wrap the dough around the filling, sealing it completely. Roll into a smooth ball and gently press sliced almonds on top. This step gives almond croissant cookies their signature look. Step 4: Bake Bake until the edges are lightly golden while the centers remain soft. Avoid overbaking, as the goal is a tender cookie with a creamy interior. Allow the cookies to cool briefly before transferring them to a rack. Once cooled, dust lightly with powdered sugar for a classic finish. Texture and Flavor Experience One of the reasons almond croissant cookies are so popular is their layered texture. The outer cookie is soft and buttery, while the almond center remains creamy and rich. The sliced almonds add a subtle crunch, and the powdered sugar enhances sweetness without overpowering the almond flavor. The almond taste is pronounced but balanced. It feels indulgent rather than heavy, making these cookies suitable for both dessert and afternoon coffee breaks. Expert Tips for Perfect Results These tips help ensure consistent, bakery-quality almond croissant cookies every time. Variations to Customize Your Cookies Almond croissant cookies are easy to adapt while keeping their core identity. Chocolate Almond Add dark chocolate chips to the cookie dough for a richer, more indulgent version. Citrus Almond Incorporate orange zest into the almond filling for a bright, aromatic twist. Mini Cookies Create smaller cookies for events or gift boxes without changing the recipe proportions. Each variation maintains the elegance and flavor profile that defines almond croissant cookies. And for a true bakery-style experience, this pistachio croissant is a must-try, offering rich flavor and irresistible layers. Serving Suggestions Serve almond croissant cookies at room temperature or slightly warm. They pair beautifully with coffee, espresso, or tea. For special occasions, arrange them on a platter and dust with fresh powdered sugar just before serving. They also work well as part of dessert tables, brunch spreads, or holiday cookie assortments. For another pistachio-inspired delight, these soft and fluffy pistachio muffins make a wonderful choice for breakfast or afternoon tea. Storage and Make-Ahead Options Almond croissant cookies store well in an airtight container at room temperature for several days. The almond filling helps keep them moist. They can also be frozen after baking or assembled and frozen before baking. When ready to enjoy, bake or gently reheat to restore freshness. If you enjoy refined nutty flavors, you may also love these cranberry pistachio shortbread cookies, a delicate treat with a perfect balance of sweetness and texture. Final Thoughts Almond croissant cookies are a

Almond Croissant Cookies: A Bakery-Style Cookie Inspired by a Classic Pastry Read More »

Cranberry Pistachio Shortbread Cookies

Cranberry Pistachio Shortbread Cookies: Buttery Elegance with a Festive Touch

Shortbread is one of the most refined cookies in classic baking, known for its rich butter flavor, delicate crumb, and timeless simplicity. When enhanced with tart dried cranberries and crunchy pistachios, it transforms into something visually stunning and irresistibly flavorful. Cranberry pistachio shortbread cookies combine tradition with celebration, making them a favorite for holidays, special occasions, and elegant everyday treats. These cookies are beloved not because they are complicated, but because they rely on balance — rich butter softened by sweetness, gentle crunch contrasted with tender texture, and bright bursts of fruit that cut through the richness. With the right technique and quality ingredients, this recipe delivers bakery-level results straight from your home kitchen. Why These Cranberry Pistachio Shortbread Cookies Stand Out What makes cranberry pistachio shortbread cookies so special is their ability to feel indulgent without being heavy. Shortbread dough contains no eggs and very little sugar compared to other cookies, allowing the butter to shine. The cranberries add a subtle tang that keeps each bite fresh, while pistachios contribute texture and depth without overpowering the dough. Visually, these cookies are striking. The red and green elements create a naturally festive appearance, which is why they are often associated with winter celebrations. However, their flavor profile is balanced enough to enjoy year-round with coffee, tea, or as part of a dessert spread. Understanding the Nature of Shortbread Shortbread differs from most cookies because it is defined by restraint. There is no leavening agent, no eggs, and no aggressive mixing. The goal is tenderness, not height or chewiness. The hallmark of excellent cranberry pistachio shortbread cookies is a crumb that melts gently on the tongue while still holding its shape. This texture is achieved by using a high ratio of butter to flour and mixing only until the dough comes together. Overworking the dough develops gluten, which can make the cookies tough. Precision and patience are far more important than speed. Ingredient To Make Cranberry Pistachio Shortbread Cookies Butter Butter is the foundation of flavor. It should be unsalted, high quality, and softened to room temperature. Cold butter will not cream properly, while melted butter will compromise structure. In cranberry pistachio shortbread cookies, butter provides richness, aroma, and the signature tender bite. Sugar Sugar sweetens without dominating. Many bakers prefer granulated sugar for a slightly crisp edge, while powdered sugar creates a finer, softer crumb. Either option works as long as the sweetness remains subtle and balanced. Flour All-purpose flour provides structure. Measuring accurately is essential. Too much flour will result in dry cookies, while too little may cause spreading. The goal is a dough that is firm yet pliable. Dried Cranberries Cranberries introduce acidity and brightness. They should be chopped into smaller pieces to distribute evenly throughout the dough. This ensures that every slice of cranberry pistachio shortbread cookies has a balanced flavor rather than pockets of tartness. Pistachios Pistachios add crunch and visual contrast. Lightly chopping them prevents uneven baking. Toasting is optional but can enhance their nutty flavor if desired. Flavor Enhancers Vanilla extract adds warmth and depth. Citrus zest, especially orange, is a popular optional addition that pairs beautifully with both cranberries and pistachios without overwhelming the butter base. Step-by-Step Method Step 1: Preparation Allow the butter to reach room temperature. Chop the cranberries and pistachios evenly. Line baking sheets with parchment paper and set aside. Step 2: Creaming Cream the butter and sugar together until pale and fluffy. This step incorporates air and is essential for tender cranberry pistachio shortbread cookies. Do not rush this process. Step 3: Flavoring Add vanilla extract and optional citrus zest. Mix just until incorporated, allowing the aroma to blend evenly into the butter. Step 4: Adding Dry Ingredients Gradually add flour and salt, mixing on low speed or by hand. Stop mixing as soon as the dough comes together. Overmixing will affect the final texture. Step 5: Folding Add-Ins Gently fold in the chopped cranberries and pistachios. The dough should look evenly speckled without being overloaded. Step 6: Shaping and Chilling Divide the dough into logs about two inches in diameter. Wrap tightly and refrigerate for at least one hour. Chilling improves flavor, controls spreading, and allows for clean slicing — a crucial step when making cranberry pistachio shortbread cookies. Step 7: Baking Preheat the oven to 350°F (175°C). Slice the chilled dough into even rounds and place them on prepared baking sheets with space between each cookie. Bake until the edges are lightly golden while the centers remain pale. Step 8: Cooling Let the cookies cool briefly on the baking sheet before transferring them to a wire rack. As they cool, they will firm up while maintaining a delicate crumb. For an extra layer of pistachio richness, a spoonful of homemade pistachio syrup brings subtle sweetness and depth to desserts. Texture and Flavor Tips Following these principles ensures consistently excellent cranberry pistachio shortbread cookies. If you enjoy bold pistachio flavor, a smooth pistachio paste is a wonderful base for fillings, creams, and baked treats. Variations to Elevate the Cranberry Pistachio Shortbread Cookies Recipe While the classic version is timeless, subtle variations can add interest: Each variation keeps the integrity of cranberry pistachio shortbread cookies while offering a new experience. For a more indulgent pastry experience, pistachio croissants offer a beautiful balance of flaky texture and nutty filling. Storage and Make-Ahead Convenience Once baked and cooled, these cookies store well in an airtight container at room temperature for up to one week. The dough logs can also be frozen for up to two months, making cranberry pistachio shortbread cookies an excellent option for advance preparation during busy seasons. Serving Suggestions Serve these cookies with hot tea, espresso, or coffee. They are ideal for gift boxes, dessert platters, and festive gatherings. Their refined appearance makes them appropriate for both casual and formal occasions. Final Thoughts Cranberry pistachio shortbread cookies represent everything that makes classic baking beautiful: simplicity, balance, and attention to detail. With rich butter, subtle sweetness, and vibrant

Cranberry Pistachio Shortbread Cookies: Buttery Elegance with a Festive Touch Read More »

Pistachio Croissant

Pistachio Croissant: The Ultimate Guide to a Luxurious Bakery-Style Pastry at Home

The pistachio croissant is one of those pastries that instantly feels special. Flaky, buttery layers meet a rich, nutty pistachio filling, creating a balance that is indulgent without being overwhelming. Once a quiet favorite in artisan bakeries, the pistachio croissant has now become a global obsession, celebrated for its vibrant color, elegant flavor, and irresistible texture. In this in-depth guide, you’ll discover everything you need to know about making a perfect pistachio croissant at home—from understanding the pastry itself to preparing a smooth pistachio filling, assembling the croissants, and baking them to golden perfection. Whether you’re an experienced baker or a passionate home cook, this article will help you achieve bakery-quality results. What Makes a Pistachio Croissant So Special? A classic croissant is already a masterpiece of baking. Its crisp exterior and honeycomb interior come from a careful process of laminating dough with butter. A pistachio croissant builds on that foundation by adding a creamy pistachio component that enhances both flavor and appearance. Pistachios bring a subtle sweetness, a slightly earthy aroma, and a natural green hue that makes the pastry visually striking. Unlike overly sweet fillings, pistachio cream complements butter rather than competing with it. This harmony is why the pistachio croissant feels refined and luxurious rather than heavy. Another reason the pistachio croissant stands out is its versatility. It can be served as a breakfast pastry, an afternoon treat, or even a dessert when paired with coffee or tea. Understanding the Structure of a Pistachio Croissant To master the pistachios croissant, it helps to understand its structure. There are three essential elements: When these elements come together, the pistachio croissant becomes far more than the sum of its parts. Ingredients for the Perfect Pistachio Croissant For the Croissants For the Pistachio Cream Filling Optional Syrup (Highly Recommended) For Topping These ingredients are simple, but their quality matters. Using real pistachios rather than artificial flavoring makes a dramatic difference in the final pistachio croissant. How to Make Pistachio Croissant Filling The filling is what defines a pistachio croissant, so it deserves special attention. Step 1: Prepare the Pistachios Lightly toast the pistachios in a dry pan for a few minutes until fragrant. Let them cool completely. This step intensifies their flavor. Step 2: Grind the Pistachios Place the pistachios in a food processor and pulse until very finely ground. Be careful not to overprocess, or they may turn oily. Step 3: Make the Cream Add the sugar and butter to the ground pistachios and blend until smooth. Add the egg, vanilla, salt, and milk, then blend again until creamy and spreadable. The result should be a rich, smooth pistachio cream that holds its shape but spreads easily. This filling is the soul of a great pistachio croissant. Preparing the Croissants Step 1: Make the Syrup Combine sugar and water in a small saucepan. Heat gently until the sugar dissolves, then let it cool. This syrup keeps the pistachio croissant moist and enhances flavor. Step 2: Slice the Croissants Cut each croissant horizontally, like a sandwich, without cutting all the way through. Step 3: Brush with Syrup Lightly brush the inside of each croissant with the syrup. This step is subtle but makes a big difference in texture. Assembling the Pistachios Croissant Now comes the most satisfying part. At this stage, your pistachios croissant already looks like something from a high-end bakery. For a deeper pistachio flavor, you can enhance the filling with a drizzle of our homemade pistachio syrup, which adds subtle sweetness and aroma. Baking Instructions Let them cool for a few minutes, then dust lightly with powdered sugar if desired. If you prefer a more intense, authentic taste, this recipe pairs beautifully with our smooth pistachio paste, made from finely ground premium pistachios. Tips for Bakery-Style Pistachios Croissants These small details separate a good pistachios croissant from a truly exceptional one. For a lighter, creamier variation, some bakers like to incorporate pistachio milk into the filling for a delicate and balanced finish. Creative Pistachio Croissant Variations Once you’ve mastered the classic pistachio croissant, try these variations: Each variation keeps the pistachio croissant at the center while offering a new flavor experience. How to Serve and Store Pistachio Croissants Serving Serve a pistachio croissant with coffee, cappuccino, or green tea. It works beautifully for brunch, dessert, or a refined afternoon snack. Storage Store leftover pistachio croissants in an airtight container at room temperature for up to 2 days. Reheat briefly in the oven to restore crispness. Freezing You can freeze unbaked assembled pistachios croissants. Bake directly from frozen, adding a few extra minutes to the baking time. Why the Pistachio Croissant Is Worth Making at Home Making a pistachios croissant at home may feel intimidating, but the payoff is enormous. You control the quality of ingredients, the intensity of pistachio flavor, and the level of sweetness. Homemade versions often taste richer and fresher than bakery ones. Beyond taste, the pistachios croissant is a visual showstopper. Its green filling, golden crust, and delicate layers make it perfect for special occasions or simply treating yourself to something extraordinary. Final Thoughts The pistachios croissant is more than just a trend—it’s a timeless pastry that combines classic French technique with the distinctive elegance of pistachios. With flaky layers, creamy filling, and a perfectly balanced flavor, it’s easy to see why this pastry has captured the hearts of bakers and food lovers alike. This article draws inspiration from carefully selected expert resources, including detailed insights found here.

Pistachio Croissant: The Ultimate Guide to a Luxurious Bakery-Style Pastry at Home Read More »

Pistachio Muffins

Bakery-Style Pistachio Muffins: A Complete and Reliable Recipe Guide

Baking at home becomes truly rewarding when the results rival those of a professional bakery. Few baked goods achieve this balance as effortlessly as pistachio muffins. With their soft interior, delicate nutty flavor, and visually appealing green tones, they feel elegant yet comforting at the same time. These muffins are perfect for breakfast, brunch, or a refined afternoon snack. This detailed guide will help you master bakery-style muffins using reliable techniques, balanced ingredients, and simple steps. The result is consistently moist, flavorful, and beautifully domed pistachio muffins that look as good as they taste. Why These Muffins Deserve a Place in Your Kitchen Pistachios bring a unique flavor that is subtly sweet, buttery, and slightly earthy. When baked into muffins, this flavor becomes gentle and well-rounded, making them appealing to a wide range of tastes. Unlike overly sweet pastries, pistachio muffins feel refined and balanced. Another reason they are so popular is their versatility. They can be kept simple for everyday enjoyment or enhanced with toppings, citrus notes, or glazes for special occasions. Their texture remains soft and tender, even a day or two after baking, making them an excellent make-ahead option. Ingredients That Make the Difference Each ingredient in this recipe plays a specific role in achieving the perfect texture and flavor. Dry Ingredients Wet Ingredients Optional Add-Ins These carefully selected ingredients work together to produce consistent, bakery-quality pistachio muffins. Step-by-Step Instructions 1. Preheat and Prepare Preheat your oven to 425°F (220°C). Line a standard muffin pan with paper liners or grease thoroughly. The high initial temperature is essential for achieving tall muffin tops. 2. Mix the Dry Ingredients In a large bowl, whisk together the flour, pistachio pudding mix, baking powder, salt, and sugar until evenly combined. 3. Combine the Wet Ingredients In another bowl, whisk the eggs, oil, melted butter, milk, sour cream, vanilla extract, and almond extract until smooth. 4. Combine Wet and Dry Add the dry mixture to the wet ingredients. Gently fold with a spatula until just combined. Avoid over-mixing, as this can lead to dense muffins. 5. Rest the Batter Allow the batter to rest for about 10 minutes. This step improves texture and promotes better rise during baking. 6. Fill the Muffin Cups Fill each cup almost to the top. Sprinkle chopped pistachios and coarse sugar over the batter for added crunch and visual appeal. 7. Bake Bake at 425°F (220°C) for 5 minutes, then reduce the temperature to 375°F (190°C) without opening the oven. Continue baking for 13–15 minutes until a toothpick comes out with a few moist crumbs. 8. Cool Let the muffins cool in the pan for 5 minutes before transferring them to a wire rack. At this stage, your pistachio muffins should be domed, golden, and fragrant. For a deeper pistachio flavor, you can also explore our homemade pistachio syrup, perfect for adding a subtle nutty sweetness to baked goods and drinks. Professional Baking Tips These small details make a noticeable difference in the final pistachio muffins. Flavor Variations Lemon Pistachio Add lemon zest to the batter for a fresh, bright contrast. Chocolate Pistachio Fold in white or dark chocolate chips for a richer version. Glazed Version Top cooled muffins with a light vanilla glaze for extra elegance. Jumbo Size Use a jumbo muffin pan and adjust baking time for oversized pistachio muffins. If you enjoy working with rich, concentrated flavors, our pistachio paste is an excellent option for enhancing both desserts and pastries. Storage and Freezing Store muffins in an airtight container at room temperature for up to three days. For longer storage, refrigerate for up to five days. To freeze, wrap each muffin individually and store in a freezer-safe container for up to two months. Thaw at room temperature or warm gently before serving. Proper storage preserves the moisture and flavor of pistachio muffins. For a lighter and dairy-free alternative, our pistachio milk offers a smooth, aromatic way to extend pistachio flavor beyond baking. Common Mistakes to Avoid Avoiding these mistakes ensures consistently soft pistachio muffins. Why This Recipe Works Every Time The combination of oil, butter, and pudding mix guarantees moisture. The balance of extracts enhances flavor without overpowering it. Proper temperature control creates bakery-style structure and appearance. This approach results in pistachio muffins that are tender, flavorful, and visually appealing every single time. Final Thoughts Baking pistachio muffins at home is simple when the right techniques are used. With carefully chosen ingredients, controlled mixing, and proper baking temperatures, you can achieve professional results in your own kitchen. These pistachio muffins are elegant enough for guests yet comforting enough for everyday enjoyment. Once you try them, they are likely to become a regular favorite in your baking routine. To ensure accuracy and depth, we consulted trusted external references that helped shape and inform this content

Bakery-Style Pistachio Muffins: A Complete and Reliable Recipe Guide Read More »

Pistachio Paste

Pistachio Paste: How to Make a Smooth, Flavorful Homemade Version

Pistachio paste is one of those ingredients that instantly elevates a recipe. Rich, nutty, naturally aromatic, and beautifully green, it adds depth to both sweet and savory creations. While it’s often associated with professional pastry kitchens, pistachios paste is surprisingly easy to make at home with just a few simple steps and high-quality pistachios. After making this recipe multiple times myself, I can confidently say that homemade pistachios paste tastes fresher, looks more vibrant, and gives you full control over texture and flavor. My Experience Making Pistachio Paste at Home The first time I made pistachios paste, I was looking for a pure, natural alternative to store-bought pistachio spreads. Many commercial versions contain added sugar, oils, or artificial coloring, which dulls the authentic pistachio flavor. When I tried making pistachio paste at home, I was surprised by how intense and clean the taste was. The aroma while blending was incredible, and the texture became smoother with patience. Since then, I’ve used this pistachios paste in desserts, creams, and even as a spread, and it has become a staple in my kitchen. Ingredients for Homemade Pistachios Paste One of the best things about pistachio paste is how simple the ingredient list is. You will need: Optional additions: That’s it. The quality of your pistachio Choosing the Best Pistachios For the best pistachio paste, use raw pistachios that are fresh and bright green. Avoid heavily roasted or salted pistachios, as they can darken the color and alter the flavor. If your pistachios still have skins, removing them will significantly improve both the color and smoothness of the final paste. Blanching the pistachios briefly and rubbing off the skins is worth the extra step if you want a professional-looking pistachio paste. How to Make Pistachios Paste Step by Step 1. Prepare the Pistachios If your pistachios have skins, blanch them briefly in hot water, drain, and rub them with a clean towel to loosen the skins. Allow them to dry completely before blending. Any moisture can interfere with the texture of the pistachios paste. 2. Blend the Pistachios Place the pistachios in a food processor. Start blending on medium to high speed. The pistachios will go through several stages: This process takes time. Stop occasionally to scrape down the sides of the bowl so everything blends evenly. 3. Be Patient with the Texture At first, the pistachio paste may seem too dry or crumbly. Continue blending. As the natural oils release, the mixture will gradually become smoother and creamier. If after several minutes the pistachio paste still feels too thick, add a very small amount of neutral oil, one teaspoon at a time. This helps the paste emulsify without diluting the flavor. 4. Adjust and Finish Once smooth, taste your pistachio paste. Add a pinch of salt if desired. Blend again briefly until fully incorporated. The final pistachio paste should be smooth, spreadable, and intensely aromatic. Common Mistakes to Avoid You Can Try Also Our Recipe Pistachio Sauce and Wafer Cookies How to Use Pistachios Paste Pistachios paste is incredibly versatile and can be used in many ways. In Desserts Pistachios paste is ideal for cakes, macarons, tarts, and pastries. It blends beautifully into pastry creams, mousses, and fillings, providing deep pistachio flavor without artificial additives. In Ice Cream and Gelato Homemade pistachios paste is perfect for frozen desserts. It gives ice cream a natural green color and a rich, authentic taste. In Frostings and Creams Mix pistachios paste into buttercream, whipped cream, or cream cheese frosting for an elegant, nutty twist. As a Spread Spread pistachios paste on toast, pancakes, or waffles. You can lightly sweeten it with honey if desired. In Savory Dishes Pistachios paste can also be used in sauces, pestos, or paired with yogurt for dips. Its earthy flavor works surprisingly well in savory recipes. How to Store Pistachio Paste Transfer your pistachios paste to an airtight container. Store it in the refrigerator for up to two weeks. For longer storage, freeze it in small portions. Pistachios paste freezes very well and can be thawed as needed. Natural oil separation may occur over time. Simply stir or re-blend before using. Why Homemade Pistachio Paste Is Worth It Making pistachios paste at home allows you to control every aspect of the recipe — flavor, texture, and purity. Compared to commercial versions, homemade pistachio paste is fresher, more aromatic, and free from unnecessary additives. From my own experience, once you try homemade pistachios paste, it’s hard to go back to store-bought options. The difference in taste and quality is immediately noticeable. Frequently Asked Questions Final Thoughts Pistachios paste is a simple yet powerful ingredient that can transform both everyday recipes and special desserts. With just pistachios, patience, and a good food processor, you can create a smooth, vibrant pistachio paste that rivals professional pastry products. Whether you use it in baking, frozen desserts, or as a spread, homemade pistachios paste is a recipe worth mastering. Once you make it, you’ll find endless ways to enjoy its rich flavor and natural elegance. This Recipe is based from this article in the link

Pistachio Paste: How to Make a Smooth, Flavorful Homemade Version Read More »

Wafer Cookies

Homemade Wafer Cookies: A Classic Vanilla Recipe You’ll Love

Introduction: My Experience Making Wafer Cookies at Home The first time I made homemade wafer cookies, I honestly didn’t expect such a big difference compared to store-bought ones. I had always used packaged vanilla wafers for desserts, especially layered puddings, without thinking twice. But once I tried baking them from scratch, I realized how much flavor and texture I had been missing. These wafer cookies were lighter, crisper, and had a real vanilla aroma that filled my kitchen while baking. What I love most about this recipe is how simple yet precise it is. With basic ingredients and a little attention to detail, you can create wafer cookies that taste nostalgic but feel homemade and special. Over time, this recipe became my go-to whenever I needed a reliable cookie for snacking, dessert bases, or elegant presentations. What Are Wafer Cookies? Wafer cookies are thin, crisp vanilla-flavored cookies with a light texture and delicate sweetness. They are known for their melt-in-the-mouth quality and subtle crunch. Traditionally, wafer cookies are small and round, making them perfect for layering in desserts or enjoying on their own. Unlike thick cookies, wafer cookie rely on a soft batter rather than a firm dough. This batter spreads slightly during baking, creating their signature flat shape. When made correctly, they are golden on the edges and crisp all the way through. Ingredients for Homemade Wafer Cookies To achieve perfect wafer cookie, quality ingredients matter. Here’s what you’ll need: These ingredients work together to create the delicate structure and classic flavor that defines wafer cookie. Powdered sugar is especially important because it dissolves easily, helping produce a smooth batter and crisp finish. How to Make Wafer Cookies Step by Step 1. Prepare the Oven and Baking Trays Preheat your oven to 350°F (180°C). Line several baking trays with parchment paper. Since wafer cookie are small and bake in batches, it’s helpful to have multiple trays ready. 2. Cream the Butter and Sugar In a large bowl, beat the softened butter until creamy and smooth. Add the powdered sugar gradually and continue mixing until the texture becomes light and fluffy. This step is essential for airy wafer cookie. 3. Add Eggs and Vanilla Slowly add the egg whites and the whole egg, mixing well after each addition. Stir in the vanilla extract. The batter may look slightly loose at this stage, which is normal for wafer cookie. 4. Incorporate Dry Ingredients Add the flour and salt to the batter. Mix gently until just combined. Overmixing can cause tough cookies, so stop as soon as the batter is smooth. 5. Pipe the Cookies Transfer the batter to a piping bag. Pipe small circles onto the prepared trays, spacing them apart to allow spreading. Uniform size helps wafer cookies bake evenly. 6. Bake Until Golden Bake for 18–20 minutes, rotating trays if necessary. The wafer cookies are done when the edges turn light golden and the centers look set. 7. Cool Completely Allow the cookies to cool fully on the trays. As they cool, they will crisp up and develop their signature texture. Try our recipes like Pistachio Sauce and Cilantro Lime Crema Tips for Perfect Wafer Cookies Small details make a big difference when baking wafer cookie. How to Use Wafer Cookies Wafer cookie are incredibly versatile. You can enjoy them as a simple snack, pair them with coffee or tea, or use them as a base for layered desserts. They work beautifully in banana pudding, ice cream sandwiches, and crumb crusts. Their neutral vanilla flavor complements fruits, creams, and chocolate perfectly. Frequently Asked Questions Storage and Shelf Life Plain wafer cookie can be stored at room temperature in an airtight container for up to one week. For longer storage, you can freeze them in a sealed container. Avoid humidity, as wafer cookie absorb moisture quickly and lose their crispness. Final Thoughts Homemade wafer cookie are a beautiful example of how simple ingredients can create something truly special. Once you try them fresh from your oven, it’s hard to go back to packaged versions. With their crisp texture, classic vanilla flavor, and endless versatility, wafer cookies deserve a place in every baker’s recipe collection. This recipe is based from biggerbolderbaking

Homemade Wafer Cookies: A Classic Vanilla Recipe You’ll Love Read More »