diamondmeals.com

drsoukainaelaziz@gmail.com

Celtic Salt Trick

Celtic Salt Trick: Simple Mineral Drink for Better Hydration

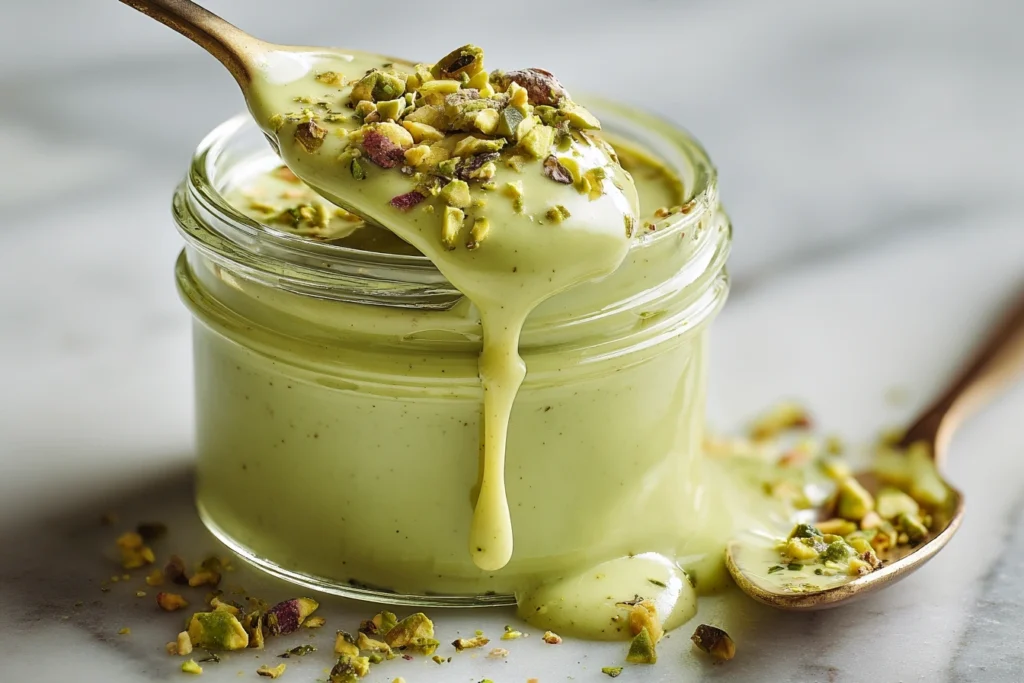
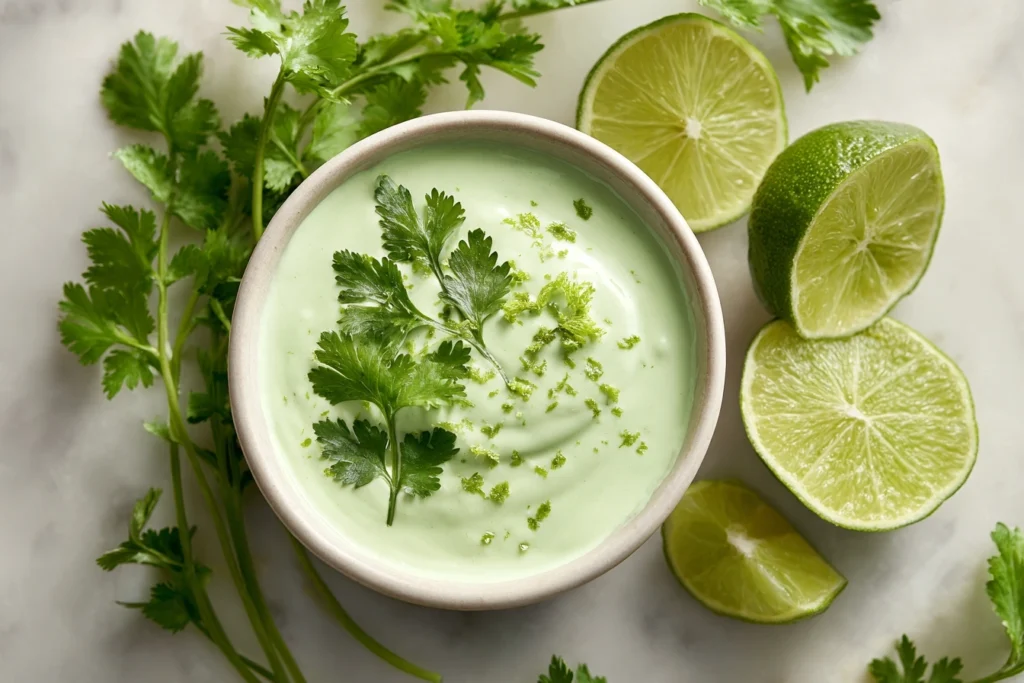
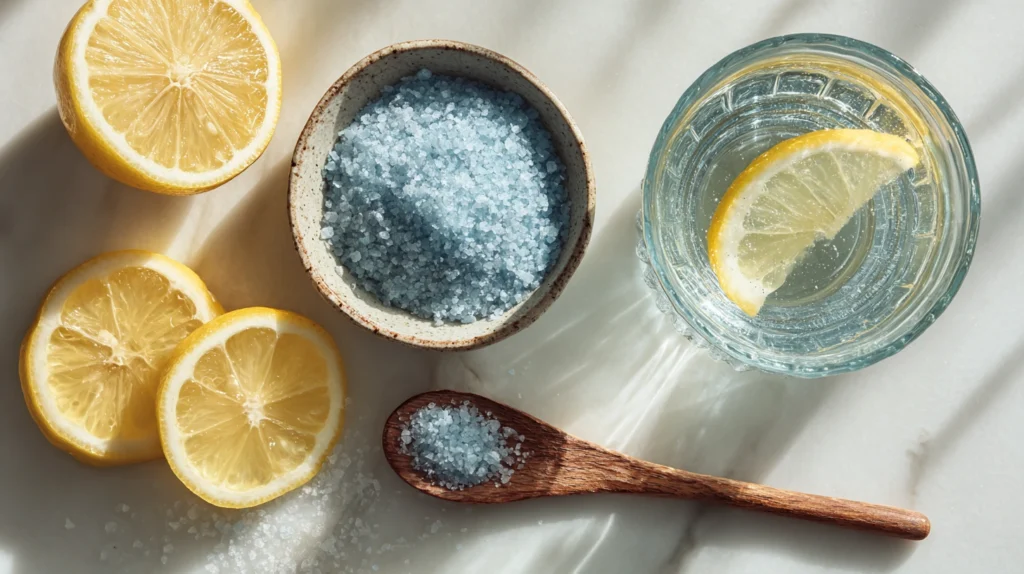
In recent years, wellness trends have increasingly returned to basics. Instead of complicated supplements or synthetic drinks, many people are rediscovering the power of simple ingredients found right in their kitchens. One trend gaining steady attention is the Celtic salt trick — a minimal, mineral-focused drink made with unrefined sea salt and water. Often shared as a morning ritual or hydration boost, the Celtic salt trick is praised for its simplicity, natural mineral content, and ease of preparation. But what exactly is it, how does it work, and is it truly beneficial? This in-depth guide explores everything you need to know, from preparation and potential benefits to safety considerations and common misconceptions. What Is the Celtic Salt Trick? The Celtic saltt trick is a simple drink made by dissolving a small pinch of unrefined Celtic sea salt in water. Unlike regular table salt, Celtic salt is minimally processed and retains trace minerals naturally present in seawater. These include magnesium, potassium, and calcium, along with sodium chloride. The idea behind the Celtic salt trick is that adding a small amount of mineral-rich salt to water may help support hydration and electrolyte balance. Advocates claim it helps water absorb more efficiently in the body, making it a popular choice first thing in the morning or before physical activity. Unlike flavored electrolyte drinks or powders, the Celtic salt trick contains no additives, sweeteners, or artificial ingredients — just salt and water. Why the Celtic Salt Trick Became Popular The rise of the Celtic salt trick reflects a broader shift toward natural wellness practices. People are increasingly cautious about processed drinks and are looking for simpler alternatives that feel more “traditional” or ancestral. Social media also played a major role. Short videos and wellness blogs often promote morning rituals using minimal ingredients, and the Celtic salt trick fits perfectly into this trend. Its low cost, ease of preparation, and “natural” image make it appealing to a wide audience. Additionally, it has been frequently mentioned alongside other salt-based wellness trends, which has helped fuel curiosity and discussion — even among those who approach it skeptically. If you’re looking for a simple, nourishing option, you may enjoy our natural Mounjaro-inspired recipe as part of a balanced lifestyle. Ingredients for the Celtic Salt Trick One of the reasons the Celtic salt trick is so accessible is its short ingredient list. Basic Ingredients Optional Add-Ins These additions are optional and do not change the core concept of the Celtic salt trick. How to Make the Celtic Salt Trick (Step by Step) Making the Celtic salt trick takes less than two minutes. Many people prefer consuming the Celtic salt trick in the morning or before light exercise, though it can be taken at other times as well. To add a fresh, zesty touch, try our homemade cilantro lime crema—it pairs beautifully with many savory dishes. How the Celtic Salt Trick Works in the Body To understand the logic behind the Celtic saltt trick, it helps to understand electrolytes. Electrolytes are minerals that carry an electrical charge and help regulate fluid balance, nerve signals, and muscle function. Sodium plays a central role in hydration. When consumed in small amounts, it helps the body retain water and move fluids into cells. Celtic sea salt also contains trace minerals that contribute to this process, though in modest quantities. By adding a small pinch of Celtic salt to water, the Celtic salt trick creates a mild electrolyte solution. This may help water absorption compared to plain water, especially in people who are mildly dehydrated or active. However, it’s important to note that this is not a medical treatment — it’s a hydration practice. Potential Benefits of the Celtic Salt Trick While research on the Celtic salt trick itself is limited, its proposed benefits are based on known roles of electrolytes and hydration. 1. Hydration Support The Celtic salt trick may help support hydration by encouraging better fluid retention, especially in warm climates or after sweating. 2. Natural Electrolyte Source Celtic salt contains trace minerals that contribute to electrolyte balance without artificial additives. 3. Digestive Comfort Some people report feeling less bloated or more comfortable after drinking the Celtic salt trick, possibly due to improved hydration. 4. Simplicity and Accessibility Unlike commercial drinks, the Celtic salt trick is inexpensive and easy to prepare at home. 5. Reduced Dependence on Processed Drinks Using the Celtic salt trick may help people reduce consumption of sugary or artificially flavored beverages. It’s important to keep expectations realistic. The Celtic salt trick supports hydration but does not replace a balanced diet or medical care. For a rich and flavorful finish, our pistachio sauce recipe is a delicious way to elevate everyday meals. Celtic Salt Trick vs Other Salt Trends The Celtic salt trick is sometimes confused with other viral “salt tricks” circulating online. Some of these trends claim dramatic effects on energy, hormones, or sexual health. The key difference is intention. The Celtic salt trick focuses on hydration and minerals, not on curing medical conditions. Claims that salt-based drinks can treat serious health issues are not supported by scientific evidence. In fact, excessive sodium intake may have the opposite effect on cardiovascular health if consumed irresponsibly. This is why moderation is essential. How Often Should You Use the Celtic Salt Trick? Most people who use the Celtic salt trick do so once per day. More is not better. Because Celtic salt still contains sodium, consuming it too frequently or in large amounts may contribute to excessive sodium intake. A good rule is: Those with high blood pressure, kidney conditions, or sodium-restricted diets should consult a healthcare professional before trying the Celtic salt trick. Common Mistakes to Avoid ❌ Using too much saltThe Celtic salt trick should taste mildly mineral, not salty. ❌ Replacing meals or water entirelyThis drink supplements hydration — it does not replace normal water intake. ❌ Assuming more minerals equal more benefitsTrace minerals are helpful, but balance matters. ❌ Believing exaggerated claimsThe Celtic salt trick

Celtic Salt Trick: Simple Mineral Drink for Better Hydration Read More »

Wafer Cookies

Homemade Wafer Cookies: A Classic Vanilla Recipe You’ll Love

Introduction: My Experience Making Wafer Cookies at Home The first time I made homemade wafer cookies, I honestly didn’t expect such a big difference compared to store-bought ones. I had always used packaged vanilla wafers for desserts, especially layered puddings, without thinking twice. But once I tried baking them from scratch, I realized how much flavor and texture I had been missing. These wafer cookies were lighter, crisper, and had a real vanilla aroma that filled my kitchen while baking. What I love most about this recipe is how simple yet precise it is. With basic ingredients and a little attention to detail, you can create wafer cookies that taste nostalgic but feel homemade and special. Over time, this recipe became my go-to whenever I needed a reliable cookie for snacking, dessert bases, or elegant presentations. What Are Wafer Cookies? Wafer cookies are thin, crisp vanilla-flavored cookies with a light texture and delicate sweetness. They are known for their melt-in-the-mouth quality and subtle crunch. Traditionally, wafer cookies are small and round, making them perfect for layering in desserts or enjoying on their own. Unlike thick cookies, wafer cookie rely on a soft batter rather than a firm dough. This batter spreads slightly during baking, creating their signature flat shape. When made correctly, they are golden on the edges and crisp all the way through. Ingredients for Homemade Wafer Cookies To achieve perfect wafer cookie, quality ingredients matter. Here’s what you’ll need: These ingredients work together to create the delicate structure and classic flavor that defines wafer cookie. Powdered sugar is especially important because it dissolves easily, helping produce a smooth batter and crisp finish. How to Make Wafer Cookies Step by Step 1. Prepare the Oven and Baking Trays Preheat your oven to 350°F (180°C). Line several baking trays with parchment paper. Since wafer cookie are small and bake in batches, it’s helpful to have multiple trays ready. 2. Cream the Butter and Sugar In a large bowl, beat the softened butter until creamy and smooth. Add the powdered sugar gradually and continue mixing until the texture becomes light and fluffy. This step is essential for airy wafer cookie. 3. Add Eggs and Vanilla Slowly add the egg whites and the whole egg, mixing well after each addition. Stir in the vanilla extract. The batter may look slightly loose at this stage, which is normal for wafer cookie. 4. Incorporate Dry Ingredients Add the flour and salt to the batter. Mix gently until just combined. Overmixing can cause tough cookies, so stop as soon as the batter is smooth. 5. Pipe the Cookies Transfer the batter to a piping bag. Pipe small circles onto the prepared trays, spacing them apart to allow spreading. Uniform size helps wafer cookies bake evenly. 6. Bake Until Golden Bake for 18–20 minutes, rotating trays if necessary. The wafer cookies are done when the edges turn light golden and the centers look set. 7. Cool Completely Allow the cookies to cool fully on the trays. As they cool, they will crisp up and develop their signature texture. Try our recipes like Pistachio Sauce and Cilantro Lime Crema Tips for Perfect Wafer Cookies Small details make a big difference when baking wafer cookie. How to Use Wafer Cookies Wafer cookie are incredibly versatile. You can enjoy them as a simple snack, pair them with coffee or tea, or use them as a base for layered desserts. They work beautifully in banana pudding, ice cream sandwiches, and crumb crusts. Their neutral vanilla flavor complements fruits, creams, and chocolate perfectly. Frequently Asked Questions Storage and Shelf Life Plain wafer cookie can be stored at room temperature in an airtight container for up to one week. For longer storage, you can freeze them in a sealed container. Avoid humidity, as wafer cookie absorb moisture quickly and lose their crispness. Final Thoughts Homemade wafer cookie are a beautiful example of how simple ingredients can create something truly special. Once you try them fresh from your oven, it’s hard to go back to packaged versions. With their crisp texture, classic vanilla flavor, and endless versatility, wafer cookies deserve a place in every baker’s recipe collection. This recipe is based from biggerbolderbaking

Homemade Wafer Cookies: A Classic Vanilla Recipe You’ll Love Read More »

pistachio sauce

Pistachio Sauce: A Creamy Italian-Inspired Recipe You’ll Love

Introduction The first time I made homemade pistachio sauce, I was honestly surprised by how luxurious it tasted compared to store-bought versions. I had always associated pistachio spreads with artificial flavoring or overly sweet creams, but preparing it from scratch completely changed my perspective. The aroma of freshly blended pistachios, the silky texture, and the deep nutty flavor felt like something you would find in an Italian pastry shop rather than a home kitchen. Since then, this pistachio sauce has become one of my favorite recipes to prepare, not only because it’s versatile, but because it delivers a rich, authentic taste that elevates both sweet and savory dishes. This recipe is inspired by traditional Italian pistachio cream, adapted into a smooth, pourable pistachios sauce that can be used in countless ways. Whether you drizzle it over desserts, spread it on toast, or incorporate it into savory recipes, this sauce offers elegance, depth, and unmistakable pistachio character What Is Pistachio Sauce? Pistachios sauce is a creamy preparation made primarily from pistachios, dairy, and a gentle sweetener. Unlike pistachio butter, which is often thick and unsweetened, pistachio sauce is smoother, richer, and designed to be spooned or poured. It balances natural nuttiness with subtle sweetness, creating a refined flavor that works in both desserts and select savory dishes. This pistachios sauce draws inspiration from Italian crema al pistacchio, a beloved specialty in regions where pistachios are highly valued. Its vibrant green color and silky texture make it visually appealing as well as delicious. Ingredients for Pistachio Sauce To achieve the best results, quality ingredients are essential. Each component plays a key role in flavor and texture. Using raw pistachios ensures a clean, authentic flavor and a brighter green color. White chocolate adds smoothness and mild sweetness without overpowering the pistachio taste How to Make Pistachios Sauce Step by Step Step 1: Preparing the Pistachios Start by briefly boiling the pistachios to loosen their skins. Once drained, rub them gently with a towel to remove as much of the outer skin as possible. This step is important for achieving a smooth and refined pistachio sauce without bitterness or grainy texture. Step 2: Melting the Creamy Base In a saucepan or microwave-safe bowl, gently melt the white chocolate with butter and a portion of the milk. Stir slowly until the mixture becomes glossy and uniform. This forms the rich base of the pistachios sauce. Step 3: Blending Place the peeled pistachios in a high-speed blender. Add powdered sugar, salt, and the warm white chocolate mixture. Blend until smooth, stopping occasionally to scrape down the sides. Step 4: Adjusting Texture Gradually add the remaining milk while blending until the pistachios sauce reaches a pourable yet creamy consistency. The final texture should be smooth enough to drizzle but thick enough to cling to desserts or pasta. Step 5: Chilling and Storing Transfer the sauce to an airtight container and refrigerate. As it cools, the pistachios sauce thickens slightly and the flavors deepen. It keeps well for up to two weeks when properly stored. Try Our Recipes Homemade Wafer Cookies and Natural Mounjaro  Ways to Use Pistachio Sauce One of the greatest strengths of pistachios sauce is its versatility. It can be used as a topping for ice cream, cheesecake, pancakes, waffles, or crepes. It works beautifully as a filling for cakes, cookies, croissants, or layered desserts. Stirring pistachio sauce into yogurt or oatmeal instantly upgrades a simple breakfast. Beyond sweet uses, this sauce can also enhance savory dishes when prepared with less sugar. A spoonful can transform pasta, risotto, or roasted vegetables into something unique and refined. Tips for the Perfect Pistachio Sauce These small details make a noticeable difference in the final pistachios sauce. Frequently Asked Questions About Pistachios Sauce Final Thoughts Homemade pistachios sauce is one of those recipes that feels indulgent yet rewarding. From my own experience, once you try making it yourself, it’s difficult to return to store-bought alternatives. The depth of flavor, natural color, and silky texture make it a standout addition to any kitchen. Whether you’re using pistachios sauce to elevate desserts, enhance breakfast, or experiment with savory dishes, this recipe offers flexibility and elegance. It’s proof that a few simple ingredients, treated with care, can create something truly special.

Pistachio Sauce: A Creamy Italian-Inspired Recipe You’ll Love Read More »

Natural Mounjaro Recipe

Natural Mounjaro Recipe: A Simple Wellness Drink That Became Part of My Daily Routine

When I first heard about the natural mounjaro recipe, I was honestly skeptical. Like many people, I had seen the name circulating online and wondered whether it was just another trend or something genuinely helpful. Out of curiosity, I decided to try it myself—not as a miracle solution, but as a natural drink to support digestion and healthier habits. After a few days of incorporating this drink into my morning routine, I noticed something interesting. I felt lighter, less bloated, and more mindful of my appetite throughout the day. It didn’t suppress hunger in an extreme way, but it helped me reconnect with my body’s natural hunger cues. That experience is what motivated me to understand the ingredients, the preparation, and the realistic benefits behind the natural mounjaro recipe. This article explains exactly what this drink is, how to prepare it, why people use it, and what you should realistically expect from it—without hype, exaggeration, or medical claims. What Is the Natural Mounjaro Recipe? The natural mounjaro recipe is a homemade wellness drink made from a small number of natural ingredients commonly used in traditional health practices. Despite the name, it has no connection to prescription medications and contains no pharmaceutical compounds. The recipe is popular because it combines ingredients known to support: Many people use the natural mounjaro recipe as part of a broader lifestyle approach rather than as a standalone solution for weight loss. Core Ingredients and Their Purpose Each ingredient in the natural mounjaro recipe has a clear role: Apple Cider Vinegar Apple cider vinegar contains acetic acid, which may help slow gastric emptying and promote a feeling of fullness. This is one reason it is often consumed before meals. Fresh Lemon Juice Lemon juice adds vitamin C and improves taste while supporting hydration and digestive comfort. It also balances the sharp acidity of vinegar. Fresh Ginger Ginger supports digestion, reduces stomach discomfort, and adds a warming effect that many people find soothing in the morning. Warm Water Warm water helps dilute the acidity and allows the ingredients to blend gently, making the drink easier on the stomach. Optional Honey Honey can be added in small amounts to soften the taste, especially for beginners. Together, these ingredients form the base of the natural mounjaro recipe used by many people worldwide. How to Make the Natural Mounjaro Recipe Ingredients Instructions This natural mounjaro recipe takes less than five minutes to prepare and uses ingredients found in most kitchens. Try Our Homemade Recipes Pistachio Sauce and Homemade Wafer Cookies When and How to Drink It Most people drink the natural mounjaro recipe: Or 15–30 minutes before mealsIn the morning on an empty stomach From my experience, drinking it slowly rather than quickly makes a noticeable difference in comfort and digestion. Consistency matters more than timing, and one serving per day is usually sufficient. What the Natural Mounjaro Recipe Can and Cannot Do What It May Support What It Does Not Do The natural mounjaro recipe works best when combined with balanced meals, movement, and adequate sleep. Common Variations of the Recipe Some people adapt the natural mounjaro recipe to suit their preferences: These variations change the taste but keep the core concept intact. Consistency and Lifestyle Habits One important lesson I learned while using this routine is that consistency matters far more than perfection. The natural mounjaro recipe works best when it becomes part of a broader lifestyle rather than a short-term experiment. Drinking it regularly encouraged me to hydrate better, slow down my mornings, and make more conscious food choices throughout the day. Instead of focusing only on results, I noticed that the ritual itself—preparing the drink, sipping it slowly, and starting the day mindfully—played a key role in its perceived benefits. When combined with balanced meals, light physical activity, and adequate sleep, this simple habit fits naturally into a sustainable wellness routine. Frequently Asked Questions Final Thoughts The natural mounjaro recipe is not about shortcuts or quick fixes. From my personal experience, its real value lies in simplicity. It encourages better hydration, slows down eating habits, and supports digestive comfort—small changes that can lead to meaningful long-term results. This recipe is based from sofierecipes

Natural Mounjaro Recipe: A Simple Wellness Drink That Became Part of My Daily Routine Read More »

cilantro lime crema

Cilantro Lime Crema: A Creamy, Fresh Sauce That Elevates Any Dish

The first time I made cilantro lime crema, it was almost by accident. I was preparing tacos at home and wanted something creamier than plain yogurt but lighter and fresher than mayonnaise. I blended a few simple ingredients I already had in my kitchen—fresh herbs, lime juice, and a creamy base—and the result was a sauce so balanced and vibrant that it instantly became a staple in my fridge. Since then, I’ve used it on tacos, bowls, grilled vegetables, and even as a dip. This recipe is now one of my go-to sauces whenever I want to add freshness and creaminess without overpowering a dish. Cilantro lime crema is loved for its simplicity, versatility, and bright flavor. It combines tangy citrus, fresh herbs, and a smooth texture that pairs beautifully with both spicy and mild foods. Whether you’re cooking Mexican-inspired meals or simply looking for a fresh sauce to elevate everyday dishes, this crema delivers consistent results with minimal effort. Ingredients You’ll Need This recipe uses simple, accessible ingredients that are easy to customize based on taste and dietary preferences. Each ingredient plays a specific role, and together they create a harmonious sauce that is creamy yet refreshing. How to Make Cilantro Lime Crema at Home Making cilantro lime crema is quick and requires no cooking. A blender or food processor is all you need. Start by adding the yogurt (or sour cream), mayonnaise, lime juice, garlic, onion powder, and salt into your blender. Blend until smooth and creamy. Once the base is fully combined, add the fresh cilantro and blend again until the sauce turns pale green with a smooth texture. Taste and adjust seasoning as needed. You can add more lime juice for extra tang or a pinch of salt if the flavors feel muted. If the crema is too thick, a small splash of water can help achieve the desired consistency. The entire process takes less than five minutes, making it ideal for busy cooking days. Best Ways to Use Cilantro Lime Crema This sauce is incredibly versatile and can be used in many ways: Because cilantro lime crema balances richness and acidity, it complements both spicy and mild dishes equally well. Texture and Flavor Tips For the best results, always use fresh lime juice rather than bottled juice. Fresh lime gives the sauce its signature brightness. Finely chopping the cilantro before blending can also help ensure an even texture. If you prefer a thicker sauce for dipping, use full-fat Greek yogurt. For a thinner drizzle-style crema, sour cream or a mix of yogurt and water works well. Letting the crema rest in the refrigerator for at least 20 minutes allows the flavors to meld and intensify. Try more recipes like Natural Mounjaro and Pistachio Sauce Storage and Make-Ahead Tips Cilantro lime crema stores well in the refrigerator when kept in an airtight container. It stays fresh for up to five days. Stir before using, as natural separation may occur. This sauce is ideal for meal prep since it can be made ahead and used throughout the week to add flavor quickly to meals. Frequently Asked Questions About Cilantro Lime Crema Final Thoughts About Cilantro lime crema Cilantro lime crema is one of those simple recipes that delivers impressive results with minimal effort. Its fresh ingredients, creamy texture, and bright flavor make it a versatile sauce you’ll want to keep on hand. From tacos to salads and everything in between, this crema adds a refreshing finishing touch that elevates everyday meals. Once you try it, you’ll understand why cilantro lime crema has become a favorite in so many kitchens—and why it continues to be searched and loved by home cooks around the world. This Recipe based this siteweb Loveandlemons

Cilantro Lime Crema: A Creamy, Fresh Sauce That Elevates Any Dish Read More »