Almond Croissant Cookies: A Bakery-Style Cookie Inspired by a Classic Pastry
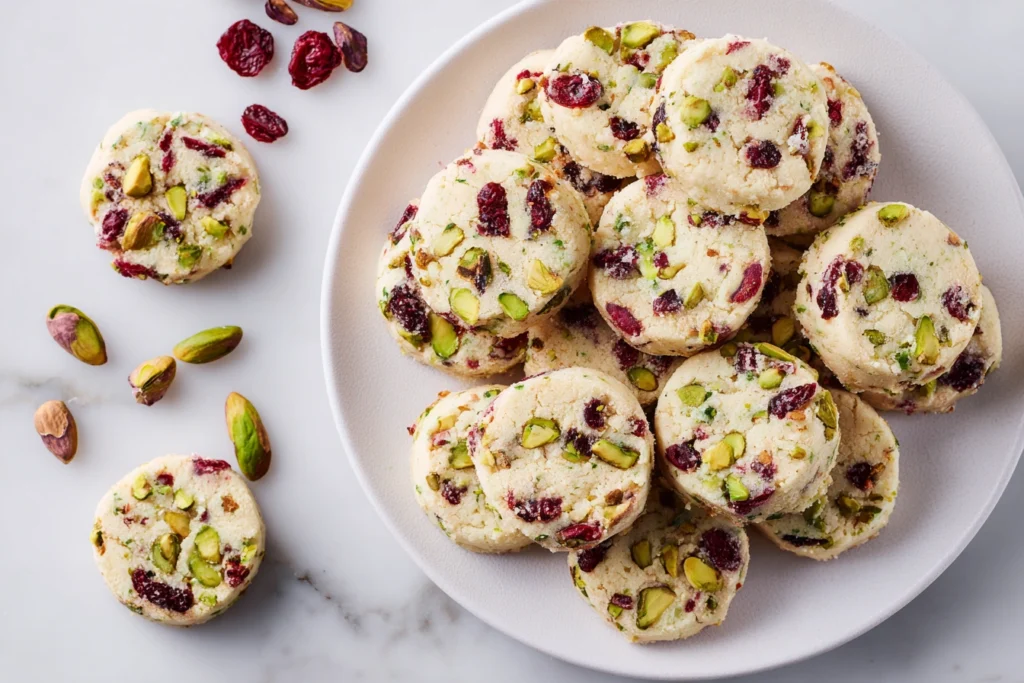
Almond croissant cookies are a refined dessert that blends the elegance of French bakery flavors with the comfort and simplicity of homemade cookies. Inspired by the iconic almond croissant, this recipe captures everything people love about that pastry—rich almond flavor, buttery notes, and a soft, indulgent texture—while transforming it into an easy-to-make cookie format. Unlike traditional croissants, which require laminated dough and long resting times, almond croissant cookies offer a far more accessible approach. They deliver the same luxurious taste through a tender cookie dough filled with a creamy almond center and finished with sliced almonds and powdered sugar. The result is a cookie that looks sophisticated, tastes indulgent, and feels special enough for any occasion. Whether you are baking for guests, holidays, or simply treating yourself, almond croissant cookies bring bakery-quality results straight from your oven. What Makes Almond Croissant Cookies Unique The appeal of almond croissant cookies lies in their thoughtful balance of texture and flavor. They are not ordinary cookies, and they are not pastries either. Instead, they sit perfectly between the two, offering the best of both worlds. Each cookie features a soft and buttery exterior that gently crisps at the edges. Inside, there is a rich almond filling inspired by frangipane, the classic almond cream used in French baking. The filling stays creamy after baking, creating a contrast with the cookie dough that makes every bite memorable. Another defining feature of almond croissant cookies is their visual appeal. The sliced almonds on top and the final dusting of powdered sugar give them a refined, bakery-style finish that elevates them beyond everyday cookies. Ingredient Breakdown and Their Role To achieve the authentic flavor and texture of almond croissant cookies, each ingredient plays an essential role. Almond Filling The almond filling is the heart of the recipe. Almond flour provides deep nutty flavor and structure, while butter adds richness and smoothness. Sugar balances the natural bitterness of almonds, and egg yolk binds everything together. Almond extract intensifies the flavor, while vanilla adds warmth and depth. Cookie Dough The cookie dough serves as a tender shell for the almond filling. Butter creates a soft, rich base, while a combination of white sugar and brown sugar ensures both sweetness and moisture. The extra egg yolk contributes to a chewy interior, while baking soda provides just enough lift to keep the cookies from becoming dense. Together, these components ensure almond croissant cookies remain soft, flavorful, and indulgent. Step-by-Step Preparation Step 1: Make the Almond Filling Start by mixing almond flour, sugar, softened butter, egg yolk, almond extract, and vanilla extract in a bowl until smooth and cohesive. The mixture should resemble a thick almond paste. Portion the filling into equal pieces and place them on a lined tray. Chill until firm. This step is crucial to prevent the filling from melting out during baking. Step 2: Prepare the Cookie Dough In a large bowl, cream butter with white sugar and brown sugar until light and fluffy. This process helps create the soft texture that defines almond croissant cookies. Add the egg, egg yolk, and almond extract, mixing until fully incorporated. In a separate bowl, combine flour, baking soda, and salt. Gradually mix the dry ingredients into the wet mixture until a soft dough forms. Step 3: Assemble the Cookies Preheat the oven and line baking sheets with parchment paper. Divide the dough into equal portions. Flatten each portion slightly and place a chilled almond filling piece in the center. Carefully wrap the dough around the filling, sealing it completely. Roll into a smooth ball and gently press sliced almonds on top. This step gives almond croissant cookies their signature look. Step 4: Bake Bake until the edges are lightly golden while the centers remain soft. Avoid overbaking, as the goal is a tender cookie with a creamy interior. Allow the cookies to cool briefly before transferring them to a rack. Once cooled, dust lightly with powdered sugar for a classic finish. Texture and Flavor Experience One of the reasons almond croissant cookies are so popular is their layered texture. The outer cookie is soft and buttery, while the almond center remains creamy and rich. The sliced almonds add a subtle crunch, and the powdered sugar enhances sweetness without overpowering the almond flavor. The almond taste is pronounced but balanced. It feels indulgent rather than heavy, making these cookies suitable for both dessert and afternoon coffee breaks. Expert Tips for Perfect Results These tips help ensure consistent, bakery-quality almond croissant cookies every time. Variations to Customize Your Cookies Almond croissant cookies are easy to adapt while keeping their core identity. Chocolate Almond Add dark chocolate chips to the cookie dough for a richer, more indulgent version. Citrus Almond Incorporate orange zest into the almond filling for a bright, aromatic twist. Mini Cookies Create smaller cookies for events or gift boxes without changing the recipe proportions. Each variation maintains the elegance and flavor profile that defines almond croissant cookies. And for a true bakery-style experience, this pistachio croissant is a must-try, offering rich flavor and irresistible layers. Serving Suggestions Serve almond croissant cookies at room temperature or slightly warm. They pair beautifully with coffee, espresso, or tea. For special occasions, arrange them on a platter and dust with fresh powdered sugar just before serving. They also work well as part of dessert tables, brunch spreads, or holiday cookie assortments. For another pistachio-inspired delight, these soft and fluffy pistachio muffins make a wonderful choice for breakfast or afternoon tea. Storage and Make-Ahead Options Almond croissant cookies store well in an airtight container at room temperature for several days. The almond filling helps keep them moist. They can also be frozen after baking or assembled and frozen before baking. When ready to enjoy, bake or gently reheat to restore freshness. If you enjoy refined nutty flavors, you may also love these cranberry pistachio shortbread cookies, a delicate treat with a perfect balance of sweetness and texture. Final Thoughts Almond croissant cookies are a
Almond Croissant Cookies: A Bakery-Style Cookie Inspired by a Classic Pastry Read More »