diamondmeals.com

drsoukainaelaziz@gmail.com

Pistachio Tiramisu

Pistachio Tiramisu Recipe – Creamy Italian Dessert with Mascarpone

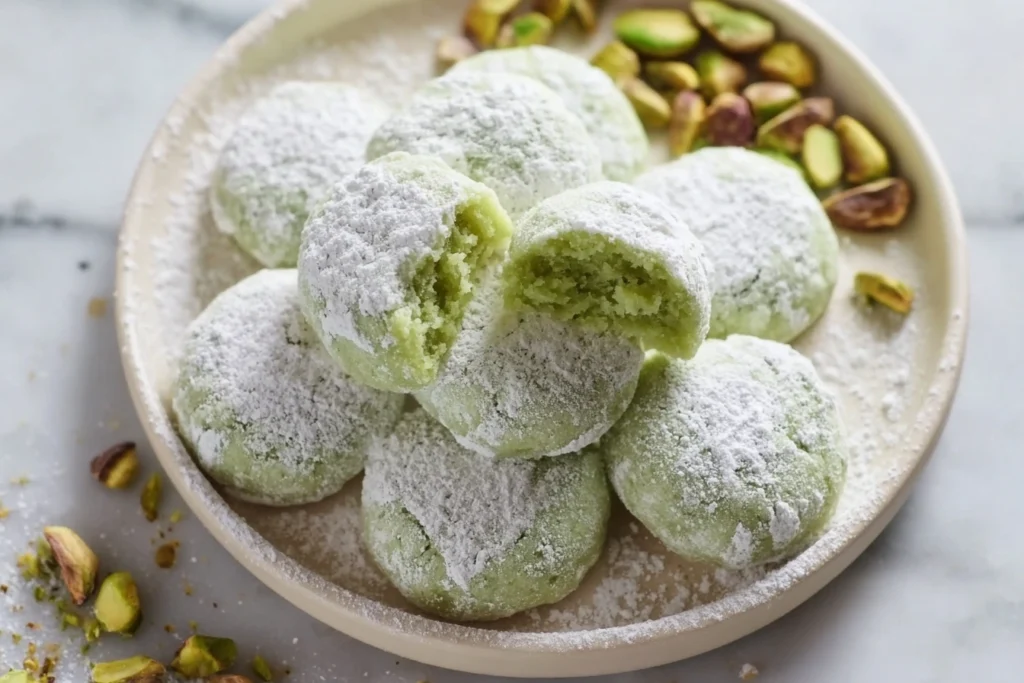
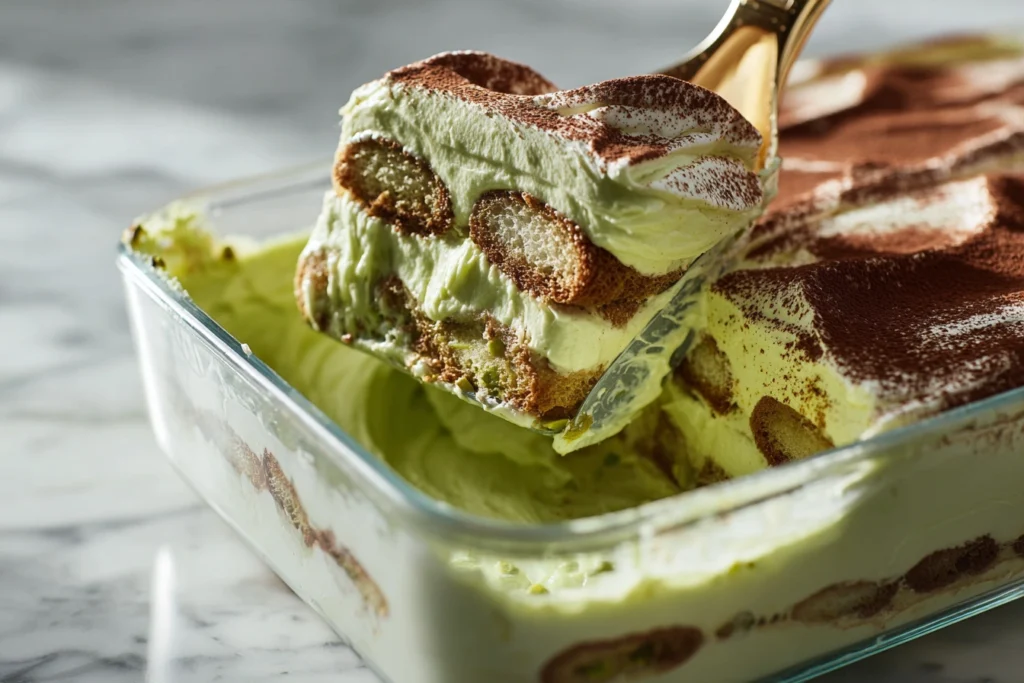
Few desserts are as iconic as tiramisu. With its delicate layers of espresso-soaked ladyfingers and silky mascarpone cream, it represents pure Italian indulgence. Yet when pistachio enters the picture, the result becomes even more luxurious. Pistachio tiramisu transforms the traditional favorite into a refined dessert that feels modern, rich, and unforgettable. This pistachio tiramisu recipe keeps the heart of the classic intact while introducing the deep, nutty elegance of pistachio paste. The balance between coffee, mascarpone, and pistachio creates a dessert that is creamy but not heavy, sweet but not overpowering. Whether served at a dinner party or prepared as a make-ahead treat, pistachio tiramisu delivers both visual beauty and exceptional flavor. Why Pistachio Tiramisu Works So Well Traditional tiramisu relies on harmony. Espresso provides bitterness, mascarpone offers richness, and ladyfingers create structure. When pistachio paste is added, it enhances rather than replaces these elements. Pistachio adds: The key to great pistachio tiramisu is balance. The pistachio flavor should complement the coffee instead of overwhelming it. When properly made, each bite feels layered, smooth, and elegant. Ingredients for the Perfect Pistachio Tiramisu Quality matters tremendously here. Choose high-quality mascarpone and real pistachio paste made primarily from pistachios. For the Base: For the Pistachio Cream: For Garnish: Using authentic pistachio paste makes a noticeable difference in pistachio tiramisu, giving it depth and natural flavor instead of artificial sweetness. Step-by-Step Instructions Step 1: Prepare the Pistachio Mascarpone Cream Whisk the egg yolks and sugar together until pale and thick. This step creates a stable base for the cream. Add the pistachio paste and vanilla, mixing until smooth and fully incorporated. Gently fold in the mascarpone until silky. In a separate bowl, whip the heavy cream to soft peaks. In another clean bowl, beat the egg whites with salt until stiff peaks form. Carefully fold the whipped cream into the pistachio mixture, followed by the egg whites. Use a spatula and light movements to keep the mixture airy. The cream should be fluffy and smooth — the foundation of excellent pistachio tiramisu. Step 2: Prepare the Coffee Layer Pour cooled espresso into a shallow bowl. If using liqueur, mix it in now. Quickly dip each ladyfinger into the coffee for about one second per side. Avoid soaking too long, as this can make the dessert overly soft. Proper dipping ensures pistachio tiramisu maintains structure while absorbing flavor. Step 3: Assemble the Layers Spread a thin layer of pistachio cream at the bottom of your serving dish. Add a layer of coffee-dipped ladyfingers. Spread a generous layer of pistachio mascarpone cream over the biscuits. Repeat the layering process until ingredients are used, finishing with a smooth layer of cream on top. At this stage, your pistachio tiramisu should show defined, even layers. The Importance of Chilling Refrigerate the dessert for at least 6 hours, preferably overnight. This resting period allows: Well-chilled pistachio tiramisu slices cleanly and holds its shape beautifully. Decorating and Presentation Before serving, you can enhance the appearance with: The contrast between creamy layers and green pistachio tones makes pistachio tiramisu visually stunning. For neat slices, dip your knife in warm water and wipe clean between cuts. If you love nutty desserts, don’t miss our delicate pistachio wedding cookies — they’re buttery, tender, and absolutely irresistible. Flavor and Texture Experience A properly made pistachio tiramisu delivers: It should feel indulgent but not dense. The folded egg whites and whipped cream create lift, preventing heaviness. For a soft and fluffy treat perfect for breakfast or brunch, try our pistachio muffins — rich in flavor and beautifully moist. Common Mistakes to Avoid Even simple desserts can go wrong without attention to detail. Over-Soaking Ladyfingers Too much coffee leads to a soggy texture. Using Artificial Pistachio Flavor Low-quality spreads can taste synthetic and overly sweet. Skipping Chill Time Without adequate refrigeration, pistachio tiramisu will not set properly. Overmixing Rough mixing deflates the cream, resulting in a dense dessert. Attention to these details ensures a professional-quality pistachio tiramisu. Want to make this dessert even more authentic? Learn how to prepare homemade pistachio paste for the deepest, most natural pistachio flavor. Creative Variations Once you master the classic version, you can experiment. Chocolate Addition Add shaved dark chocolate between layers. Alcohol-Free Version Simply omit the liqueur. Individual Cups Layer in glasses for elegant single servings. White Chocolate Swirl Fold melted white chocolate into the mascarpone mixture. Each adaptation keeps the spirit of pistachio tiramisu while introducing subtle differences. Storage Tips Store covered in the refrigerator for up to three days. Because the flavors continue to develop, pistachio tiramisu often tastes even better the next day. Avoid freezing, as the mascarpone texture may change when thawed. When to Serve This Dessert This elegant treat is ideal for: The refined flavor profile makes pistachio tiramisu suitable for both casual and formal occasions. Why You’ll Love This Recipe Pistachio tiramisu combines tradition with innovation. It respects the structure of classic tiramisu while elevating it with nutty richness. The espresso balances sweetness, and the pistachio adds depth without overpowering the dessert. The result is: With proper technique and quality ingredients, pistachio tiramisu becomes a show-stopping dessert that feels luxurious but achievable at home. Final Thoughts If you love traditional tiramisu, this variation offers something exciting without losing authenticity. Pistachio tiramisu brings together coffee, mascarpone, and pistachio in perfect harmony. From its airy texture to its delicate nutty flavor, every layer feels intentional and refined. Once you prepare pistachio tiramisu for the first time, it may become your signature dessert. Allow it to chill fully, slice carefully, and enjoy the rich, creamy reward of a beautifully crafted pistachio tiramisu. This recipe is inspired by techniques and insights shared in this detailed guide: which offers helpful tips for achieving the perfect texture and flavor.

Pistachio Tiramisu Recipe – Creamy Italian Dessert with Mascarpone Read More »

Pistachio Wedding Cookies

Pistachio Wedding Cookies – Buttery Melt-in-Your-Mouth

Few desserts feel as delicate and celebratory as pistachio wedding cookies. With their soft, crumbly texture and snowy powdered sugar coating, these bite-sized treats are both elegant and comforting. Whether served at weddings, holiday gatherings, bridal showers, or afternoon tea, pistachio wedding cookies always add a refined touch to any dessert table. These cookies are inspired by traditional wedding cookies such as Mexican wedding cookies and Russian tea cakes. The pistachio variation introduces a subtle nutty richness and a beautiful pale green color that makes them visually stunning as well as delicious. If you are looking for a dessert that feels luxurious but is surprisingly simple to prepare, pistachio wedding cookies are the perfect choice. What Makes Pistachio Wedding Cookies So Special? The charm of pistachio wedding cookies lies in their texture. They are tender, buttery, and almost melt instantly when you take a bite. Unlike chewy cookies or crisp shortbread, these cookies are delicate and crumbly. The pistachio flavor adds depth without overpowering sweetness. It creates a balanced dessert that is rich but never heavy. Their soft green hue also makes them ideal for weddings and festive occasions, giving dessert trays a sophisticated and coordinated appearance. Another reason pistachio wedding cookies are beloved is their versatility. They can be dressed up for formal celebrations or served casually with coffee at home. Ingredients for Perfect Pistachio Wedding Cookies One of the beauties of pistachio wedding cookies is that they require only a few pantry staples. Each ingredient contributes to the signature melt-in-your-mouth texture. You Will Need: Optional additions: The butter provides richness and tenderness. Powdered sugar keeps the dough soft rather than crisp. The pistachio pudding mix enhances both flavor and structure, ensuring pistachio wedding cookies hold their shape while staying delicate inside. Step-by-Step Instructions Step 1: Cream Butter and Sugar In a large bowl, beat the softened butter with powdered sugar until light and fluffy. This step is crucial because it incorporates air into the mixture, helping pistachio wedding cookies achieve their delicate crumb. Add vanilla extract and mix until combined. Step 2: Mix Dry Ingredients In another bowl, whisk together flour and pistachio pudding mix. Gradually add this mixture to the butter mixture, mixing on low speed until a soft dough forms. Do not overmix, as that can make pistachio wedding cookies dense instead of tender. Step 3: Chill the Dough Wrap the dough in plastic wrap and refrigerate for at least one hour. Chilling is essential because it prevents spreading and helps pistachio wedding cookies maintain their classic round shape during baking. Step 4: Shape the Cookies Preheat the oven to 350°F (175°C). Line a baking sheet with parchment paper. Scoop about one tablespoon of dough and roll into smooth balls. Place them about one inch apart. Since pistachio wedding cookies do not spread much, shaping them neatly now ensures an attractive final result. Step 5: Bake Gently Bake for 8–10 minutes, until the bottoms are lightly golden. The tops should remain pale. Avoid overbaking, as the softness of pistachio wedding cookies depends on gentle baking. Allow them to cool for five minutes on the baking sheet. Step 6: Roll in Powdered Sugar While still slightly warm, gently roll each cookie in powdered sugar. After they cool completely, roll them again for a thick snowy coating. This double coating gives pistachio wedding cookies their iconic look and soft sweetness. Tips for Bakery-Quality Pistachio Wedding Cookies To ensure perfect results every time, keep these professional tips in mind: Following these steps will guarantee your pistachio wedding cookies turn out beautifully every time. If you love the nutty richness in these cookies, you’ll absolutely enjoy our moist and flavorful Pistachio Loaf for a beautifully tender slice of pistachio perfection. Flavor Variations to Try While traditional pistachio wedding cookies are wonderful on their own, you can easily customize them. Almond Pistachio Version Add almond extract for deeper nuttiness. Citrus Touch Incorporate a small amount of lemon zest for brightness. Extra Nutty Texture Fold finely chopped pistachios into the dough. Chocolate Drizzle Drizzle melted dark chocolate over cooled cookies for contrast. These variations allow you to personalize pistachio wedding cookies while preserving their delicate character. For a soft and bakery-style treat perfect for breakfast or brunch, try our Pistachio Muffins — they’re light, fluffy, and packed with irresistible pistachio flavor. Why They Are Perfect for Weddings and Holidays There is a reason pistachio wedding cookies have become a symbol of celebration. Their powdered sugar coating resembles freshly fallen snow, making them especially popular during winter holidays. At weddings, their soft green tint complements floral arrangements and elegant themes. Because they are small and easy to serve, pistachio wedding cookies fit beautifully into dessert buffets and gift boxes. They also pair wonderfully with tea, espresso, or cola , enhancing their appeal at sophisticated gatherings. Want to intensify the natural pistachio taste in your baking? Our homemade Pistachio Paste is the ultimate ingredient for deeper, more authentic nutty richness. Storage and Make-Ahead Advice Pistachio wedding cookies are ideal for preparing in advance. Add the powdered sugar coating after thawing for the freshest presentation. Because they maintain texture and flavor well, pistachio wedding cookies are excellent for holiday baking schedules. Troubleshooting Common Problems Cookies Spread Too Much The dough was not chilled long enough. Texture Is Too Dry They were likely overbaked. Flavor Is Too Subtle Add almond extract or chopped pistachios. Powdered Sugar Disappears Wait slightly before coating, but do not let them cool completely for the first roll. With careful preparation, pistachio wedding cookies are simple and reliable to make. The Texture That Defines Pistachio Wedding Cookies The true magic of pistachio wedding cookies lies in their crumbly yet tender texture. High butter content ensures richness. Powdered sugar in the dough creates softness. The pistachio element adds depth without overwhelming sweetness. Each bite dissolves gently, leaving behind a subtle nutty flavor and a light sugary finish. This delicate texture is why pistachio wedding cookies remain beloved across generations. Final Thoughts Elegant,

Pistachio Wedding Cookies – Buttery Melt-in-Your-Mouth Read More »

Homemade Perfectly Seasoned Collard Greens

Homemade Perfectly Seasoned Collard Greens: A Rich and Flavorful Southern Classic

Few dishes carry as much comfort and tradition as Homemade Perfectly Seasoned Collard Greens. This deeply rooted Southern staple transforms simple leafy greens into a tender, savory, and satisfying side dish that pairs beautifully with countless meals. When prepared correctly, collards lose their bitterness and become silky, flavorful, and rich with layers of seasoning. If you want a method that guarantees balanced flavor, tender texture, and authentic depth, this guide will walk you step by step through making Homemade Perfectly Seasoned Collard Greens the right way. Why Collard Greens Are So Special Collard greens are sturdy, dark leafy vegetables known for their slightly earthy and mildly bitter flavor. Unlike delicate greens, they require slow cooking to unlock their best texture and taste. That slow simmering process is what makes Homemade Perfectly Seasoned Collard Greens so irresistible. Beyond flavor, collard greens are extremely nutritious. They are rich in fiber, vitamin K, vitamin A, vitamin C, calcium, and antioxidants. When simmered gently, they retain much of their nutritional value while absorbing seasoning beautifully. The Key to Flavorful Collard Greens The difference between bland greens and Homemade Perfectly Seasoned Collard Greens lies in three elements: Collard greens need time to soften and absorb flavor. Rushing the cooking process can leave them tough or bitter. Patience is essential. Ingredients You’ll Need To prepare authentic Homemade Perfectly Seasoned Collard Greens, gather the following: These ingredients create the deep, savory foundation necessary for truly Homemade Perfectly Seasoned Collard Greens. Step 1: Clean and Prepare the Greens Proper preparation ensures your Homemade Perfectly Seasoned Collard Greens are smooth and grit-free. Start by removing the thick stems from each leaf. Fold the leaf in half and slice along the stem to separate it. Stack the leaves, roll them tightly, and slice into one-inch ribbons. Place the chopped greens in a large bowl of cold water and swish them around thoroughly. Dirt often hides in the folds. Lift the greens out of the water rather than pouring them out, leaving any grit behind. Clean greens are the foundation of excellent Homemade Perfectly Seasoned Collard Greens. Step 2: Build the Flavor Base In a large Dutch oven over medium heat, cook the chopped bacon until crispy and the fat has rendered. This smoky fat becomes the backbone of your seasoning. Remove excess grease if needed, leaving about two tablespoons. Add the chopped onion and sauté until soft and translucent. Stir in the garlic and cook briefly until fragrant. This aromatic mixture is what gives Homemade Perfectly Seasoned Collard Greens their rich, savory depth. Step 3: Add the Greens and Liquid Add the sliced greens to the pot in batches. They may look like a large volume at first, but they will quickly wilt. Pour in the broth and stir to combine. Season with salt, pepper, and optional red pepper flakes. Bring everything to a gentle simmer. Once bubbling lightly, reduce heat to low and cover. This is when Homemade Perfectly Seasoned Collard Greens begin their transformation. Step 4: Simmer Low and Slow Allow the greens to simmer gently for 45 minutes to 1 hour. During this time: Stir occasionally to ensure even cooking. Low heat ensures the greens cook evenly without becoming mushy. Slow cooking is the defining characteristic of Homemade Perfectly Seasoned Collard Greens. Step 5: Finish with Brightness After the greens are fully tender, stir in the apple cider vinegar. This small addition brightens the dish, balances the smokiness, and enhances the overall flavor profile. Taste and adjust seasoning if necessary. At this stage, your Homemade Perfectly Seasoned Collard Greens are ready to serve. For a bold and tangy side that pairs beautifully with these greens, try our horseradish pickles for an extra layer of vibrant flavor. What Is Pot Liquor? As the greens cook, they release flavorful liquid known as pot liquor. This nutrient-rich broth contains minerals and flavor extracted from the greens and seasoning. Many people consider pot liquor an essential part of Homemade Perfectly Seasoned Collard Greens. It can be spooned over rice, soaked up with cornbread, or enjoyed on its own. Never discard it — it holds incredible flavor. If you enjoy herb-forward seasonings, our homemade chimichurri seasoning adds a fresh and aromatic twist to any savory dish. How to Reduce Bitterness If you find collard greens slightly bitter, here are helpful adjustments when preparing Homemade Perfectly Seasoned Collard Greens: Proper seasoning and cooking time eliminate harsh flavors while preserving depth. To complement the smoky depth of this recipe, consider serving it alongside our pickled garlic for a deliciously sharp contrast. Serving Suggestions Homemade Perfectly Seasoned Collard Greens pair well with: They are especially popular during holidays and Sunday dinners, but they are equally delicious as an everyday side dish. Storage and Reheating One of the best features of Homemade Perfectly Seasoned Collard Greens is how well they store. Refrigerate in an airtight container for up to 4 days. To freeze, cool completely and store in freezer-safe containers for up to 3 months. Reheat gently on the stovetop with a splash of broth to restore moisture. In fact, Homemade Perfectly Seasoned Collard Greens often taste even better the next day as the flavors deepen. Nutritional Benefits Collard greens are nutrient-dense and support overall health. Homemade Perfectly Seasoned Collard Greens provide: This dish offers comfort while still being wholesome and nourishing. Variations to Try You can personalize Homemade Perfectly Seasoned Collard Greens in several ways: Each variation keeps the spirit of Homemade Perfectly Seasoned Collard Greens intact while adapting to different tastes. Final Thoughts Mastering Homemade Perfectly Seasoned Collard Greens is about patience, balance, and proper seasoning. With simple ingredients and slow cooking, collard greens transform into a dish rich in history and flavor. The combination of smokiness, gentle acidity, and tender greens creates a deeply satisfying experience. Whether served at a family gathering or prepared for a quiet dinner at home, Homemade Perfectly Seasoned Collard Greens remain a timeless classic. Once you try this method, you’ll understand why Homemade Perfectly Seasoned Collard Greens

Homemade Perfectly Seasoned Collard Greens: A Rich and Flavorful Southern Classic Read More »

Horseradish Pickles

Horseradish Pickles: A Bold and Flavorful Homemade Classic

If you enjoy vibrant flavors with a little heat, horseradish pickles are the perfect addition to your kitchen repertoire. Crisp cucumbers infused with sharp horseradish create a bold twist on traditional pickles. The balance of tangy vinegar, aromatic spices, and that unmistakable sinus-clearing kick makes them unforgettable. Homemade horseradish pickles are surprisingly easy to prepare. With a simple brine and fresh ingredients, you can create jars of crunchy, spicy goodness that elevate sandwiches, burgers, salads, and charcuterie boards. What Are Horseradish Pickles? At their core, horseradish pickles are cucumbers preserved in a vinegar-based brine enhanced with freshly grated or prepared horseradish root. While classic dill pickles rely mainly on garlic and herbs, this variation introduces a peppery intensity that deepens the flavor profile. Horseradish belongs to the mustard family and releases natural compounds when grated. These compounds are responsible for its distinctive heat. When combined with vinegar, salt, and spices, the root transforms ordinary cucumbers into something complex and bold. The result is a pickle that delivers: Why Make Them at Home? Store-bought options rarely capture the brightness of freshly made horseradish pickles. When you prepare them yourself, you control: Homemade batches also allow you to experiment with variations while preserving the satisfying crunch that makes good pickles irresistible. Choosing the Right Cucumbers The foundation of excellent horseradish pickles begins with selecting the best cucumbers. Look for small pickling varieties that are: Fresh cucumbers produce crisp results. For optimal texture, pickle them within 24 hours of purchasing or harvesting. Before brining, rinse thoroughly and trim a thin slice from the blossom end. This small step helps maintain firmness during storage. The Essential Ingredients Here is a balanced refrigerator-style recipe for horseradish pickles. For the Pickles: For the Brine: This combination allows the flavor of horseradish to shine without overwhelming the natural freshness of the cucumbers. Step-by-Step Preparation 1. Prepare the Cucumbers Wash and dry them carefully. Leave whole, slice into spears, or cut into coins depending on preference. 2. Make the Brine Combine water, vinegar, salt, sugar, and spices in a saucepan. Bring to a gentle boil, stirring until dissolved. Remove from heat and allow to cool slightly. 3. Layer the Jars Place dill, garlic, and half of the grated horseradish at the bottom of sterilized jars. 4. Pack Tightly Arrange cucumbers tightly inside the jars. Add the remaining horseradish over the top. 5. Pour the Brine Cover the cucumbers completely with brine. Ensure no air pockets remain. 6. Refrigerate Seal jars and refrigerate for at least 48 hours. For best flavor, wait 4–5 days before enjoying. These refrigerator horseradish pickles develop stronger character over time. Flavor Development During the first two days, vinegar provides dominant tanginess. As the days pass, the horseradish integrates fully into the brine. After several days, the flavor becomes rounder and more balanced. The spice level depends on the freshness and quantity of horseradish used. You can easily adjust it to suit your tolerance. Variations to Try One of the pleasures of making horseradish pickles is customizing the flavor. Extra-Spicy Version Increase the grated horseradish and add additional red pepper flakes. Sweet and Spicy Add slightly more sugar for contrast between heat and sweetness. Garlic-Forward Double the garlic for deeper savory notes. Fermented Method Use a saltwater brine instead of vinegar and allow natural fermentation at room temperature for several days before refrigerating. Each variation maintains the signature character while introducing subtle differences. Serving Ideas Horseradish pickles pair beautifully with rich foods. Their acidity cuts through fat and enhances savory dishes. Try serving them: Their crisp texture and bold flavor make them a standout condiment. For a creamy and refreshing pairing, try our cilantro lime crema — it adds the perfect smooth contrast to bold, spicy flavors. Storage and Safety Because these are refrigerator-style horseradish pickles, they are not shelf-stable. Always store them in the refrigerator. For best quality, consume within 3–4 weeks. Discard if you notice: Proper hygiene and clean jars ensure safe preparation. To deepen the herbal notes and bring vibrant seasoning to your table, explore our homemade chimichurri seasoning for an irresistible flavor boost. Nutritional Overview Horseradish pickles are low in calories and fat-free. They contain small amounts of vitamin C and antioxidants from both cucumbers and horseradish. Horseradish itself contains natural plant compounds associated with antimicrobial and digestive-support properties. However, like all pickled foods, they contain sodium, so moderation is recommended. If you enjoy tangy, punchy condiments, don’t miss our pickled garlic recipe — a deliciously sharp addition to any savory spread. Final Thoughts Homemade horseradish pickles offer an exciting upgrade to traditional pickles. They deliver crisp texture, vibrant acidity, and a distinctive spicy finish that transforms simple meals into memorable ones. With fresh cucumbers, quality horseradish, and a well-balanced brine, you can create jars of horseradish pickles that are flavorful, customizable, and deeply satisfying. Once you experience their bold character, they may become a permanent favorite in your kitchen. This recipe has been thoughtfully inspired by insights from https://emilykylenutrition.com/horseradish-pickles/, whose approach to flavor balance and technique helped shape this version.

Horseradish Pickles: A Bold and Flavorful Homemade Classic Read More »

pickled garlic

Pickled Garlic Recipe – Easy Homemade Tangy Garlic Cloves

If you enjoy bold, vibrant flavors in your cooking, pickled garlic is a must-have ingredient in your kitchen. This simple preparation transforms sharp raw garlic cloves into mellow, tangy, and slightly sweet bites that enhance everything from salads to charcuterie boards. Easy to prepare and surprisingly versatile, pickled garlic is one of those homemade staples that feels gourmet yet requires minimal effort. In this complete guide, you’ll learn exactly how to make it, how it changes in flavor over time, storage tips, and the best ways to use it in everyday meals. What Is Pickled Garlic? Pickled garlic is fresh garlic that has been preserved in a vinegar-based brine. The acidity softens the harsh bite of raw garlic while maintaining its aromatic depth. Instead of the intense spiciness that raw cloves can bring, the pickling process creates a smoother, tangier flavor that is easier to enjoy on its own. During the pickling process, garlic absorbs the vinegar mixture and gradually becomes tender. After a few weeks, the cloves develop a balanced taste — still garlicky, but rounded and pleasantly sharp rather than overpowering. Unlike fermented garlic, which depends on beneficial bacteria to develop over time, this method uses vinegar to safely preserve the cloves in the refrigerator. Why You Should Make It at Home Making pickled garlic yourself offers several advantages: Longer Shelf Life Fresh peeled garlic lasts only a short time before drying out or sprouting. Once preserved in vinegar, it can stay fresh for months when refrigerated properly. Milder Flavor Profile Many people find raw garlic too aggressive. Pickling reduces that intensity while keeping its signature aroma intact. Versatility in Cooking From appetizers to main dishes, this preserved ingredient adds brightness and depth without overwhelming a recipe. Customizable Taste You can easily adjust sweetness, acidity, and spice levels depending on your preference. Classic Pickled Garlic Recipe This traditional method is simple, reliable, and beginner-friendly. Ingredients Step-by-Step Instructions 1. Prepare the Garlic Peel the cloves carefully and remove any bruised pieces. Rinse lightly and dry thoroughly. 2. Heat the Brine In a saucepan, combine vinegar, salt, and sugar. Bring to a gentle boil and stir until dissolved. 3. Fill the Jars Place the cloves into sterilized glass jars. Add herbs or chili flakes if desired. 4. Pour the Brine Carefully pour the hot liquid over the garlic, ensuring the cloves are completely submerged. Leave about half an inch of space at the top. 5. Cool and Refrigerate Let the jars cool to room temperature before sealing. Store in the refrigerator for at least three weeks before tasting. The flavor deepens and improves over time, making patience worthwhile. How the Flavor Develops In the first few days, the garlic will still taste relatively sharp. After two weeks, it begins to mellow noticeably. By the third or fourth week, pickled garlic becomes smooth, tangy, and pleasantly aromatic. Occasionally, the cloves may turn slightly blue or green. This is a natural chemical reaction involving sulfur compounds and does not mean the batch is spoiled. As long as it smells fresh and remains refrigerated, it is safe to eat. For a creamy, zesty pairing, try our Cilantro Lime Crema — it complements bold flavors beautifully and adds a refreshing finish to any dish. Flavor Variations to Try One of the joys of preparing this recipe at home is experimentation. Here are a few variations: Spicy Version Add sliced jalapeños, whole peppercorns, or extra red pepper flakes. Herb-Infused Style Rosemary, thyme, oregano, or bay leaves give a Mediterranean touch. Sweet and Tangy Twist Use apple cider vinegar and increase sugar slightly for a softer flavor. Savory Asian-Inspired Option Add a splash of soy sauce and a pinch of sesame seeds for depth. These small changes allow you to personalize your jar while keeping the essential character intact. If you love vibrant herb-based blends, our Chimichurri Seasoning brings a fresh, savory depth that pairs wonderfully with tangy ingredients. Creative Ways to Use It Once your jar is ready, you’ll find endless ways to incorporate this ingredient into your cooking. Cheese Boards Whole cloves pair beautifully with aged cheeses, olives, and cured meats. Salad Dressings Finely chop and whisk into vinaigrettes for brightness. Sandwiches and Wraps Slice thinly and layer into grilled sandwiches for a tangy kick. Pasta and Grain Bowls Stir into warm dishes to add contrast and complexity. Sauces and Dips Blend into yogurt dips, hummus, or creamy spreads for subtle garlic flavor without harshness. Because the cloves are already tender, they integrate smoothly into both cold and warm dishes. Looking for a comforting side to balance bright flavors? Our Smashed Broccoli with Cheese makes the perfect rich and satisfying addition. Storage and Safety Proper handling is essential when preparing pickled garlic. Garlic preserved in oil at room temperature can be unsafe, so always use a vinegar-based method and keep it chilled. The Science Behind the Transformation Garlic contains sulfur compounds that create its pungent aroma. When exposed to acid, these compounds break down and soften. The vinegar environment also prevents harmful bacteria from developing. The occasional color change happens when sulfur interacts with trace minerals. While it may look unusual, it does not affect taste or safety. Understanding this simple chemistry helps explain why pickled garlic tastes milder yet still aromatic. Nutritional Overview Although the flavor profile changes, garlic retains many of its beneficial plant compounds. It remains low in calories and fat-free while adding bold taste to dishes without heavy sauces. However, because it contains salt from the brine, moderation is advisable for individuals monitoring sodium intake. Frequently Asked Questions Final Thoughts Homemade pickled garlic is one of the simplest ways to elevate everyday cooking. With just vinegar, salt, and fresh cloves, you create a pantry ingredient that adds brightness and sophistication to countless dishes. The transformation from sharp raw garlic to tangy preserved cloves is both practical and satisfying. Once you prepare your first jar, you may find yourself keeping it stocked year-round. Whether served on a cheese board, chopped

Pickled Garlic Recipe – Easy Homemade Tangy Garlic Cloves Read More »

Nutella Mug Cake No Egg

Nutella Mug Cake No Egg – Easy 5-Minute Microwave Chocolate Dessert

When you’re craving something warm, chocolatey, and comforting, but don’t want to bake a full cake, the solution is simple: nutella mug cake no egg. This quick microwave dessert delivers rich hazelnut flavor, a soft texture, and deep chocolate satisfaction in just minutes — without using eggs. Whether you’re avoiding eggs due to allergies, dietary preferences, or simply because you ran out, this recipe guarantees indulgent results. The beauty of a nutella mug cake no egg lies in its simplicity. It uses pantry staples, requires only one mug, and takes less than five minutes from start to finish. If you love easy desserts with minimal effort, this recipe may become your favorite sweet fix. Why You’ll Love This Nutella Mug Cake No Egg There are many reasons this dessert stands out. First, it’s incredibly fast. You mix everything directly in a mug and microwave it. No oven, no baking tray, no complicated preparation. Second, the texture is soft and moist without being rubbery. Traditional mug cakes that contain eggs can sometimes turn dense if overcooked. A nutella mug cake no egg avoids that issue entirely. Third, it’s perfectly portioned. Instead of baking a full cake and being tempted by leftovers, this single-serving treat satisfies your craving instantly. Finally, Nutella provides enough richness and sweetness to create deep flavor without needing complicated ingredients. Ingredients for the Perfect Nutella Mug Cake No Egg One reason the nutella mug cake no egg is so popular is that it requires very few ingredients. You probably already have everything in your kitchen. Ingredients: Nutella already contains sugar and fat, which helps replace the role eggs usually play in cake recipes. That’s why a nutella mug cake no egg can still turn out fluffy and tender. Step-by-Step Instructions Making this dessert is simple and beginner-friendly. Step 1: Choose the Right Mug Select a microwave-safe mug that holds at least 10–12 ounces. The batter will rise during cooking, so extra space prevents overflow. Step 2: Soften the Nutella Place Nutella in the mug and microwave for about 15–20 seconds. This helps it blend smoothly with the other ingredients. Step 3: Add Wet Ingredients Add milk and oil to the softened Nutella. Stir until smooth and glossy. The mixture should look creamy and evenly combined. Step 4: Add Dry Ingredients Add flour, baking powder, sugar (if using), and salt. Mix gently until no dry flour remains. Do not overmix — this keeps your nutella mug cake no egg soft. Step 5: Microwave Cook on high for 60–90 seconds. Start checking at 60 seconds. The top should look set but still slightly soft in the center. Step 6: Let It Rest Allow the cake to cool for one to two minutes before eating. This resting time helps the texture finish setting. Why This Recipe Works Without Eggs Eggs normally provide structure and moisture in baked goods. However, Nutella contains oils, cocoa, sugar, and emulsifiers that mimic these properties. In a nutella mug cake no egg, the combination of Nutella, milk, and oil creates enough moisture and richness to form a tender crumb. Baking powder provides lift, allowing the cake to rise even without eggs. This makes the recipe: The absence of eggs also means you don’t risk undercooked egg texture in the center. Texture Tips for the Best Nutella Mug Cake No Egg Microwaves vary in power, so slight adjustments may be needed. For a Fudgy Texture: Cook for about 60–65 seconds. The center will remain slightly gooey. For a Cake-Like Texture: Cook for 80–90 seconds. The top should feel springy when lightly touched. Avoid overcooking. Even 10 seconds too long can dry out a nutella mug cake no egg. If you’re in the mood for something light and airy after this rich dessert, you might also enjoy our delicate Cloud Cake recipe for a beautifully soft treat. Delicious Variations Once you master the classic version, you can experiment with creative twists. 1. Lava Center Version Add 1 teaspoon Nutella in the center before microwaving. This creates a molten core inside your nutella mug cake no egg. 2. Peanut Butter Swirl Swirl in 1 teaspoon peanut butter before cooking for a nutty contrast. 3. Mocha Boost Add ½ teaspoon instant coffee to enhance chocolate flavor. 4. Chocolate Chip Upgrade Mix in 1 tablespoon chocolate chips for extra richness. 5. Vegan Option Use plant-based milk and ensure your chocolate spread contains no dairy. The base recipe adapts beautifully. For a nutty twist with a refined flavor, don’t miss our Pistachio Loaf — a perfectly moist bake that pairs wonderfully with afternoon coffee. Topping Ideas Your cake is delicious on its own, but toppings elevate it further. Serving your nutella mug cake no egg warm with cold ice cream creates a luxurious contrast. If you love bold and refreshing flavors, our Grapefruit Pie offers a vibrant citrus contrast that’s both elegant and irresistible. Common Mistakes to Avoid Even simple recipes can go wrong without small precautions. Overmixing Stir just until combined. Overmixing can make the cake dense. Overcooking The most common issue. Microwaves cook quickly and unevenly. Always check early. Using Too Much Flour Too much flour leads to dryness. Level your tablespoons carefully. Small Mug Always use a large mug to prevent spilling. Can You Make It Gluten-Free? Yes. Replace all-purpose flour with a gluten-free flour blend. The texture remains similar because Nutella adds moisture and structure. Can You Bake It in the Oven? Yes, although the microwave method is what makes the nutella mug cake no egg so convenient. To bake: The oven version will have a slightly more even crumb. Storage and Reheating This dessert is best enjoyed immediately. However, you can: Keep in mind that freshness ensures the softest texture. Nutritional Perspective Because it’s single-serving, portion control becomes easier. Instead of cutting slices from a full cake, a nutella mug cake no egg satisfies your craving without excess. To lighten it: Small adjustments make a difference. Final Thoughts The beauty of a nutella mug cake no

Nutella Mug Cake No Egg – Easy 5-Minute Microwave Chocolate Dessert Read More »

Grapefruit Pie

Grapefruit Pie – A Creamy Citrus Dessert That Feels Fresh and Elegant

If you’re looking for a dessert that is both refreshing and sophisticated, grapefruit pie is a beautiful choice. This creamy citrus pie combines the bright flavor of fresh grapefruit with a smooth custard filling and a buttery crust. The result is a dessert that feels light yet indulgent, perfect for warm weather or special occasions. Many bakers compare grapefruit pie to classic citrus custard pies because of its silky texture. However, the flavor is unique. Grapefruit brings a gentle tartness with subtle sweetness, creating a balanced dessert that never feels overwhelming. Whether served at brunch, after dinner, or during a celebration, this recipe delivers a refined experience that stands out from traditional pies. Why Grapefruit Pie Is Becoming a Favorite Dessert Citrus desserts have always been popular, but grapefruit pie offers something slightly different. Instead of the intense sourness of lemon, grapefruit provides a softer citrus note that feels elegant and modern. One reason this recipe works so well is its simplicity. The filling requires only a few ingredients, yet the texture turns out rich and creamy. The natural acidity of grapefruit helps thicken the custard, giving the pie a smooth consistency without complicated techniques. Another advantage is versatility. Grapefruit pie can be dressed up with whipped cream, fresh fruit, or even a light meringue topping, making it suitable for both casual and formal settings. Ingredients You’ll Need Creating a perfect grapefruit pie starts with fresh, high-quality ingredients. Using real grapefruit juice instead of bottled juice enhances both flavor and texture. For the Crust For the Filling These ingredients combine to create the signature creamy filling that makes grapefruit pie so appealing. Optional Garnishes Step-by-Step Instructions Prepare the Crust Preheat your oven to 350°F (180°C). Place the crust in a pie dish and bake it briefly until lightly golden. Pre-baking helps prevent the base from becoming soggy once the filling is added. Mix the Filling In a mixing bowl, whisk together the condensed milk and egg yolks until smooth. Add the grapefruit zest, then slowly pour in the fresh juice while whisking gently. You’ll notice the mixture thickening slightly as the citrus reacts with the milk. Bake the Pie Pour the filling into the warm crust and bake until the edges are set while the center remains slightly soft. This gentle baking process allows grapefruit pie to develop its creamy custard texture. Chill Before Serving Let the pie cool completely, then refrigerate it for several hours. Chilling is essential because it helps the filling firm up and improves the flavor. The Secret Behind the Creamy Texture The magic of grapefruit pie lies in the balance between acidity and richness. When citrus juice combines with condensed milk, the proteins naturally begin to thicken. Egg yolks then stabilize the mixture during baking, creating a smooth custard that holds its shape. Unlike heavy cream-based desserts, this pie feels light while still delivering a satisfying bite. The result is a texture that is both silky and refreshing, making grapefruit pie a wonderful alternative to richer cakes or pastries. ✨ If you enjoy light and airy desserts, you may also love our cloud cake recipe, a soft and delicate treat perfect for citrus lovers. Expert Tips for Success Choose the Right Grapefruit Pink or red grapefruit tends to be sweeter, while white grapefruit has a stronger tangy flavor. Both work beautifully, depending on your preference. Zest First Always zest the fruit before juicing. This ensures you capture the aromatic oils that enhance the pie’s flavor. Avoid Overbaking The center should still jiggle slightly when you remove the pie from the oven. It will continue to set as it cools. Chill Long Enough For the best slices, allow grapefruit pie to chill overnight. This step makes a big difference in texture and presentation. ✨ For a richer bakery-style flavor, try our pistachio loaf, a moist and nutty dessert that pairs beautifully with fresh fruit pies. Creative Variations One of the reasons grapefruit pie is so popular is its adaptability. Small changes can create entirely new flavor experiences. Meringue Topping Adding a soft meringue layer brings extra sweetness and visual appeal. The airy texture contrasts beautifully with the creamy filling. Graham Cracker Crust A graham crust introduces a subtle crunch and enhances the dessert’s sweetness, making it especially appealing for those who prefer milder citrus flavors. Mixed Citrus Version Combining grapefruit with lemon or lime juice creates a brighter, more complex taste while keeping the classic custard texture. ✨ Looking for a refreshing drink to serve alongside this dessert? Our peach iced tea is a bright and cooling option that complements sweet citrus flavors perfectly. Serving Ideas Presentation plays an important role in how grapefruit pie is enjoyed. Because of its delicate color and smooth surface, simple garnishes often work best. This dessert pairs beautifully with tea, light coffee, or sparkling water, making it ideal for afternoon gatherings. Storage and Make-Ahead Tips Grapefruit pie stores well in the refrigerator for several days when covered tightly. If you plan to prepare it ahead of time, wait to add toppings until just before serving so they stay fresh. You can also freeze the pie without garnish. Wrap it securely, then thaw in the refrigerator overnight before decorating. Frequently Asked Questions Does grapefruit pie taste too tart? Not at all. The sweetness of the filling balances the natural bitterness of grapefruit, resulting in a smooth and pleasant flavor. Can I use bottled grapefruit juice? Fresh juice is recommended because it provides brighter flavor and helps the filling set properly. Is grapefruit pie similar to other citrus pies? Yes, it shares a creamy texture with classic citrus custard pies but offers a more subtle and sophisticated taste. Final Thoughts Grapefruit pie is a refreshing dessert that blends simplicity with elegance. Its creamy filling, delicate citrus flavor, and beautiful presentation make it a wonderful addition to any dessert table. Whether you’re baking for a family dinner or a special celebration, this pie delivers a unique twist on traditional citrus recipes. Once

Grapefruit Pie – A Creamy Citrus Dessert That Feels Fresh and Elegant Read More »

pioneer woman broccoli cheese soup

Pioneer Woman Broccoli Cheese Soup – Creamy Comfort in Every Spoon

There is something timeless about a warm bowl of pioneer woman broccoli cheese soup. Creamy, cheesy, and packed with tender vegetables, this recipe has become a favorite for home cooks who want a comforting meal without complicated steps. Known for its rich texture and approachable ingredients, pioneer woman broccoli cheese soup transforms simple broccoli and cheddar into a cozy dish that feels perfect for both busy weekdays and relaxed weekends. From its velvety base to its satisfying flavor, pioneer woman broccoli cheese soup captures the essence of classic American comfort food. Whether you are cooking for family or preparing a quick meal for yourself, this recipe delivers warmth and simplicity in every bite. Why This Soup Became a Comfort Food Classic The appeal of pioneer woman broccoli cheese soup lies in its balance between indulgence and simplicity. Instead of complicated techniques, the recipe focuses on everyday ingredients like butter, milk, cheese, and fresh broccoli. These elements combine to create a smooth, creamy consistency that feels both homemade and satisfying. Another reason people love pioneer woman broccoli cheese soup is its versatility. Some cooks prefer a chunky version with visible broccoli florets, while others blend the soup until it becomes silky and smooth. Regardless of texture, the flavor remains comforting and familiar. Ingredients for Pioneer Woman Broccoli Cheese Soup One of the best things about pioneer woman broccoli cheese soup is how accessible the ingredients are. Most items are already in a typical kitchen, making this recipe easy to prepare at any time. Main Ingredients Optional Additions Using freshly grated cheese is highly recommended when making pioneer woman broccoli cheese soup because it melts smoothly and creates a creamy finish. Step-by-Step Instructions Step 1: Sauté the Onion Begin by melting butter in a large pot over medium heat. Add diced onion and cook until soft and fragrant. This step builds the foundation of flavor that defines pioneer woman broccoli cheese soup. Step 2: Make the Roux Sprinkle flour over the cooked onions and stir constantly. The mixture should look slightly thick and pasty. This roux helps pioneer woman broccoli cheese soup achieve its signature creamy texture. Step 3: Add the Dairy Slowly pour in milk and half-and-half while whisking gently. Continue stirring as the mixture thickens into a smooth base. Step 4: Cook the Broccoli Add chopped broccoli, salt, and pepper. Reduce heat and allow the soup to simmer until the vegetables become tender. This slow cooking step allows pioneer woman broccoli cheese soup to develop its rich flavor. Step 5: Melt the Cheese Lower the heat and gradually add shredded cheddar. Stir slowly until the cheese melts completely, giving pioneer woman broccoli cheese soup its creamy, cheesy finish. Step 6: Choose Your Texture You can leave the soup chunky, mash part of the broccoli, or blend it partially for a smoother consistency. Each method creates a slightly different experience while keeping the classic taste. Slow Cooker Variation For a hands-off method, pioneer woman broccoli cheese soup can be adapted to a slow cooker. Combine broccoli, onion, and liquid ingredients, then cook until tender. Once finished, blend part of the soup and stir in cheese before serving. This version produces a lighter texture while maintaining the comforting flavor that makes pioneer woman broccoli cheese soup so popular. Expert Tips for Perfect Results Grate Cheese Fresh Fresh cheese melts better and prevents a grainy texture. Keep Heat Low After Adding Cheese High temperatures can cause separation, so gentle heat is key. Season Gradually Because cheddar is naturally salty, taste before adding extra seasoning. Add a Touch of Nutmeg A small pinch enhances the creaminess without overpowering pioneer woman broccoli cheese soup. ✅ If you enjoy cheesy vegetable dishes, you may also love our smashed broccoli with cheese recipe for a crispy and flavorful twist. Serving Ideas and Presentation Pioneer woman broccoli cheese soup pairs beautifully with simple sides. Serve it in a bowl with crusty bread, or create a restaurant-style meal by placing it inside a bread bowl. Garnish with extra cheese, black pepper, or chopped herbs for a polished look. Some cooks enjoy adding crunchy toppings like toasted croutons, while others keep the presentation simple and rustic. No matter how you serve it, pioneer woman broccoli cheese soup always feels inviting. ✅ Looking for a hearty side dish to serve alongside your soup? Try our classic potato O’Brien for a golden and satisfying addition. Storage and Reheating Store leftover pioneer woman broccoli cheese soup in an airtight container in the refrigerator for up to four days. Reheat slowly over low heat, stirring frequently to maintain its creamy consistency. Because it contains dairy, freezing may change the texture slightly. If you decide to freeze pioneer woman broccoli cheese soup, reheat gently and stir well to restore smoothness. Nutritional Notes Although pioneer woman broccoli cheese soup is rich and comforting, it also includes vegetables that add fiber and nutrients. Broccoli provides vitamins and freshness, while the creamy base makes the soup filling enough to serve as a main dish. Enjoying pioneer woman broccoli cheese soup in moderation allows you to experience both comfort and nourishment. Common Mistakes to Avoid Even a simple recipe can have challenges. Here are a few tips to keep pioneer woman broccoli cheese soup perfect every time: Paying attention to these small details makes a big difference in the final result. Flavor Variations to Try Once you master the classic pioneer woman broccoli cheese soup, you can experiment with new flavors: These small changes keep pioneer woman broccoli cheese soup exciting while maintaining its comforting character. ✅ For another creamy and comforting appetizer, explore our cottage cheese spinach artichoke dip, perfect for pairing with warm bread or crackers. Frequently Asked Questions Can I use frozen broccoli? Yes, frozen broccoli works well and makes preparation faster. What is the best cheese? Sharp cheddar is traditional, but you can combine cheeses for a more complex flavor. How do I make the soup thicker? Allow the roux to cook properly and

Pioneer Woman Broccoli Cheese Soup – Creamy Comfort in Every Spoon Read More »

Smashed Broccoli with Cheese

Smashed Broccoli with Cheese: A Crispy Oven-Roasted Recipe Full of Flavor

If you want a simple way to turn vegetables into something irresistible, smashed broccoli with cheese is a recipe you need to try. This modern cooking method transforms ordinary broccoli into crispy, golden bites that are packed with flavor. With tender centers and crunchy cheesy edges, smashed broccoli with cheese works beautifully as a side dish, appetizer, or healthy snack. Unlike traditional roasted vegetables, smashed broccoli with cheese uses a special technique that increases the surface area of each floret. By flattening the broccoli before roasting, you create more contact with the baking tray, allowing the cheese to melt and crisp into a delicious crust. The result is a dish that feels indulgent while still highlighting the natural goodness of broccoli. Why Smashed Broccoli with Cheese Is So Popular One of the reasons smashed broccoli with cheese has become such a popular recipe is its unique texture. Instead of soft or steamed vegetables, you get a combination of crispy edges and tender interiors. This contrast makes smashed broccoli with cheese appealing even to people who usually don’t enjoy vegetables. Another advantage is how easy the recipe is to prepare. With only a handful of ingredients, smashed broccoli with cheese delivers bold flavor without complicated techniques. Many home cooks love that it can be customized with different cheeses or seasonings while still keeping the same crispy base. Ingredients for the Best Smashed Broccoli with Cheese To make smashed broccoli with cheese at home, you only need a few simple ingredients. Main Ingredients Optional Add-Ins Using Parmesan cheese is often recommended because it melts quickly and forms a golden crust, which is essential for crispy smashed broccoli with cheese. Step-by-Step Instructions Step 1: Prepare the Broccoli Start by washing and trimming the broccoli. Cut the florets into medium-large pieces so they hold their shape when flattened. Bring a pot of water to a boil or prepare a steamer basket, then cook the broccoli until just fork-tender. This step softens the broccoli enough to create perfect smashed broccoli with cheese later. Once cooked, drain thoroughly and pat the broccoli dry. Removing excess moisture helps the smashed broccoli with cheese develop crispy edges during roasting. Step 2: Smash and Season Preheat your oven to 425°F (218°C) and line a baking sheet with parchment paper. Place the broccoli on the baking sheet, leaving space between each piece. Using the bottom of a glass or measuring cup, gently press each floret until flattened. Drizzle olive oil over the top and season with garlic powder, salt, and pepper. At this stage, you’ll begin to see how smashed broccoli with cheese takes shape. Step 3: Add Cheese and Roast Sprinkle Parmesan evenly across the smashed pieces. The cheese plays a major role in giving smashed broccoli with cheese its signature crispy texture. Roast for 15 to 25 minutes until the edges turn golden and slightly caramelized. The cheese should be bubbly and crisp, while the broccoli remains tender inside. Let the smashed broccoli with cheese cool for a few minutes before serving so the crust sets properly. Expert Tips for Perfect Smashed Broccoli with Cheese Dry the Broccoli Well Moisture is the main reason roasted vegetables fail to crisp. Always dry the florets thoroughly before preparing smashed broccoli with cheese. Avoid Overcrowding Spacing the pieces evenly allows hot air to circulate, helping the smashed broccoli with cheese roast instead of steam. Use High Heat A hotter oven encourages caramelization and gives smashed broccoli with cheese a richer flavor. ✨ If you enjoy bold, comforting flavors, you may also love our rich and savory Carne Con Chile recipe — a perfect complement to this dish. Flavor Variations to Try One of the best things about smashed broccoli with cheese is how adaptable it is. You can easily adjust the recipe to match different cuisines or dietary preferences. Lemon Garlic Style Add fresh lemon zest and extra garlic powder for a bright twist on smashed broccoli with cheese. Spicy Version Sprinkle chili flakes or cayenne pepper before roasting for a gentle heat that balances the cheese. Extra Cheesy Option Combine Parmesan with mozzarella or cheddar to create a softer melted layer while still keeping crispy edges. Herb-Infused Flavor Oregano, thyme, or Italian seasoning can give smashed broccoli with cheese a Mediterranean-inspired taste. ✨ For a creamy and satisfying appetizer idea, try our Cottage Cheese Spinach Artichoke Dip, a delicious option that pairs beautifully with roasted vegetables. Serving Ideas Because of its crispy texture, smashed broccoli with cheese can be served in many creative ways. It works just as well as a snack as it does as part of a full meal. This versatility is one of the reasons the recipe continues to grow in popularity. ✨ Looking for another crispy side dish? Our Potato O’Brien recipe brings golden texture and classic flavor to any meal. Nutritional Benefits Broccoli is naturally rich in vitamins, fiber, and antioxidants. When prepared as smashed broccoli with cheese, it becomes a satisfying dish that still supports balanced eating habits. Roasting instead of frying keeps the recipe lighter, while the cheese adds flavor and a small boost of protein. Because smashed broccoli with cheese uses simple ingredients, it can easily fit into many eating styles, including low-carb or balanced diets. Storage and Reheating Tips Although smasheed broccoli with cheese tastes best fresh from the oven, leftovers can still be enjoyable. Common Mistakes to Avoid Overcooking Before Smashing If the broccoli becomes too soft, smashedd broccoli with cheese may lose its structure during roasting. Using Too Much Oil A light drizzle is enough. Excess oil can make smashedd broccoli with cheese greasy instead of crispy. Skipping the Cheese Layer The cheese helps form the golden crust that makes smashed broccoli with cheese unique. Final Thoughts Smashedd broccoli with cheese proves that vegetables can be both delicious and exciting. By combining tender broccoli with a crispy cheese crust, this recipe transforms a simple ingredient into a dish that feels special. Whether you serve smashedd broccoli with cheese

Smashed Broccoli with Cheese: A Crispy Oven-Roasted Recipe Full of Flavor Read More »

almond flour tortillas

Almond Flour Tortillas: A Soft, Low-Carb Wrap You Can Make at Home

Homemade wraps have become increasingly popular as more people look for healthier alternatives to traditional bread. One recipe that stands out for its simplicity and versatility is almond flour tortillas. These gluten-free wraps are soft, flexible, and easy to prepare with only a few ingredients, making them ideal for busy kitchens. Whether you want a light lunch option or a nourishing base for tacos and wraps, learning to make almond flour tortillas at home can completely change your meal routine. Unlike classic wheat tortillas, this recipe focuses on wholesome ingredients that provide texture without relying on gluten. The result is a tender wrap that can be folded, rolled, or filled without breaking, giving you endless creative possibilities. Why Homemade Gluten-Free Wraps Are Trending Many home cooks are moving toward recipes that balance taste and nutrition. The popularity of almond flour tortillas comes from their ability to offer a soft texture while remaining naturally grain-free. They fit easily into keto, low-carb, and gluten-free lifestyles, which makes them appealing to a wide audience. Another reason for their growing popularity is how easy they are to customize. Some people prefer adding herbs or spices, while others keep the recipe minimal. No matter the variation, almond flour tortillas remain a reliable base that adapts to many flavors and cuisines. The Role of Almond Flour in This Recipe Almond flour is made from finely ground almonds and has a mild, slightly nutty taste. Its natural fats help create a moist dough that stays tender even after cooking. Because it lacks gluten, a binder such as psyllium husk is often used to give structure and flexibility to almond flour tortillas. One of the advantages of almond flour is its ability to produce wraps that feel satisfying without being heavy. Many people enjoy how almond flour tortillas provide a balanced texture that works equally well for savory fillings or lighter meals. Ingredients You Will Need The beauty of this recipe is its simplicity. Most versions of almond flour tortillas rely on only a few pantry staples, which makes them convenient for everyday cooking. Ingredients: These ingredients combine to form a soft dough that holds together without traditional flour. The psyllium absorbs moisture and helps ensure that almond flour tortillas remain flexible once cooked. Step-by-Step Instructions Preparing this recipe is straightforward, even if you’ve never worked with gluten-free dough before. Follow these steps to create perfectly soft almond flour tortillas. Step 1: Mix the Dry Ingredients In a mixing bowl, combine the almond flour, psyllium husk, and salt. Stir well so everything is evenly distributed. This helps prevent uneven texture later in the process. Step 2: Add the Liquid Pour the warm water into the bowl while stirring continuously. Within seconds, the mixture will thicken into a dough. Allow it to rest for about five minutes so the psyllium can fully hydrate, which is essential for shaping almond flour tortillas. Step 3: Shape the Dough Divide the dough into small portions and roll each piece into a ball. Place one ball between parchment sheets and flatten it into a thin circle. Rolling gently ensures that almond flour tortillas stay smooth and even. Step 4: Cook in a Skillet Heat a nonstick pan over medium heat. Cook each tortilla for one to two minutes per side until light golden spots appear. As they cook, you’ll notice how almond flour tortillas develop a soft yet sturdy texture. Helpful Tips for Success Working with almond flour requires a slightly different approach than traditional baking. These tips will help you achieve consistent results when making almond flour tortillas. With practice, shaping almond flour tortillas becomes quick and intuitive. If you enjoy simple low-carb baking, you might also love our creamy and satisfying avocado bread recipe, perfect for a healthy everyday meal. Taste and Texture Many people are pleasantly surprised by how soft and satisfying these wraps can be. The texture of almond flour tortillas is slightly more tender than wheat tortillas, with a mild nutty flavor that pairs beautifully with a variety of fillings. Because almond flour contains natural fats, the tortillas feel rich without needing extra oil. This makes almond flour tortillas a favorite choice for people looking for balanced meals that still feel indulgent. Looking for another high-protein comfort idea? Try our flavorful protein pizza, a delicious option that fits perfectly into a balanced lifestyle. Nutrition Highlights Although nutrition values vary depending on portion size, almond flour tortillas are often lower in carbohydrates compared to traditional versions. They typically contain healthy fats, moderate protein, and fiber, which contribute to a feeling of fullness. Many home cooks appreciate how almond flour tortillas support mindful eating habits while still tasting delicious. They provide an option that feels wholesome without sacrificing flavor or texture. For more light and flexible meal ideas, explore our collection of low-carb wraps, designed for quick lunches and nourishing dinners. Serving Ideas One of the reasons people enjoy making almond flour tortillas is their versatility. You can use them in countless recipes throughout the week. Here are a few creative ideas: No matter how you serve them, almond flour tortillas adapt easily to different cuisines and flavors. Flavor Variations Once you master the basic recipe, you can experiment with small changes to create new versions of almond flour tortillas. Herb Blend: Add dried oregano or basil for a savory twist.Spicy Touch: Mix in paprika or chili flakes for warmth.Richer Texture: Add a teaspoon of olive oil to the dough for extra softness. These variations allow you to personalize almond flour tortillas based on your preferences. Storage and Meal Prep Tips Homemade wraps are convenient to prepare in advance. Store cooked almond flour tortillas in an airtight container in the refrigerator for several days. For longer storage, place parchment paper between each tortilla and freeze them. When reheating, warm the tortillas gently in a skillet or microwave to restore flexibility. Proper storage ensures that almond flour tortillas stay soft and ready whenever you need them. Final Thoughts Making your

Almond Flour Tortillas: A Soft, Low-Carb Wrap You Can Make at Home Read More »