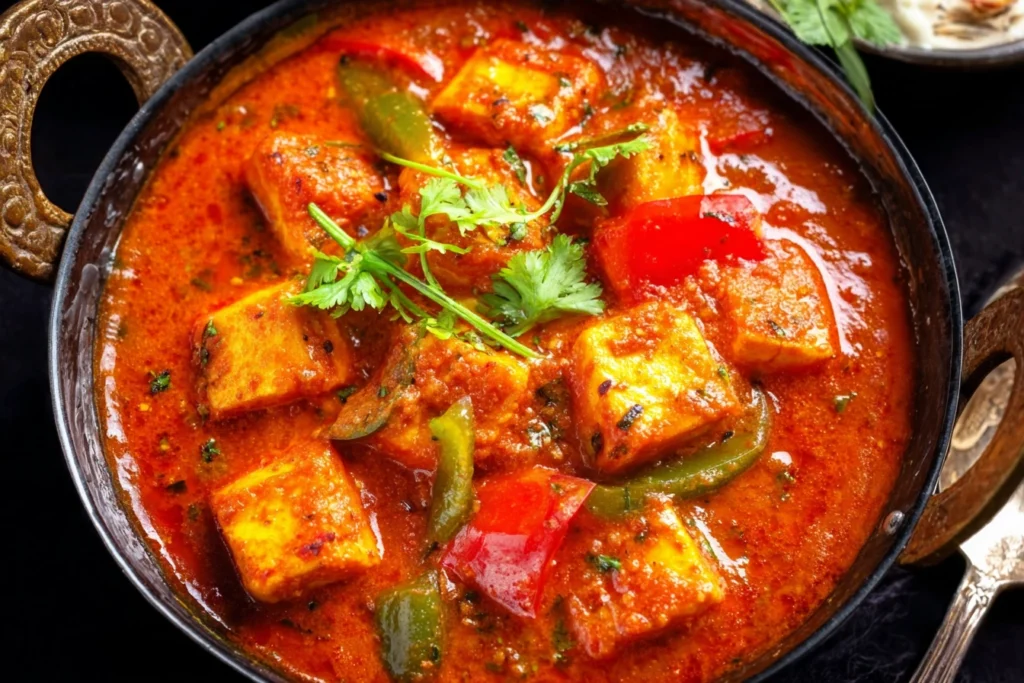
Kadai Paneer – Authentic Restaurant-Style North Indian Curry with Fresh Kadai Masala
If you enjoy bold Indian flavors and comforting vegetarian meals, kadai paneer is a recipe you need to try at home. This classic North Indian curry combines soft paneer cubes with sautéed onions, bell peppers, and a freshly ground spice blend that gives the dish its signature aroma. Unlike creamy gravies, this dish highlights roasted spices and rustic textures, making it both flavorful and satisfying. The beauty of kadai paneer lies in its simplicity. With a handful of everyday ingredients and a few traditional techniques, you can recreate a restaurant-style curry in your own kitchen. Whether served for a family dinner or a festive gathering, kadai paneer offers warmth, depth, and a vibrant taste that never disappoints. What Is Kadai Paneer? Kadai paneer is a popular North Indian dish traditionally cooked in a deep wok called a kadai. The cooking style allows the spices to toast evenly and develop a rich flavor. The curry usually features paneer, tomatoes, onions, and bell peppers coated in a fragrant masala made from roasted whole spices. Paneer is a fresh cheese that holds its shape while cooking, making it perfect for stir-fried curries. In this dish, paneer absorbs the spices without melting, giving kadai paneer its hearty texture. The combination of tangy tomato gravy and smoky spices makes this dish stand out from other paneer recipes. Why You’ll Love This Recipe There are many paneer curries, but kadai paneer has a unique appeal. The flavors are bold yet balanced, and the dish feels both comforting and festive. Here are a few reasons why this recipe is worth trying: Because kadai paneer is easy to customize, it suits different tastes and spice levels. Ingredients for Kadai Paneer For the Fresh Kadai Masala For the Curry These ingredients create the bold flavors that define kadai paneer while keeping the recipe approachable for home cooks. Step-by-Step Method Step 1: Prepare the Spice Blend Dry roast coriander seeds, dried red chilies, fennel seeds, cardamom, cloves, and cinnamon in a pan until fragrant. Let them cool and grind into a coarse powder. This freshly prepared spice blend is essential for authentic kadai paneer flavor. Step 2: Cook the Onion and Tomato Base Heat oil in a heavy pan. Add chopped onions and sauté until soft. Stir in the tomatoes and cook until they break down into a thick mixture. Allow this to cool slightly, then blend into a smooth paste. Step 3: Sauté the Vegetables Add a little oil to the pan and cook cubed onions and bell peppers on high heat. They should remain slightly crunchy with lightly charred edges. Set them aside while you prepare the masala. Step 4: Build the Masala Add ginger-garlic paste to the pan and sauté briefly. Sprinkle in the freshly ground spice mix and cook until aromatic. Add the onion-tomato puree and simmer until the mixture thickens and releases oil from the sides. Step 5: Adjust the Consistency Add water to reach your desired texture. For a richer curry, keep the sauce thick. Season with salt, garam masala, and crushed kasuri methi for added fragrance. Step 6: Finish the Dish Gently fold in paneer cubes and the sautéed vegetables. Cook for only a minute or two so the paneer stays soft. Garnish with fresh coriander leaves before serving. Semi-Dry vs. Gravy Style One of the best aspects of kadai paneer is its versatility. You can prepare it as a semi-dry dish or with a thick gravy depending on your preference. Gravy Style: Perfect for pairing with naan or basmati rice, this version has a rich tomato sauce that coats the paneer beautifully. Semi-Dry Style: With less liquid, this variation highlights the roasted spices and crisp vegetables, making it ideal as a side dish. Both versions maintain the essence of kadai paneer while offering different textures. For a creamy, protein-packed appetizer idea, don’t miss our cottage cheese buffalo chicken dip, a flavorful option that’s perfect for sharing. Expert Tips for Perfect Flavor Choose Quality Paneer Fresh paneer gives the best texture. If using packaged paneer, soak it in warm water for a few minutes before cooking to soften it. Roast the Spices Carefully The spice blend defines kadai paneer, so roast the spices gently to avoid burning them. Avoid Overcooking Paneer Paneer becomes firm if cooked too long. Add it toward the end of the recipe for the best results. Use High Heat for Authentic Taste Quick sautéing of onions and peppers adds a slightly smoky flavor that makes the dish taste like restaurant food. Looking for something light, crunchy, and full of vibrant spices? Try our refreshing bhel puri recipe for a delicious street-food inspired twist. Serving Suggestions Kadai paneer pairs wonderfully with many Indian staples. Serve it hot with: You can also add a side of cucumber salad or yogurt raita to balance the bold spices. If you enjoy bold and comforting flavors, you might also love our carne con chile recipe, a rich and satisfying dish perfect for hearty meals. Variations to Try Creamy Version Add a splash of cream at the end for a richer texture while keeping the spices prominent. Vegan Alternative Replace paneer with firm tofu to create a plant-based version of kadai paneer. Extra Spicy Style Increase the dried red chilies in the spice blend if you prefer more heat. No Onion-Garlic Option Skip onions and garlic for a lighter version that still delivers strong flavors. Nutritional Highlights Paneer provides protein and calcium, while bell peppers and tomatoes contribute vitamins and antioxidants. When prepared with moderate oil, kadai paneer can be part of a balanced vegetarian diet that feels both nourishing and indulgent. Frequently Asked Questions What makes this dish different from other paneer curries? The freshly ground spices and sautéed vegetables give kadai paneer its rustic, bold character compared to creamy paneer gravies. Can I make this recipe without a kadai pan? Yes, a heavy skillet or wok works perfectly well. How spicy is it? The heat level is adjustable depending on how many
Kadai Paneer – Authentic Restaurant-Style North Indian Curry with Fresh Kadai Masala Read More »