diamondmeals.com

drsoukainaelaziz@gmail.com

Pistachio Syrup

Pistachio Syrup: A Complete Homemade Guide for Drinks, Desserts, and Creative Recipes

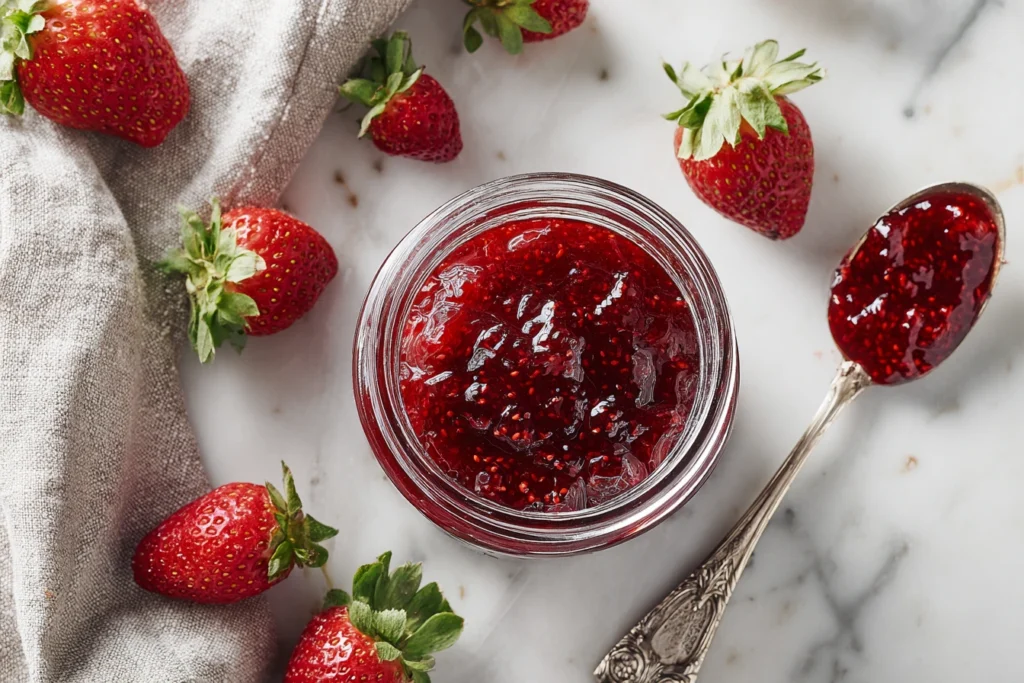
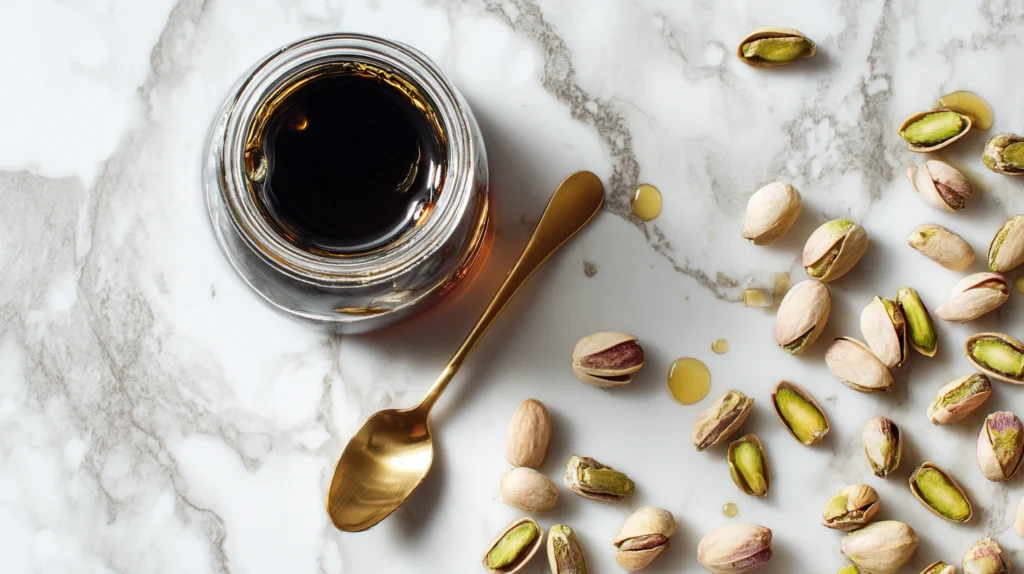
Pistachio syrup is one of those ingredients that instantly elevates any recipe it touches. With its delicate nutty aroma, subtle sweetness, and luxurious character, it has become a favorite in coffee shops, home kitchens, and dessert studios around the world. Whether stirred into a warm latte, drizzled over pancakes, or blended into a milkshake, pistachio syrup brings depth and elegance that few other flavored syrups can match. In this article, you will discover everything you need to know about pistachio syrup: what it is, how to make it at home, expert techniques for perfect flavor, variations to suit different lifestyles, and the many delicious ways to use it. What Is Pistachio Syrup? Pistachio syrup is a sweet, nut-infused liquid made by combining sugar, water, and pistachios. During gentle cooking, the pistachios release their natural oils and flavor compounds into the syrup, creating a smooth and aromatic result. Unlike artificial nut syrups, a well-made pistachio syrup delivers a natural taste that feels rich but balanced. Its texture is slightly thicker than simple syrup, making it ideal for beverages, desserts, and sauces. The flavor profile is soft, creamy, and mildly roasted, with a sweetness that complements rather than overwhelms other ingredients. Why Make Pistachio Syrup at Home? Making pistachio syrup at home gives you full control over quality and flavor. Many commercial syrups rely heavily on artificial coloring and flavoring, while homemade versions highlight real pistachios as the star ingredient. Homemade pistachio syrup allows you to: For anyone who values flavor and simplicity, homemade pistachio syrup is an excellent kitchen staple. Ingredients Needed A classic pistachio syrup recipe requires only a few ingredients, yet each one plays an essential role: Choosing fresh pistachios with a pleasant aroma is key to achieving a high-quality syrup. Step-by-Step Method 1. Prepare the Pistachios Roughly chop the pistachios to expose their interior. This helps release flavor during cooking. 2. Combine Ingredients Add sugar, water, and pistachios to a saucepan and stir gently. 3. Heat Gently Bring the mixture to a boil over medium heat, stirring until the sugar is fully dissolved. 4. Simmer Slowly Reduce the heat and let the mixture simmer for 8–10 minutes. This step allows the pistachio flavor to infuse deeply into the syrup. 5. Rest for Infusion Remove from heat and let the syrup sit for about 15 minutes to intensify the flavor. 6. Strain Strain through a fine mesh sieve or cheesecloth, pressing lightly to extract all liquid. 7. Cool and Store Once cooled, pour the pistachio syrup into a clean bottle and refrigerate. For a richer pistachio experience, you may also enjoy our homemade pistachio sauce recipe, perfect for desserts and drinks. Flavor and Texture Characteristics Properly prepared pistachio syrup should be smooth, lightly thick, and glossy. The taste is gently sweet with a clear pistachio presence that feels creamy rather than heavy. The color may range from pale gold to light green depending on the pistachios used. As it cools, the syrup naturally thickens, making it ideal for both hot and cold applications. Pistachio Syrup Variations Sugar-Free Option Use a sugar substitute designed for cooking. A small amount of thickener can help replicate traditional texture. Extra-Rich Version Blending the syrup briefly before straining extracts more nut oils, producing a more intense pistachio flavor. Lightly Aromatic Version A touch of vanilla or almond extract enhances depth without overpowering the pistachio. Each variation allows pistachio syrup to adapt to different dietary needs and flavor preferences. If you love natural sweetness, don’t miss our strawberry jam without pectin, made with simple ingredients and pure fruit flavor. How to Use Pistachio Syrup Coffee and Hot Drinks Pistachio syrup pairs beautifully with espresso, cappuccino, and lattes. It adds warmth and a refined nutty sweetness. Iced Beverages It dissolves easily in iced coffee, cold brew, and iced milk drinks, creating a refreshing yet indulgent result. Desserts Drizzle pistachio syrup over ice cream, waffles, pancakes, or yogurt. It also works well in dessert sauces and glazes. Baking Use it to flavor cake layers, frostings, or pastry fillings for a subtle pistachio note. Cocktails and Mocktails Pistachio syrup brings originality to drinks, especially creamy or nut-based beverages. For a unique and refreshing pairing, try our banana matcha recipe, a smooth blend that works beautifully with nutty flavors. Expert Tips for Best Results Attention to detail ensures consistently excellent pistachio syrup. Pistachio Syrup Compared to Other Flavored Syrups Unlike vanilla or caramel syrups, pistachio syruup offers complexity from natural nut oils. It provides body as well as sweetness, acting as both a flavor enhancer and textural element. This makes it feel more luxurious, even when used sparingly. Its versatility allows it to shine in both simple and elaborate recipes. Why Pistachio Syrup Is So Popular The growing interest in specialty coffee and homemade gourmet recipes has brought pistachio syruup into the spotlight. Its unique flavor, elegant appearance, and wide range of uses make it appealing to both professionals and home cooks. As people seek more natural and distinctive flavors, pistachio syrup continues to stand out as a refined yet comforting choice. Final Thoughts Pistachio syruup is a simple ingredient with remarkable impact. Made from just a few components, it transforms drinks and desserts into memorable creations. Preparing pistachio syrup at home allows you to enjoy authentic flavor, customize sweetness, and elevate everyday recipes with ease. Once you add pistachio syruup to your kitchen, it quickly becomes an indispensable so favorite. This article draws inspiration from trusted culinary references, including detailed guides such as as this pistachio syrup resource.

Pistachio Syrup: A Complete Homemade Guide for Drinks, Desserts, and Creative Recipes Read More »

banana syrup for coffee

Banana Syrup for Coffee (Easy Homemade Café-Style Recipe)

Banana syrup for coffee is a unique and comforting way to add natural sweetness and depth to your favorite coffee drinks. Smooth, aromatic, and gently spiced, this homemade syrup transforms ordinary coffee into a café-style experience without relying on artificial flavors or preservatives. Made from ripe bananas and simple pantry ingredients, it delivers a warm, bakery-inspired taste that feels indulgent yet balanced. In recent years, flavored coffee syrups have become increasingly popular, especially among home baristas looking to recreate specialty drinks at home. Banana syrup for coffee stands out because it offers something different from classic vanilla or caramel. Its flavor is soft, rounded, and naturally sweet, making it ideal for both hot and iced coffee drinks. What Is Banana Syrup for Coffee? Banana syrup for coffee is a fruit-based syrup created by simmering ripe bananas with a sweetener and water until the flavors concentrate into a smooth, pourable liquid. Unlike commercial syrups that rely on extracts, this version uses real bananas, which gives it depth, authenticity, and a naturally rich aroma. The purpose of banana syrup for coffee is not to overpower the drink, but to enhance it. When used correctly, it blends seamlessly with coffee, adding subtle sweetness and a comforting note reminiscent of banana bread or caramelized fruit. Its texture allows it to dissolve easily into hot espresso or cold beverages without separating. Because it is made from real ingredients, banana syrup for coffee offers a fresher, more nuanced flavor than many store-bought alternatives. Why Banana Works So Well in Coffee Coffee naturally contains bitter, roasted, and sometimes chocolatey notes. These flavors benefit from gentle sweetness and warmth. Banana syrup for coffee complements coffee because ripe bananas contain natural sugars and mild caramel tones that soften bitterness without masking the coffee itself. When combined with vanilla and cinnamon, banana syrup develops a flavor profile that feels cozy and familiar. It pairs particularly well with creamy textures, which is why it shines in lattes, cappuccinos, and iced milk-based drinks. Even in black coffee or cold brew, a small amount of banana syrup for coffee can round out sharp edges and create balance. This harmony between fruit sweetness and roasted coffee makes banana syrup a surprisingly elegant addition. Ingredients for Banana Syrup for Coffee This recipe relies on simple, accessible ingredients. The quality of your bananas is the most important factor. Ingredients Optional additions include nutmeg, allspice, or a cinnamon stick for extra warmth. These ingredients work together to create a balanced banana syrup for coffee that is flavorful without being heavy. How to Make Banana Syrup for Coffee Making banana syrup for coffee is quick and straightforward, even for beginners. The process takes about ten minutes. Step 1: Prepare the Bananas Peel the bananas and mash them thoroughly in a bowl. The riper the bananas, the sweeter and more aromatic the syrup will be. Step 2: Combine Ingredients Place the mashed bananas, sweetener, water, cinnamon, and salt into a small saucepan. Stir gently to combine. Step 3: Simmer Heat the mixture over medium heat until it reaches a gentle simmer. Stir occasionally and allow it to cook for 5 to 7 minutes. During this time, the flavors will blend and the liquid will slightly thicken. Step 4: Add Vanilla Remove the saucepan from heat and stir in the vanilla extract. This step enhances the aroma and smoothness of the banana syrup for coffee. Step 5: Strain For a smooth, professional texture, strain the syrup through a fine mesh sieve. Press gently to extract as much liquid as possible. Step 6: Cool and Store Let the syrup cool completely before transferring it to a clean glass container. As it cools, the banana syrup for coffee will thicken slightly. If you enjoy creamy, nut-forward flavors, you may also love our pistachio sauce recipe, which adds a rich and elegant touch to both drinks and desserts How to Use Banana Syrup for Coffee Once prepared, banana syrup for coffee can be used in many different ways. Hot Banana Latte Add one to two tablespoons of banana syrup for coffee to a cup of espresso. Top with steamed milk and stir gently. This creates a comforting, café-style drink. Iced Coffee Pour cold coffee or cold brew over ice, add banana syrup for coffee, and finish with milk or a plant-based alternative. The result is refreshing and smooth. Cold Brew Stir banana syrup for coffee directly into cold brew to soften its boldness while maintaining its strength. Dessert-Style Drinks Banana syrup pairs well with chocolate or cocoa, creating rich drinks reminiscent of dessert coffees. Start with a small amount and adjust according to taste. Banana syrup for coffee is naturally sweet, so moderation is key. For another homemade classic, our strawberry jam made without pectin is a beautiful example of how simple ingredients can deliver pure, authentic flavor Variations of Banana Syrup for Coffee One of the advantages of banana syrup for coffee is how easy it is to customize. Caramelized Banana Version Lightly caramelize the bananas with sugar before adding water. This creates a deeper, more intense flavor. Banana Bread Style Add nutmeg and extra cinnamon to mimic the taste of banana bread. Vegan Option Use maple syrup or coconut sugar to keep the recipe fully plant-based. Each variation keeps the essence of banana syrup for coffee while offering a slightly different experience. If you’re curious about unique café-style combinations, our banana matcha recipe offers a smooth and modern twist that pairs wonderfully with natural sweetness. Storage and Shelf Life Because it contains fresh fruit, banana syrup for coffee should be stored in the refrigerator. Use an airtight container and consume within 4 to 5 days. If the syrup thickens too much when cold, warm it slightly or stir in a small amount of water or coffee before use. Tips for Best Results These small details make a noticeable difference in the final banana syrup for coffee. Beyond Coffee Uses Although designed for coffee, banana syrup can also be drizzled over

Banana Syrup for Coffee (Easy Homemade Café-Style Recipe) Read More »

carne con chile

Carne con Chile Recipe – Authentic Slow-Cooked Beef with Rich Chile Flavor

Carne con chile is a classic dish that represents comfort, tradition, and bold flavor. Built around slow-cooked beef and a rich chile-based sauce, this recipe has been passed down through generations and adapted across regions while preserving its essence. Hearty, warming, and deeply satisfying, it remains a favorite for family meals and special gatherings alike. This dish is rooted in rustic cooking, where simple ingredients are transformed through time and technique. Rather than relying on heavy sauces or shortcuts, the focus is on carefully prepared chiles, quality beef, and patience. The result is a stew that is rich without being heavy and spicy without overpowering the palate. The Character of a Classic Dish What makes carne con chile special is its balance. The dish highlights the natural richness of beef while allowing the chiles to provide depth, smokiness, and warmth. Unlike many modern chili-style recipes, this preparation emphasizes flavor development over heat intensity. The texture is equally important. The beef is cooked until tender enough to break apart with a spoon, while the sauce thickens naturally as it simmers. Every bite carries layers of flavor that feel both comforting and bold. Ingredients That Build Flavor A successful carne con chile starts with carefully chosen ingredients. Each one plays a specific role in building the final taste. Core Ingredients Optional Enhancements The ingredient list is intentionally simple. The depth of flavor comes from preparation and slow cooking rather than complexity. Preparing the Chile Sauce The heart of carne con chile lies in its sauce. Begin by removing stems and most seeds from the dried chiles. Briefly rinse them, then soak them in hot water until soft. This process releases their aroma and flavor. Once softened, the chiles are blended with garlic and a portion of onion until smooth. A small amount of soaking liquid or broth helps achieve the right consistency. For a refined texture, the sauce can be strained, though this step is optional. This sauce forms the foundation of the dish and determines much of its final character. Browning the Beef for Depth Proper browning is essential. Season the beef with salt and pepper, then brown it in a heavy pot over medium-high heat. Work in batches to avoid steaming the meat. This step creates caramelized flavors that enrich the final dish. Once browned, the beef is set aside while the base of the stew is prepared. Building the Stew Base In the same pot, onions are cooked until soft and lightly golden. Garlic is added briefly to release its aroma. The chile sauce is then poured in and stirred thoroughly, lifting the flavorful browned bits from the bottom of the pot. This mixture is gently simmered to allow the flavors to blend before the beef is returned to the pot. Slow Cooking to Perfection The browned beef is added back, followed by enough broth to partially cover the meat. Spices are added, and the heat is lowered. The stew is covered and allowed to simmer slowly. This stage is where carne con chile truly develops its character. Over the course of two to three hours, the beef becomes tender and absorbs the chile sauce. Occasional stirring ensures even cooking and prevents sticking. As the liquid reduces, the sauce thickens naturally, coating the meat with rich flavor. Final Adjustments and Balance Before serving, the stew is tasted and adjusted. Salt, spices, or liquid can be added as needed. The ideal consistency is thick but still spoonable. Allowing the dish to rest briefly before serving enhances its depth, as the flavors continue to meld. Serving Suggestions Carne con chile is extremely versatile at the table. It can be served in many traditional and creative ways: No matter how it is served, the dish remains hearty and satisfying. If you enjoy rich, home-style flavors, our picadillo recipe is another comforting classic worth exploring. Helpful Tips for Best Results These simple tips make a noticeable difference in the final result. For a bold and festive dish packed with smoky character, our discada recipe offers a delicious change of pace Popular Variations While the traditional preparation is widely loved, carne con chile can be adapted in subtle ways: Each variation keeps the soul of the dish intact while offering something new. Why This Dish Endures The lasting appeal of carne con chile lies in its simplicity and depth. It is a dish that rewards patience and care, turning humble ingredients into something memorable. It brings warmth to the table and invites sharing, making it as meaningful as it is flavorful. This recipe reflects a cooking philosophy that values time, balance, and tradition — qualities that never go out of style. Seafood lovers may also appreciate our tacos gobernador recipe, a refined blend of shrimp, cheese, and Mexican flair. Frequently Asked Questions About carne con chile How does “chile con carne” sound in Spanish? “Chile con carne” literally means chile with meat. In Spanish-speaking regions, it often refers to a meat-based dish cooked with chiles, though the exact preparation varies by country. What meat is used for Chile Colorado? Chile Colorado is traditionally made with beef, most commonly beef chuck or beef shoulder, which becomes tender after slow cooking in a red chile sauce. What is the best meat to use in chile? The best meat for chile is well-marbled beef such as chuck roast or stew meat, as it stays juicy and tender during long simmering. How is carne con chile traditionally made? Carne con chile is traditionally prepared by slow-cooking chunks of beef in a sauce made from dried chiles, garlic, onions, and spices until the meat is tender and deeply flavored. Conclusion Rich, comforting, and deeply flavorful, carne con chile remains a timeless classic. Its tender beef, bold chile sauce, and slow-cooked richness make it a dish worth mastering. Whether prepared for a family meal or a special occasion, it delivers satisfaction with every bite. Once you make it part of your kitchen repertoire, it becomes more than just a

Carne con Chile Recipe – Authentic Slow-Cooked Beef with Rich Chile Flavor Read More »

Prune Juice and Butter Recipe

Prune Juice and Butter Recipe: Natural Digestive Relief That Works Fast

The prune juice and butter recipe has become increasingly popular as a natural, home-based solution for occasional digestive discomfort. Many people are searching for gentle alternatives to commercial laxatives, and this simple combination has drawn attention because it uses familiar ingredients that are easy to prepare and widely available. Although it may sound unusual at first, the idea behind this drink is rooted in the known digestive properties of prune juice combined with a small amount of dietary fat. This article explores the prune juice and butter recipe in detail, including how it works, how to prepare it correctly, when to use it, and important considerations for safe use. The goal is to provide a clear, balanced, and informative guide suitable for a high-quality recipe or wellness blog. What Is the Prune Juice and Butter Recipe? The prune juice and butter recipe is a warm beverage made by gently heating prune juice and stirring in a small amount of unsalted butter until fully melted. It is typically consumed on an empty stomach, most often in the morning or in the evening before bed. This recipe is not a traditional culinary dish but rather a functional drink used for digestive support. Its popularity comes largely from personal experiences shared online and from the long-standing reputation of prune juice as a natural aid for bowel regularity. Why Prune Juice Plays a Central Role Prune juice is produced from dried plums that are rehydrated and pressed into liquid form. It has been used for decades to support digestion, making it the key ingredient in the prune juice and butter recipe. Sorbitol and Water Retention Prune juice naturally contains sorbitol, a type of sugar alcohol that attracts water into the intestines. This process helps soften stool and encourages smoother bowel movements. This mechanism is one of the primary reasons prune juice is effective for digestive support. Natural Fiber Content While prune juice contains less fiber than whole prunes, it still contributes soluble fiber, which helps regulate stool consistency and movement. When combined with adequate hydration, this fiber supports overall gut function. Micronutrients and Hydration Prune juice provides potassium and antioxidants that support muscle activity and fluid balance in the digestive system. Hydration plays a crucial role in maintaining regular digestion, and prune juice contributes to daily fluid intake. The Purpose of Butter in the Recipe The inclusion of butter in the prune juice and butter recipe is intentional and functional rather than purely for taste. Dietary Fat and Digestive Response Dietary fats stimulate bile release, which plays a role in digestion and intestinal movement. A small amount of butter may help activate digestive processes and complement the effects of prune juice. Texture and Palatability Butter gives the drink a smoother texture and slightly mellows the intense sweetness of prune juice. When consumed warm, this combination can feel soothing to the digestive system. Choosing the Right Butter Unsalted butter is recommended to avoid excess sodium. Using only a small quantity ensures the drink remains gentle and easy to digest. Ingredients You Will Need To prepare the classic prune juice and butter recipe, you only need: Optional ingredients for flavor: These additions are optional and do not significantly affect the digestive function of the recipe. How to Make the Prune Juice and Butter Recipe Step 1: Heat the Prune Juice Warm the prune juice gently in a saucepan or microwave. It should be warm but not boiling. Step 2: Add the Butter Add one teaspoon of unsalted butter to the warm juice and stir until fully melted. Step 3: Mix Thoroughly Ensure the butter is evenly incorporated for a smooth texture. Step 4: Drink Slowly Sip the drink slowly while it is warm, preferably on an empty stomach. Preparing the prune juice and butter recipe takes less than five minutes and requires no special equipment. When Is the Best Time to Use It? Most people use the prune juice and butter recipe either in the morning or in the evening. The timing depends on personal preference and digestive response. For a soothing and visually stunning drink, be sure to explore our Butterfly Pea Flower Tea recipe, loved for both its color and calming properties How Often Should It Be Used? This recipe is intended for occasional use, not daily consumption. Using the prune juice and butter recipe responsibly helps avoid dependency. If you enjoy warm, aromatic beverages, our Clove Tea recipe is a wonderful option to complement your daily wellness routine. Potential Benefits The prune juice and butter recipe may offer several benefits when used occasionally: These benefits make it appealing for people seeking a natural digestive aid. Those looking for a simple, functional blend may also appreciate our Bariatric Seed Trick recipe, thoughtfully created for mindful eating habits Possible Side Effects and Precautions While generally safe for most adults, some precautions should be considered: Listening to your body is essential when using any digestive remedy. Variations of the Recipe Dairy-Free Option Replace butter with coconut oil or olive oil. Lighter Version Use half a teaspoon of butter instead of a full teaspoon. Flavor Variation Add cinnamon or vanilla for taste without affecting digestion. These variations allow flexibility while maintaining the core concept of the prune juice and butter recipe. Supporting Digestive Health Naturally While the prune juice and butter recipe can help occasionally, long-term digestive health depends on daily habits: These factors reduce the need for remedies over time. Frequently Asked Questions Is the prune juice and butter recipe safe for regular use?It is best used occasionally rather than daily. Can it replace medical treatment?No. Persistent digestive issues should always be evaluated by a healthcare professional. Why do people put butter in prune juice?Butter adds a small amount of fat that may help stimulate digestion and support bowel movement, while also softening the strong taste of prune juice. How quickly do prune juice and butter work?Results vary, but many people notice an effect within a few hours to the next day, depending on individual

Prune Juice and Butter Recipe: Natural Digestive Relief That Works Fast Read More »

Strawberry Jam Without Pectin

Strawberry Jam Without Pectin: A Traditional Homemade Recipe Worth Mastering

Homemade jam has a special place in the kitchen, especially when it is prepared using simple, time-honored methods. Making strawberry jam without pectin allows the natural flavor of fresh strawberries to take center stage while avoiding artificial thickeners. This approach relies on careful cooking, the right balance of sugar and acidity, and a bit of patience. The result is a jam that tastes fresher, richer, and more authentic than many commercial alternatives. This guide will walk you through every step of the process, from ingredient selection to storage tips, helping you achieve a perfect homemade jam with a smooth, spreadable texture and vibrant strawberry flavor. Why Make Jam Without Added Pectin? Traditional jam recipes existed long before commercial pectin became widely available. In those methods, fruit, sugar, and acid worked together naturally to create a thick preserve. Strawberry jam without pectin follows this classic technique, producing a softer and more luxurious texture that many people prefer. There are several reasons why this method remains popular: This style of jam is especially appealing for those who enjoy cooking from scratch and value simple, traditional preparations. How Jam Thickens Naturally To understand why strawberry jam without pectin works, it helps to know what causes jam to set. Three elements are essential: Strawberries are naturally low in pectin, so longer cooking and the addition of lemon juice are necessary. As the mixture simmers, water evaporates, sugars concentrate, and the jam thickens gradually. The final texture sets more firmly as it cools. Ingredients You Will Need The success of this recipe depends on ingredient quality more than quantity. Core Ingredients Optional Enhancements Each ingredient plays a specific role in achieving the ideal balance for strawberry jam without pectin. Selecting the Best Strawberries Choose strawberries that are fully ripe, bright red, and fragrant. Ripe berries provide natural sweetness and better flavor concentration. Avoid underripe strawberries, which lack sweetness, or overly soft berries, which can release excess water and affect consistency. High-quality fruit is the foundation of excellent strawberry jam without pectin, so seasonal, locally sourced strawberries often produce the best results. Step-by-Step Cooking Instructions Step 1: Prepare the Fruit Wash the strawberries thoroughly, remove the stems, and chop them into evenly sized pieces. Smaller pieces break down more easily during cooking. Step 2: Combine with Sugar Place the strawberries in a large bowl and mix with the sugar. Let the mixture rest for 30 to 45 minutes. This process draws out the juices and begins dissolving the sugar, which helps prevent crystallization during cooking. Step 3: Add Lemon Juice Stir in the lemon juice just before cooking. This step is essential for flavor balance and proper thickening. Step 4: Cook Slowly Transfer the mixture to a heavy-bottomed pot and cook over medium heat, stirring frequently until the sugar fully dissolves. Once boiling begins, reduce the heat slightly and allow the mixture to simmer uncovered. As it cooks, the mixture will foam and thicken. Stir regularly to prevent sticking or burning. This stage is crucial for developing the correct texture for strawberry jam without pectin. Step 5: Test for Set To test doneness, place a small spoonful of jam on a chilled plate. After a few seconds, push it gently with your finger. If it wrinkles and holds its shape, the jam is ready. Step 6: Jar and Cool Remove the pot from heat and allow the jam to rest briefly. Spoon into clean jars, leaving a small gap at the top. Seal and allow to cool completely at room temperature. What Texture to Expect Unlike commercial jams, strawberry jam without pectin has a softer, more natural consistency. It spreads easily but is not stiff or rubbery. The jam continues to thicken as it cools and reaches its final texture after several hours. This softer set is ideal for toast, pastries, yogurt, and baking. For an extra layer of richness, try our homemade pistachio paste, a smooth and flavorful recipe that elevates both desserts and sauces. Common Mistakes and How to Avoid Them Cooking Too Quickly High heat can cause burning and uneven thickening. Moderate heat ensures steady evaporation. Skipping Acid Without enough acidity, strawberry jam without pectin may remain runny. Under-Cooking Jam that appears thick while hot may loosen once cooled. Always perform a set test. Over-Cooking Excessive boiling can create a sticky or overly dense texture. If you enjoy light, crisp textures, our wafer cookies recipe is a delicate classic that pairs beautifully with jams and creams. Storage and Shelf Life Refrigeration Stored in an airtight container, the jam keeps well in the refrigerator for up to four weeks. Freezing Jam freezes successfully for several months. Leave room in containers for expansion. Pantry Storage When properly sealed using traditional canning methods, strawberry jam without pectin can be stored for up to one year in a cool, dark place. To enhance this recipe with a nutty twist, don’t miss our pistachio sauce, a creamy and versatile addition that brings depth and elegance to sweet creations Serving Ideas This jam pairs beautifully with many dishes: The pure fruit flavor of strawberry jam without pectin enhances both simple breakfasts and elegant desserts. Flavor Variations Once comfortable with the base recipe, try small variations: Each variation preserves the integrity of strawberry jam without pectin while offering subtle changes in flavor and texture. Nutritional Perspective Homemade jam contains real fruit and sugar with no artificial additives. While it should be enjoyed in moderation, strawberry jam without pectin provides natural antioxidants and vitamin C from fresh strawberries. Frequently Asked Questions Can you can strawberry jam without pectin? Yes, you can safely can strawberry jam without pectin as long as it contains enough sugar and acid and is processed correctly. Proper sealing and cleanliness are essential for safe storage. Can you make jam without pectin? Yes, jam can be made without pectin by cooking fruit with sugar and acid until it naturally thickens. The process relies on evaporation and concentration rather than added gelling agents. How do I thicken my

Strawberry Jam Without Pectin: A Traditional Homemade Recipe Worth Mastering Read More »

bariatric seed trick recipe

Bariatric Seed Trick Recipe: A Practical Fiber Ritual for Appetite Control and Digestive Balance

The bariatric seed trick recipe has become a popular wellness habit among people looking for a simple, natural way to support appetite control and digestion. Shared widely across social media and health communities, this seed-based preparation is often described as a morning ritual that helps people feel fuller for longer and make more mindful food choices throughout the day. Although the name may suggest a connection to bariatric surgery, the bariatric seed trick recipe does not replicate any surgical procedure. Instead, it reflects eating principles commonly recommended in bariatric-style nutrition: small portions, high fiber, nutrient density, and slow digestion. When used correctly, this recipe can be a helpful addition to a balanced lifestyle focused on long-term wellness rather than quick fixes. This article explores what the bariatric seed trick recipe is, how it works, how to prepare it properly, and how to use it safely and effectively. What Is the Bariatric Seed Trick Recipe? The bariatric seed trick recipe is a blend of fiber-rich seeds—most commonly chia seeds, flaxseed, and pumpkin seeds—prepared in a way that promotes fullness and digestive comfort. The seeds are usually ground or partially ground and mixed with water to form a gel-like drink consumed before meals, most often in the morning. The term “bariatric” is used because the recipe aligns with post-bariatric dietary strategies, such as emphasizing fiber, reducing portion sizes, and slowing gastric emptying. However, it is important to understand that the bariatric seed trick recipe does not change stomach size, metabolism, or hormones in the same way surgery does. Instead, it works through nutrition fundamentals that support satiety and mindful eating. Why the Bariatric Seed Trick Recipe Is So Popular Several factors explain the rapid rise of the bariatric seed trick recipe: Many people are drawn to the bariatric seed trick recipe because it feels manageable. Rather than eliminating foods or following rigid rules, this approach encourages starting the day with a nourishing ritual that supports better choices later on. How the Bariatric Seed Trick Recipe Works in the Body The benefits of the bariatric seed trick recipe are based on well-established nutritional mechanisms, especially the effects of fiber and healthy fats. Fiber and Fullness Chia seeds and flaxseed are rich in soluble fiber. When mixed with water, this fiber absorbs liquid and expands, forming a thick gel. This gel increases stomach volume temporarily, which helps signal fullness to the brain. As a result, many people feel satisfied sooner and experience fewer hunger cues between meals. Pumpkin seeds add both fiber and plant-based protein, enhancing the satiety effect of the bariatric seed trick recipe. Slower Digestion The gel-like consistency slows digestion and delays gastric emptying. This slower process contributes to sustained energy levels and reduces sudden hunger spikes. Blood Sugar Support Fiber slows carbohydrate absorption, helping stabilize blood sugar levels. Stable blood sugar is closely linked to reduced cravings and better appetite regulation. Nutrient Density Despite its small portion size, the bariatric seed trick recipe provides: This nutrient density is one reason the recipe aligns with bariatric-style nutrition principles. Classic Bariatric Seed Trick Recipe (Step by Step) Below is a standard version of the bariatric seed trick recipe suitable for daily use. Ingredients Preparation How to Use This method allows the seeds to expand fully, which is essential for the effectiveness of the bariatric seed trick recipe. If you enjoy gentle, herbal rituals, you may also appreciate this calming infusion that fits beautifully into a mindful daily routine. Variations of the Bariatric Seed Trick Recipe The bariatric seed trick recipe can be adapted to personal preferences without losing its core benefits. Warm Lemon Version Prepared with warm water and fresh lemon juice for a refreshing morning drink. Ginger-Infused Option Adding fresh ginger can enhance digestive comfort and flavor. Overnight Soak Soaking the seeds overnight creates a thicker, pudding-like texture. Savory Use The seed blend can also be sprinkled over yogurt, soups, or salads instead of being consumed as a drink. These variations help maintain consistency with the bariatric seed trick recipe over time. For another soothing and naturally vibrant option, this floral tea offers a refreshing way to support balance and relaxation. How Often Should You Use the Bariatric Seed Trick Recipe? Most people benefit from using the bariatric seed trick recipe once per day. Morning use is the most common, as it may help regulate appetite throughout the day. Beginners should start with one tablespoon per day to allow the digestive system to adapt to increased fiber intake. Safety and Best Practices While generally safe, the bariatric seed trick recipe should be used responsibly. Start Slowly Sudden increases in fiber can cause bloating or discomfort. Stay Hydrated Fiber absorbs water, so adequate hydration is essential. Grind Seeds Properly Ground seeds improve digestion and nutrient absorption. Watch Portions Seeds are calorie-dense; moderation matters. Medical Conditions Individuals with digestive disorders, seed allergies, or specific medical conditions should consult a professional before use. Those who enjoy warm, comforting drinks may want to explore this aromatic tea, perfect for cozy moments and digestive ease. What the Bariatric Seed Trick Recipe Is Not To avoid unrealistic expectations, it’s important to clarify that the bariatric seed trick recipe: It is a supportive tool, not a standalone solution. Integrating the Bariatric Seed Trick Recipe Into a Healthy Lifestyle For best results, combine the bariatric seed trick recipe with: Used this way, the recipe supports long-term habits rather than short-term results. Frequently Asked Questions What is the seed trick for weight loss? The seed trick for weight loss is a simple habit that involves consuming a small amount of fiber-rich seeds mixed with water. The seeds absorb liquid, expand in the stomach, and help promote fullness, which may reduce appetite and support mindful eating. What is the bariatric seed drink? The bariatric seed drink is a beverage made by mixing a tablespoon of a ground seed blend—usually chia seeds, flaxseed, and pumpkin seeds—with water. It is often consumed before breakfast to support satiety and digestion as part of a

Bariatric Seed Trick Recipe: A Practical Fiber Ritual for Appetite Control and Digestive Balance Read More »

lemon balm

Lemon Balm: A Fresh, Citrusy Herb for Refreshing Homemade Recipes

Lemon balm is a fragrant, lemon-scented herb that has quietly earned a place in both traditional kitchens and modern home cooking. Belonging to the mint family, lemon balm is loved for its soft citrus aroma, gentle sweetness, and versatility. Unlike sharp lemon juice or zest, lemon balm offers a rounded, aromatic lemon flavor that feels light, refreshing, and elegant. When used correctly, lemon balm transforms simple recipes into refined, memorable creations. This article explores lemon balm from a culinary point of view, with a strong focus on drinks and easy homemade recipes. From a honey lemon balm spritzer to syrups, teas, and creative serving ideas, you’ll learn how to use lemon balm in a practical, flavorful, and inspiring way. What Makes Lemon Balm Special in Cooking Lemon balm stands out among fresh herbs because of its balance. It has the brightness of lemon, the softness of mint, and a subtle floral note that makes it perfect for both sweet and savory dishes. Lemon balm does not overpower other ingredients. Instead, it enhances them gently, making it ideal for drinks, desserts, and light meals. Fresh lemon balm leaves are tender and aromatic. When crushed or lightly muddled, they release essential oils that instantly perfume a dish. This is why lemon balm works so well in cold infusions such as spritzers, lemonades, and iced teas. Heat can reduce its fragrance, so lemon balm is best added at the end of cooking or infused gently rather than boiled aggressively. Another reason lemon balm is popular is its accessibility. It grows easily in gardens and containers, producing abundant leaves throughout the season. A small plant can supply enough lemon balm for many recipes, making it both economical and rewarding. How to Prepare Lemon Balm for Recipes Before using lemon balm, proper preparation makes a noticeable difference in flavor. Honey Lemon Balm Spritzer: The Star Recipe One of the most refreshing ways to enjoy lemon balm is in a honey lemon balm spritzer. This drink is light, fragrant, naturally sweetened, and perfect for warm weather. It works beautifully as a non-alcoholic beverage or as a base for a refined cocktail. Ingredients Optional additions: Instructions This honey lemonn balm spritzer highlights everything that makes lemon balmm special: freshness, aroma, and balance. The honey rounds out the citrus, while the lemon ballm adds an herbal note that feels elegant and soothing. Lemon Balm Simple Syrup for Drinks and Desserts Lemonn balm simple syrup is one of the most useful preparations you can make. It stores well, concentrates flavor, and can be used in countless recipes. Ingredients Instructions Lemon balm syrup is perfect for sweetening iced tea, cocktails, lemonade, yogurt, fruit salads, or even drizzling over cakes. For readers exploring gentle, natural approaches to balance and wellness, you may also enjoy discovering this carefully crafted natural recipe. Lemon Balm Iced Tea: A Calming Classic Lemonn balm iced tea is caffeine-free, refreshing, and ideal for everyday hydration. Its mild lemon flavor makes it enjoyable even without sweeteners. Ingredients Instructions This lemon ballm tea can also be enjoyed warm, making it a year-round staple. Lemon Balm Lemonade with a Herbal Twist Lemon balm lemonade offers a softer, more aromatic version of traditional lemonade. It’s perfect for serving guests who enjoy subtle, natural flavors. To prepare it, infuse lemon balm into a simple syrup, then combine it with lemon juice and cold water. The result is a lemonade that feels refined rather than sharp, with lemon balm providing depth and fragrance. If you’re interested in refreshing drinks designed to support daily well-being, this soothing cocktail is another option worth exploring. Creative Ways to Use Lemon Balm in the Kitchen Lemon ballm is not limited to drinks. With a little imagination, it can be used in many dishes. The key is to use lemon ballm gently. Its charm lies in its subtlety. Those who appreciate simple herbal preparations may also find this classic tea recipe a comforting addition to their routine. Flavor Pairings That Work Beautifully with Lemon Balm Lemon ballm pairs well with many ingredients, especially those that enhance its citrus profile: These combinations allow lemonn balm to shine without overpowering the dish. Storing and Preserving Lemon Balm Fresh lemonn balm can be stored in the refrigerator wrapped loosely in a damp paper towel for several days. For longer storage, lemon baalm can be dried or frozen. To dry lemon balm, hang small bundles in a shaded, well-ventilated area. Once dry, crumble the leaves and store them in an airtight container. While dried lemon ballm loses some aroma, it remains excellent for teas. Freezing lemon baalm in ice cube trays with water or syrup is another excellent option, especially for drinks. Frequently Asked Questions What is the lemon balm recipe for weight loss?A simple lemon balm drink for weight management is made by steeping fresh lemon balm leaves in hot water, then drinking it warm or cold before meals. It’s often combined with lemon juice or a small amount of honey to support hydration and mindful eating. Does lemon balm help lose belly fat?Lemon balm does not directly burn belly fat. However, it may support weight goals indirectly by helping reduce stress, improving digestion, and limiting emotional or stress-related eating. Is lemon balm like Ozempic?No. Lemon balm is a natural herb and does not work like Ozempic. Ozempic affects hormones that regulate appetite and blood sugar, while lemon balm only offers mild supportive effects such as calming cravings or stress. How to make a lemon balm drink?To make a basic lemon balm drink, steep a handful of fresh lemon balm leaves in hot water for 5–10 minutes, strain, and enjoy warm or chilled. You can add lemon slices or a teaspoon of honey for flavor. benefits Lemon baalm is appreciated not only for its refreshing flavor but also for its gentle wellness benefits. Often used in calming herbal preparations, lemon baalm may help promote relaxation and emotional balance, making it a popular choice for evening drinks. Its soothing nature can

Lemon Balm: A Fresh, Citrusy Herb for Refreshing Homemade Recipes Read More »

Cortisol Cocktail

Cortisol Cocktail: The Refreshing Wellness Drink Everyone Is Talking About

The cortisol cocktail has quickly become one of the most talked-about wellness drinks in recent years. Popular across social media, lifestyle magazines, and health-focused blogs, this vibrant, non-alcoholic beverage is praised for its refreshing taste and its role in modern self-care routines. Despite its intriguing name, the cortisol cocktail does not contain cortisol itself. Instead, it is a carefully balanced combination of fruit juice, coconut water, minerals, and electrolytes designed to support hydration and daily wellness. As people search for natural ways to feel more energized, hydrated, and balanced throughout the day, the cortisol cocktail has emerged as a simple and approachable option. Whether enjoyed in the morning, during a busy afternoon, or after physical activity, this drink fits seamlessly into a mindful lifestyle. In this article, we’ll explore what a cortisol cocktail really is, why it has gained such popularity, how to make it at home, and how to customize it to your taste—all while keeping expectations realistic and grounded. What Is a Cortisol Cocktail? A cortisol cocktail is a non-alcoholic wellness drink made with ingredients that naturally contain electrolytes, vitamin C, and essential minerals. The name comes from the idea that supporting hydration and nutrient intake may help the body cope better with everyday stress. However, it’s important to understand that the cortisol cocktail is not a medical treatment and is not intended to directly alter hormone levels. At its core, the cortisol cocktail is a refreshing mocktail that combines coconut water, citrus or fruit juice, a pinch of salt, and optional magnesium. Together, these ingredients create a balance of sweet, salty, and tangy flavors while offering hydration and micronutrients. Many people enjoy the cortisol cocktail as part of a morning routine or as a gentle alternative to coffee, especially when they want something refreshing without caffeine. Why the Cortisol Cocktail Became So Popular The rise of the cortisol cocktail can be linked to several lifestyle trends. First, there is a growing focus on hydration and electrolyte balance. Second, people are increasingly interested in functional beverages that feel both indulgent and nourishing. Finally, social media has played a major role in turning simple recipes into viral wellness rituals. The cortisol cocktail also appeals to those who prefer natural ingredients over processed drinks. Unlike many commercial energy beverages, it relies on whole foods and minimal processing. This simplicity makes it easy to prepare at home and adjust based on personal preference. Another reason for its popularity is its versatility. The cortisol cocktail can be customized with different fruits, citrus options, or sparkling water, making it suitable for a wide range of tastes. Key Ingredients in a Cortisol Cocktail Although recipes vary, most cortisol cocktail versions share a similar foundation. Each ingredient plays a specific role in flavor and nutrition. Coconut Water Coconut water is the base of many cortisol cocktail recipes. It is naturally rich in potassium and provides gentle hydration with a light, refreshing taste. Citrus or Fruit Juice Orange juice is commonly used for its vitamin C content and natural sweetness. Some variations replace orange juice with strawberries, kiwi, or lemon juice to reduce acidity or sugar levels while still delivering flavor and antioxidants. Salt A small pinch of sea salt or mineral salt adds sodium, which supports fluid balance and enhances the overall taste of the drink. Magnesium (Optional) Some cortisol cocktail recipes include magnesium powder. Magnesium is an essential mineral involved in muscle function and relaxation, though it should be used in moderation and according to individual tolerance. Sparkling Water (Optional) Sparkling water can be added for a light, fizzy texture that makes the cortisol cocktail feel more like a mocktail. Classic Cortisol Cocktail Recipe This classic cortisol cocktail recipe is simple, refreshing, and easy to prepare at home. Ingredients Instructions This cortisol cocktail delivers a refreshing balance of flavors and works well as a morning drink or midday refresher. If you enjoy simple wellness drinks, you may also appreciate our natural Mounjaro-inspired recipe, crafted with everyday ingredients and easy steps. Strawberry Kiwi Cortisol Cocktail Variation For those who prefer a fruit-forward version, this strawberry kiwi cortisol cocktail offers a vibrant color and naturally sweet flavor. Ingredients Instructions This version of the cortisol cocktail is especially refreshing during warm weather and works beautifully as an afternoon drink. For readers interested in gentle, food-based wellness ideas, our natural Mounjaro recipe is another refreshing option worth exploring. When to Drink a Cortisol Cocktail Many people enjoy a cortisol cocktail in the morning as a hydrating start to the day. Others prefer it in the afternoon when energy dips or after physical activity to replenish fluids. Because it contains natural sugars from fruit, it’s best enjoyed alongside meals or as part of a balanced routine rather than late at night. What the Cortisol Cocktail Can—and Can’t—Do The cortisoll cocktail is best viewed as a hydrating wellness drink rather than a miracle solution. It can support hydration, provide electrolytes, and deliver vitamins from natural ingredients. These benefits may help you feel refreshed and energized. However, it’s important to be realistic. The cortisol cocktail does not directly lower cortisol levels, cure stress, or replace medical care. True stress management involves sleep, nutrition, physical activity, and mental well-being. You might also like our clove tea recipe, a warm and aromatic drink that fits beautifully into a mindful daily routine. Tips for Making the Best Cortisol Cocktail Who Should Be Mindful While the cortisoll cocktail is generally safe for most people, those with blood sugar concerns, sodium restrictions, or specific medical conditions should adjust ingredients accordingly or consult a healthcare professional. Frequently Asked Questions What is the cortisol cocktail? The cortisol cocktail is a non-alcoholic wellness drink made with coconut water, fruit juice, salt, and sometimes magnesium. It is designed to support hydration and electrolyte balance and is often enjoyed as part of a daily self-care routine. What can I drink to reduce my cortisol levels? No drink can directly reduce cortisol levels. However, staying well hydrated and choosing beverages made

Cortisol Cocktail: The Refreshing Wellness Drink Everyone Is Talking About Read More »

Cazuela

Cazuela: A Traditional Chilean Stew That Warms the Soul

Few dishes embody comfort, tradition, and nourishment quite like cazuela. This classic Chilean stew is a humble yet deeply satisfying meal built on simple ingredients, slow simmering, and generations of culinary wisdom. Served in homes across Chile and throughout Latin America, cazuela is not just food—it is a reflection of family, seasonality, and cultural identity. At its core, cazuela is a one-pot dish made with meat, vegetables, and a fragrant broth. Every bowl tells a story of local produce, rural cooking traditions, and the belief that the best meals come from patience rather than complexity. Whether prepared with chicken or beef, cazuela remains a timeless recipe that continues to bring people together around the table. The Meaning and Origins of Cazuela The word cazuela originally refers to the clay pot traditionally used to cook and serve this dish. Over time, the name became synonymous with the stew itself. Long before modern cookware, these earthenware vessels allowed ingredients to simmer gently, developing deep flavor while preserving nutrients. Cazuela has roots in indigenous South American cooking, particularly among the Mapuche people, who prepared brothy meals using local vegetables such as potatoes, squash, and corn. With the arrival of Spanish settlers, meat and new cooking techniques were introduced, shaping the cazuela we recognize today. This fusion of indigenous and colonial influences created a dish that is both rustic and refined. Cazuela evolved into a staple of everyday cooking, especially valued for its ability to stretch ingredients while delivering warmth and nourishment. Why Cazuela Is a Household Essential In Chilean culture, cazuella represents more than sustenance. It is often associated with family lunches, cooler weather, and moments of rest. Many households prepare cazuela at least once a week, adjusting ingredients based on what is fresh and available. What makes cazuela especially beloved is its versatility. It can be light or hearty, simple or elaborate, yet it always maintains its comforting essence. Each serving typically includes a piece of meat, a potato, a chunk of squash, corn on the cob, and a generous ladle of broth—making it both filling and balanced. Cazuela is also known for its ability to nourish the body. Rich in vegetables, protein, and minerals from the broth, it is often described as restorative food—ideal for cold days or when energy is low. Essential Ingredients for Traditional Cazuela Although every family has its own variation, classic cazuela relies on a core group of ingredients that work in harmony. Protein Cazuela is most commonly made with: Bone-in cuts are preferred because they enrich the broth with flavor and body. Vegetables Vegetables are the heart of cazuella and give it its signature look: Starch Many versions of cazuella include: Aromatics and Seasoning Flavor is built gently using: Fresh parsley or cilantro is often used as a garnish before serving. Broth Water or homemade stock forms the base. As the meat and vegetables simmer together, the broth becomes naturally rich without the need for heavy seasoning. Classic Chilean Cazuela Recipe This recipe reflects a traditional approach to cazuella, balancing authenticity with practicality for home kitchens. Preparation Time 30 minutes Cooking Time 90 minutes Servings 6 generous portions Ingredients Step-by-Step Instructions 1. Brown the Meat Heat a large pot over medium heat with a small amount of oil. Season the meat lightly with salt and pepper. Brown the pieces on all sides to develop flavor, working in batches if necessary. 2. Create the Broth Add the onion, garlic, bay leaf, and oregano to the pot. Pour in the water or broth and bring to a gentle boil. Reduce heat and simmer uncovered for 30 minutes, skimming any foam from the surface. 3. Add Root Vegetables Carefully add the potatoes, carrots, and pumpkin to the pot. Continue simmering for another 25 minutes until the vegetables begin to soften. 4. Add Rice and Corn Stir in the rice and corn pieces. Simmer for 15 minutes, allowing the rice to cook fully and the broth to thicken slightly. 5. Final Seasoning Taste the cazuela and adjust seasoning with salt and pepper. Remove the bay leaf. 6. Serve Serve cazuella hot in deep bowls. Each portion should include meat, vegetables, corn, and plenty of broth. Garnish with fresh herbs just before serving. If you enjoy bold, rustic flavors, you may also love our authentic discada recipe, packed with rich, slow-cooked goodness. Cazuela Variations You Can Try One of the joys of cazuella is its adaptability. Chicken Cazuella Lighter and faster to cook, chicken cazuela is ideal for weeknight meals while still delivering comfort. Beef Cazuela Richer and deeper in flavor, beef cazuela benefits from longer simmering and is perfect for colder days. Seasonal Vegetable Cazuela Some cooks add zucchini, peas, or sweet potato depending on the season, maintaining the structure of cazuella while enhancing freshness. No-Rice Cazuella In some households, rice is omitted to keep the broth clearer and lighter. For another comforting classic made with simple ingredients, take a look at our homemade picadillo recipe. Tips for the Best Cazuella Seafood lovers might want to explore our tacos gobernador recipe, a flavorful option with a delicious coastal twist How Cazuela Is Traditionally Served Cazuella is typically served as a complete meal. Some people enjoy it with crusty bread on the side to soak up the broth. Others add a spoon of fresh salsa or a squeeze of lemon for brightness. Leftover cazuela tastes even better the next day, as the flavors continue to develop. It can be reheated gently on the stove without losing its character. Why Cazuela Remains Timeless In a world of fast food and complicated recipes, cazuella stands out for its simplicity and heart. It proves that good cooking does not require luxury ingredients—only care, patience, and respect for tradition. Cazuella continues to thrive because it adapts without losing its soul. It remains deeply rooted in culture while fitting effortlessly into modern kitchens. Every pot of cazuella carries warmth, nourishment, and a sense of home. Frequently Asked Questions This article draws inspiration from trusted culinary

Cazuela: A Traditional Chilean Stew That Warms the Soul Read More »

Picadillo

Picadillo: A Timeless Latin Comfort Food with Rich Flavor and Tradition

Picadillo is one of those classic dishes that feels both humble and deeply comforting at the same time. Made with ground meat, aromatic vegetables, tomatoes, and a unique balance of savory, sweet, and tangy ingredients, picadillo has earned its place as a staple in many kitchens across Latin America and beyond. Simple to prepare yet rich in flavor, this dish is loved for its versatility, affordability, and ability to bring people together around the table. Although picadillo appears in many countries, each region has adapted it to local tastes and traditions. From Spain to Cuba, Mexico, and the Caribbean, picadillo has evolved while keeping its essential identity: finely chopped or ground ingredients simmered together to create a hearty, satisfying meal. In this article, you will discover the origins of picadillo, what makes the Cuban version so special, how to prepare an authentic and flavorful recipe at home, and the many ways you can customize it to suit your preferences. The Origins and Cultural Significance of Picadillo The word picadillo comes from the Spanish verb picar, which means “to mince” or “to chop.” This name perfectly reflects the nature of the dish, which is traditionally made using finely chopped or ground meat combined with other small, evenly cut ingredients. Originally rooted in Spanish cuisine, picadillo traveled across the Atlantic during the colonial era. As Spanish settlers introduced their cooking techniques to new regions, local ingredients and cultural influences reshaped the dish. Over time, picadillo became deeply embedded in everyday home cooking throughout Latin America and the Caribbean. What makes picadillo so culturally significant is its role as a practical, family-friendly meal. It was often prepared as a way to stretch ingredients, use what was available, and create something nourishing and flavorful without excess. Today, picadillo remains a symbol of comfort food, often associated with childhood memories, family lunches, and traditional gatherings. What Makes Cuban Picadillo Unique Among the many regional versions, Cuban picadillo stands out for its distinctive balance of flavors. It combines savory ground beef with tomatoes, onions, garlic, and bell peppers, then elevates the dish with olives, capers, and raisins. This contrast between salty, sweet, and acidic elements is what gives Cuban picadillo its signature taste. Potatoes are often added to make the dish more filling, while white wine or broth provides depth and richness to the sauce. The result is a dish that is bold yet comforting, complex yet easy to enjoy. Cuban picadillo is most commonly served with white rice, which absorbs the flavorful sauce beautifully. It is frequently accompanied by fried plantains or a simple salad, creating a complete and satisfying meal. Essential Ingredients for Classic Picadillo One of the reasons picadillo is so popular is that it relies on simple, accessible ingredients. While variations exist, a traditional Cuban-style picadillo typically includes: Each ingredient plays an important role. The vegetables form a fragrant base, the beef provides richness, the tomatoes create body, and the olives and capers add a salty bite that balances the natural sweetness of the raisins. Step-by-Step Picadillo Recipe This recipe yields a flavorful, well-balanced picadiillo that is ideal for family meals or meal prep. Ingredients (Serves 6) Instructions 1. Prepare the Aromatic Base Heat the olive oil in a large skillet or heavy pot over medium heat. Add the chopped onion, bell pepper, and garlic. Cook gently until the vegetables are soft and fragrant, stirring frequently to avoid burning. 2. Brown the Meat Add the ground beef to the pan. Season with cumin, salt, and black pepper. Break the meat apart with a spoon and cook until it is evenly browned. Proper browning at this stage helps develop deep flavor in the picadillo. 3. Add the Potatoes Stir in the diced potatoes, making sure they are well mixed with the meat and vegetables. Allow them to cook for a few minutes so they absorb some of the seasoning. 4. Deglaze and Simmer Pour in the broth, scraping the bottom of the pan to release any flavorful bits. Add the tomato sauce and raisins, then stir until everything is well combined. Reduce the heat to low, cover the pan, and let the picadiillo simmer gently for 20 to 30 minutes. Stir occasionally and add a small amount of liquid if needed to prevent sticking. 5. Finish with Olives and Capers In the final minutes of cooking, add the olives and capers. Taste and adjust seasoning if necessary. The picadiillo should be thick, rich, and aromatic, with tender potatoes and a balanced flavor profile. How to Serve Picadillo Picadiillo is traditionally served hot over steamed white rice. The rice acts as the perfect base, soaking up the savory sauce and highlighting the contrast of flavors. Popular side dishes include: Picadiillo can also be used as a filling for empanadas, tacos, stuffed peppers, or even baked potatoes, making it a highly versatile recipe. If you enjoy bold, rustic flavors, you may also love this hearty discada recipe, perfect for sharing and slow, flavorful cooking Popular Picadillo Variations One of the greatest strengths of picadiillo is its adaptability. While the Cuban version is iconic, many variations exist: These variations show how picadiillo can easily be adjusted to suit different tastes and dietary needs. For a lighter and refreshing contrast, this vibrant bhel puri brings a delightful mix of crunch, spice, and freshness. Why Picadillo Remains a Favorite Picadiillo has stood the test of time because it is practical, nourishing, and deeply satisfying. It brings together simple ingredients in a way that feels comforting and familiar, yet never boring. The balance of flavors makes it appealing to a wide audience, while its versatility allows home cooks to make it their own. Whether prepared for a quick weeknight dinner or a traditional family gathering, picadillo continues to be a dish that connects people through food, culture, and shared memories. And if you’re craving something deeply comforting and modern, this rich birria ramen offers an irresistible fusion of flavors FAQ Final Thoughts Picadiillo is more than just a

Picadillo: A Timeless Latin Comfort Food with Rich Flavor and Tradition Read More »